Showing posts with label side dish. Show all posts

Tuesday, April 15, 2014

Blue Cheese Coleslaw


Guess what?  I hate blue cheese.  Guess what else?  I love this coleslaw.  I don't know how that happens, but I'm pretty sure this is one of my favorite side dishes now.  When my brother and his family moved from Memphis to Birmingham, I started eating at their house a good bit.  I mean, I was single, and I wasn't cooking a whole lot.  Then there was my sister-in-law Shannon and her knack for finding good recipes, so why would I ever turn down an invitation?  (Of course my adorable niece and nephews had nothing to do with my being there so much...)  One meal in particular blew my mind: beef brisket with homemade bbq sauce, some kind of salad, and blue cheese coleslaw.  I don't know - maybe I was just really hungry that night, but yeah, I went pretty nuts on everything.  When my husband and I recently accepted a dinner invitation that involved grilling burgers, I knew the time was right to try my own hand at Shannon's masterpiece.

Blue Cheese Coleslaw
chefjennylyn.com

2 pounds cabbage, shredded (I used coleslaw mix.)
8 oz. blue cheese, crumbled
1/2 cup apple cider vinegar
1/4 tsp. dry mustard
1 1/2 tsp. celery seeds
2 cloves garlic, minced
1/2 tsp. salt
Pepper to taste
2 tbsp. sugar
1/4 cup minced onion
3/4 cup vegetable oil

In a large bowl, toss cabbage and blue cheese together.  Chill one hour.
Whisk remaining ingredients in a separate bowl.  Chill one hour.
Toss together just before serving.
Serves 8-10

Note: I cut the recipe in half to serve 4-5.
Shannon got this recipe from Treebeards, a restaurant she enjoys.


The original recipe serves 8-10, but I decided to cut that in half.  What happens when you want half of 1 1/2 teaspoons of celery seed?  The Adjustable Measuring Spoon does 3/4 tsp.!  How awesome is that?  The above ingredients are organized on the Cutting Board using the Scoop 'n Measure, Measuring Spoons, an Adjustable Measuring Spoon, and an Easy Read Measuring Cup.  I always do this before adding anything to a mixing bowl because I can avoid this scenario: Add a few things.  Phone rings.  Answer.  Don't remember if I already added the sugar/salt/etc.  When it's all right in front of you, you're less likely to make mistakes.


Again, cutting the recipe in half, I ended up with an awkward measurement.  I needed half of 3/4 cup of oil.  Guess what?  This Easy Read Measuring Cup shows that 3/4 cup is 6 oz., so I can just measure to... 3 oz. It's the little things!


This never gets old.  If you don't have the Garlic Press, stop what you're doing, call me, and order one.  You don't have to peel the garlic!


Cabbage mixture + blue cheese = Get ready for awesome!


The cabbage/blue cheese mixture is in the Medium Stainless Mixing Bowl, and everything else is whisked in the Small Stainless Mixing Bowl.  I used a Bamboo Spatula and the Mini Stainless Whisk to get these mixed to perfection.


This is a beautiful, refreshing, adult side dish that you can be proud to take to your next gathering.  The fact that it's insanely easy to put together is just a bonus.  Let me know if you make it!

Like the products used?
Shop Online 24/7 at pamperedchef.biz/jennylyn
E-mail me: chefjennylyn[at]gmail.com
Call me up: (205) 585-2464


Monday, February 24, 2014

Mushroom Orzo


Finding a good side dish is a huge, huge score!  I served this orzo a couple of weeks ago, and I knew I needed make it again for the blog.  I mean, you've got the fun of orzo, the delicious flavor of portobello mushrooms, and the fancy touch of Romano cheese.  What's not to love?  The best part is that the flavors say weekend, but the simplicity says weeknight.

Mushroom Orzo
chefjennylyn.com

3/4 cup uncooked orzo
1 1/2 tablespoons butter
3 cups sliced cremini (portobello) mushrooms
1/2 tsp. black pepper
3/8 tsp. salt (Ok, I estimated because... 3/8?)
1/4 cup chicken broth
1 tablespoon white wine vinegar
1/4 cup minced chives
1 oz. Romano cheese (about 1/4 cup)

Cook pasta according to package directions, omitting salt and fat.

Melt butter in a large skillet over medium heat; cook 1 minute or until lightly browned. (This step is important.  Browning the butter lends a depth of flavor you'll miss if you rush.)  Add mushrooms, salt, and pepper.  Cook 4 minutes or until mushrooms release their liquid, stirring frequently.  (I cook mine longer.)

Add broth and vinegar; stir in orzo and chives.  Top with cheese.

* This recipe is from Cooking Light, my favorite food magazine, but I changed a couple of things.  The original calls for white balsamic vinegar, but I used what I already had, and it worked just fine.


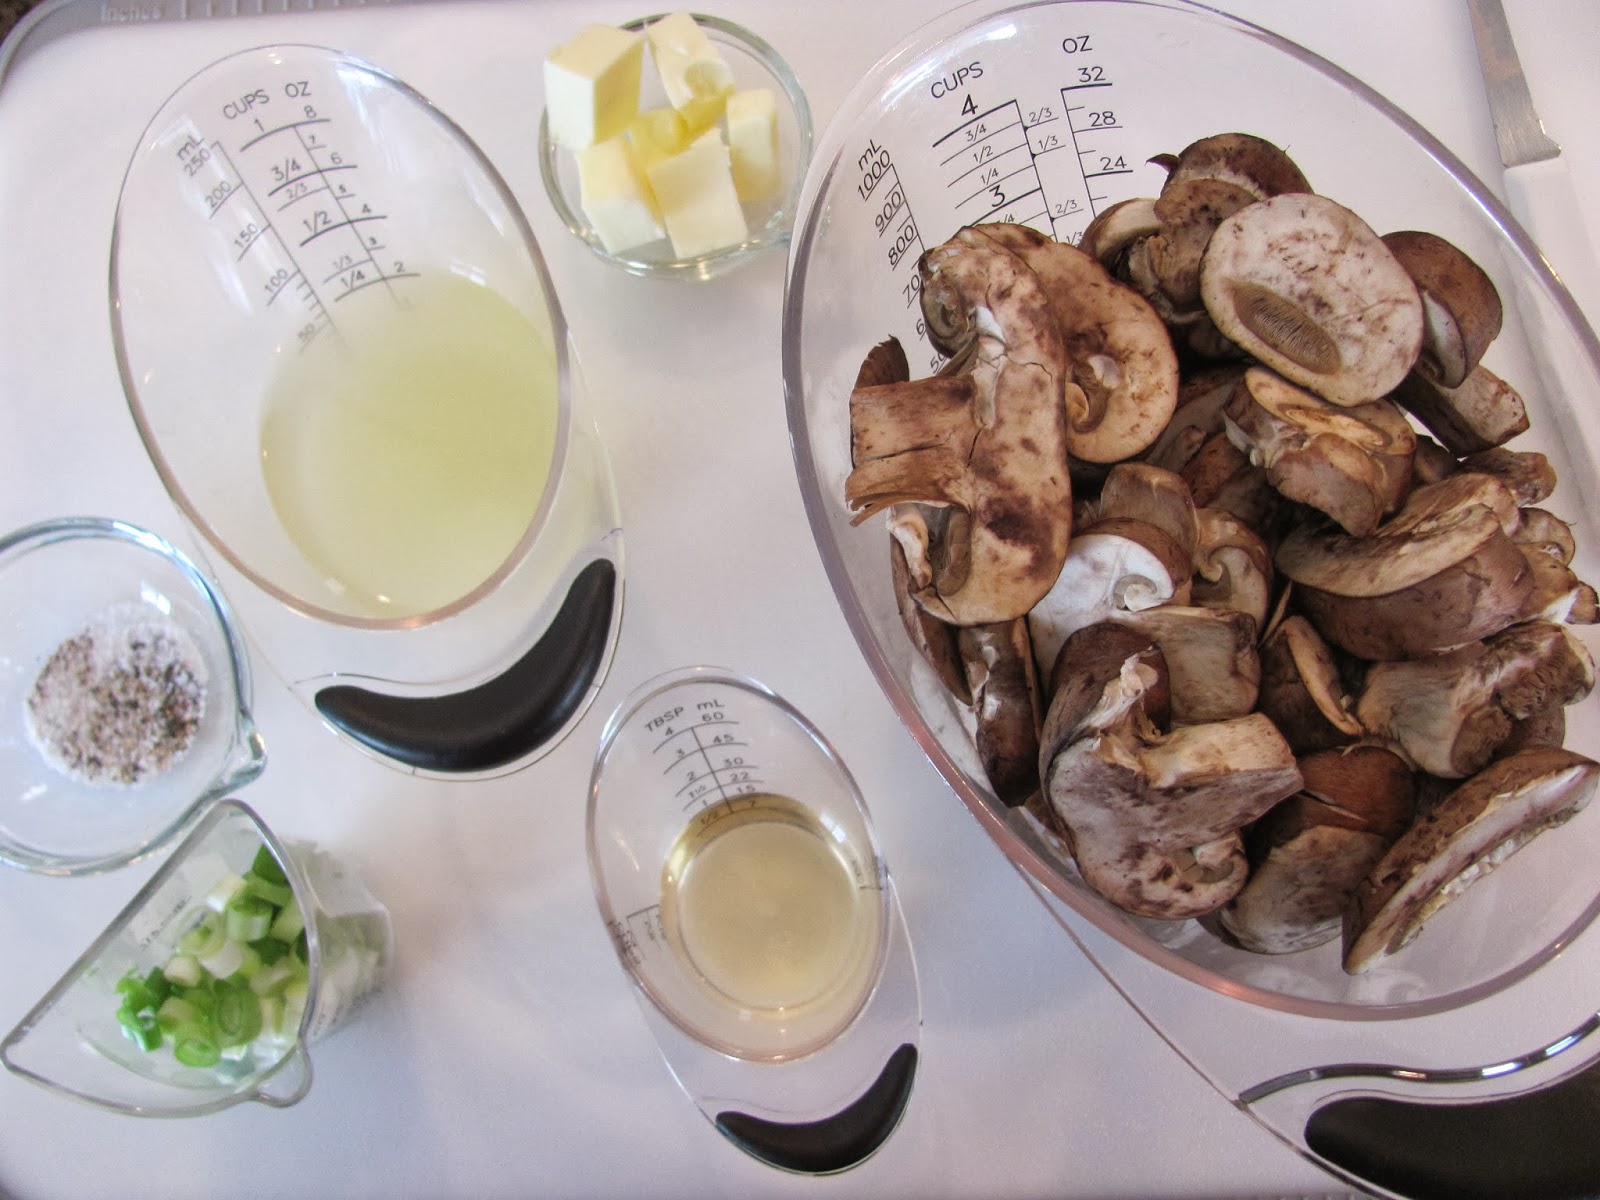
Let me take a second to tell you how much you need the Bamboo Grinder Set.  These are the most attractive grinders I've ever seen, and they're backed by the quality of the Pampered Chef.  The best part is that you can actually see when you're running out of something instead of figuring it out while in the midst of four hot burners.  I measured all of my ingredients, and then I used the 3 1/2" Paring Knife from the Forged Cutlery Collection to slice my chives.  To finish, I scooped them with the cute little Scoop 'n Measure.  (See below.)


Salt, pepper, and butter are in Pinch Bowls.  Broth and mushrooms are in Easy Read Measuring Cups, and the vinegar is in the Mini Easy Read Measuring Cup.  Then there's the cute Scoop 'n Measure I mentioned.  Adorable!  As always, I'm using the Large Cutting Board to lay it all out.


One reason I like laying all of my ingredients out on a cutting board is that it makes it easy for me to set them right by the pan where I'm cooking.  Then I don't end up scrambling to find things when the skillet is hot and the next ingredient is needed.  By the way, my orzo is boiling while I'm melting the butter, so everything ends up finishing around the same time.


Like I noted in the recipe directions, I cooked my mushrooms more than four minutes.  They're just so much better if you let them get good and brown.  I mean, look at how delicious these look!  In fact, you could stop here and have a fabulous side dish.  Anyway, the mushrooms are in the 10" Skillet from the Executive Cookware Collection, and I used the Mix 'n Scraper as my spatula.


Once your mushrooms are done, you just mix everything together.  Stir in the chives, top with the cheese, and you've got a gorgeous side that's worthy of any dinner guest.  By the way, the first time I made this, I forgot the cheese, and it was still delicious.  Don't tell Cooking Light.

Like the products you saw used?
Shop Online 24/7 at pamperedchef.biz/jennylyn
E-mail me: chefjennylyn[at]gmail.com
Call me up: (205) 585-2464


Friday, February 14, 2014

Easy Brussels Sprouts


I have really curbed my impulse purchasing at the grocery store, but I recently bought something I hadn't planned, and I honestly don't know what I was thinking.  That something was a one-pound bag of Brussels sprouts, a vegetable I knew I hated.  There was one time I actually enjoyed these with a meal, and I guess that memory was in the back of my mind when these guys found their way into my cart.  But really - I think I was just feeling kind of fat.

Easy Brussels Sprouts
chefjennylyn.com

1 1/2 pounds Brussels sprouts
3 tbsp. olive oil
3/4 tsp. kosher salt
1/2 tsp. freshly ground pepper

Preheat oven to 400 degrees.
Cut off brown ends of Brussels sprouts, and remove any yellow leaves.  Mix all ingredients in a bowl, and place Brussels sprouts in an oven-proof dish.  Bake 35-45 minutes or until browned and crispy on the outside and tender on the inside.  Shake the pan every now and then to ensure even browning.


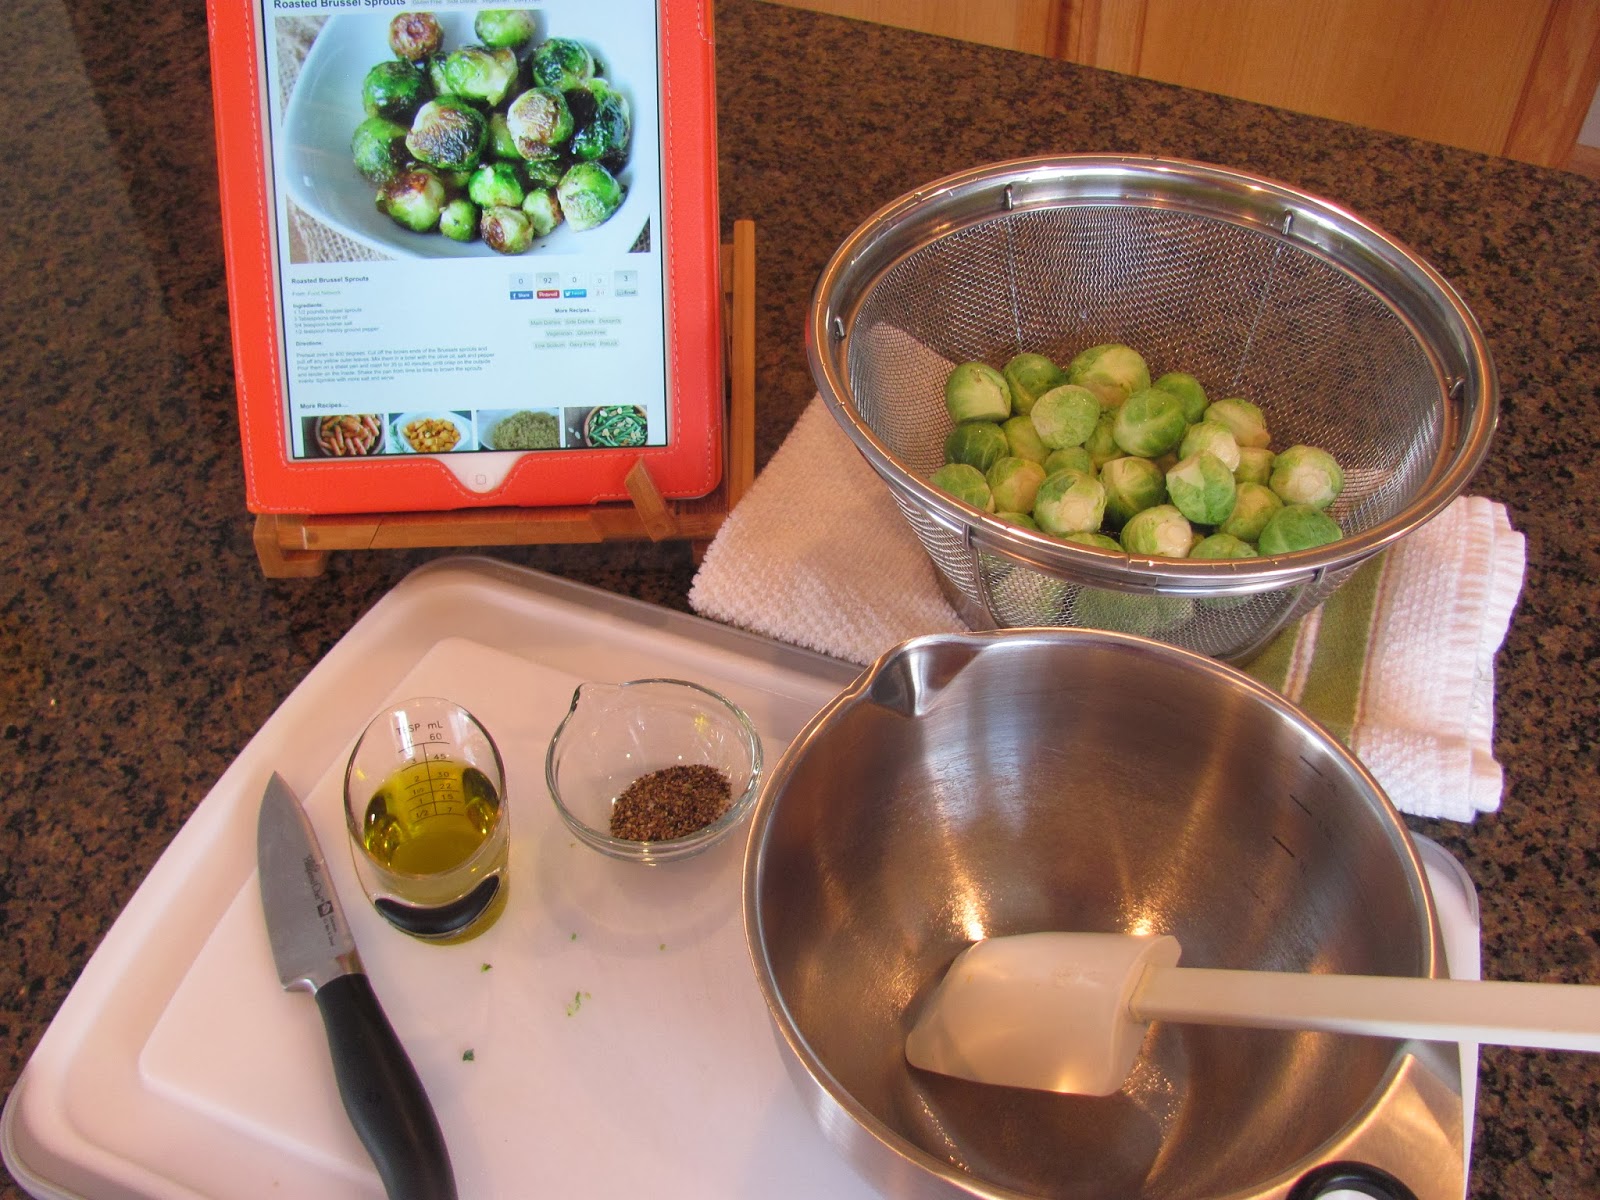
This is a sneak peek at something coming in March - the Bamboo Tablet Stand.  I'm so excited about this item because my current cookbook stand is too big for my iPad, a recipe card, or a single sheet of paper.  Besides, this new stand is gorgeous!  Hats off to the Pampered Chef for hitting us with yet another awesome product!

Moving on - This may be the easiest recipe you'll ever prepare in your life because it's salt, pepper, olive oil - stir, bake.  Do things get any simpler than that?  I have my oil in the Mini Easy Read Measuring cup, and my salt is in an Adjustable Measuring Spoon.  The recipe calls for 3/4 tsp., and guess what?  This spoon adjusts among all of those weird incremental measurements!  I'll mix my salt and pepper in this Pinch Bowl, and of course my Bamboo Grinder Set is poised and ready for action.  There's no pepper like freshly ground pepper, people!


I'm using the Large Cutting Board and the 3 1/2" Paring Knife from the Forged Cutlery Collection to prep my sprouts.  Just cut off the little ends, and the outside leaves will come right off.


Once everything is prepped and ready, you just mix it together!  My prepped, rinsed sprouts are in a Stainless Mesh Colander, and I'll add everything together in a Stainless Mixing Bowl.


I'm sorry all the pictures look a lot alike, but that's what happens when you have four ingredients and oh, I don't know... two steps?  I'm using the Small Mix 'n Scraper to stir the Brussels sprouts, and my Mini Baker is ready to be used.  This is one of my favorite pieces from the Stoneware Collection because it's so versatile!  I use it for dips, etc., but it also holds a good amount when you're making vegetables on the side.  And the results?  Just look at the first picture!

Enjoy your Brussels sprouts tonight!

Like the products you saw used?
Shop Online 24/7 at pamperedchef.biz/jennylyn
E-mail me: chefjennylyn[at]gmail.com
Call me up: (205) 585-2464

Saturday, February 8, 2014

Roasted Broccoli


Roasted Broccoli with Pampered Chef Rub
chefjennylyn.com


Broccoli
Olive oil
Pampered Chef Rub (I used Garlic & Herb)

Preheat oven to 425 degrees.
Cut broccoli crowns from stalks, and rinse thoroughly.  Toss with olive oil and Pampered Chef Rub.
Spread broccoli on Medium Bar Pan, and bake 15 minutes or until crisp-tender.


I often tell people how good the Pampered Chef rubs are on vegetables, but I think it will be helpful to show exactly what I do.  First, choose which Rub you'd like to use.  I'm doing steak with a mushroom fettuccini, so Garlic & Herb seems more appropriate than, say, Buffalo.  Behind my bottle, you can see that I used the 5" Santoku Knife from the Forged Cutlery Collection and the Large Cutting Board to prep my broccoli.


I rinsed the broccoli in a Stainless Mesh Colander and tossed it with my Rub and olive oil in a Stainless Mixing Bowl.  This took place at approximately 6:20 p.m.


I got the perfect amount for the Medium Bar Pan, one of my favorite pieces in the Stoneware Collection.


15 minutes later, I had perfectly crisp-tender broccoli with excellent flavor.  When you're doing a couple of recipes that do take thought, it's great to have a healthy side that just goes in the oven without any measurements, etc.  That's the beauty of the Pampered Chef Rubs - all of the measuring is done for you!  My pan is on the Cooling Rack, and I have a Large Serving Spatula to dish it up.

Here are the other recipes in the picture:
Creamy Mushroom Fettuccini
Filet Mignon with Chive-Horseradish Butter


Like the products you saw used?
Shop Online 24/7 at pamperedchef.biz/jennylyn
E-mail me: chefjennylyn[at]gmail.com
Call me up: (205) 585-2464


Friday, February 7, 2014

Creamy Mushroom Fettuccini


Want to know something about me?  I love recipes.  I have four three-ring binders full of them in my kitchen, and I have a fifth binder of to-dos.  The beauty of recipes is that they don't expire, so there's no pressure to try that pasta dish that looked pretty good... tomorrow.  This was in my to-do binder, and it immediately earned itself a spot as a keeper.  Enjoy installment 2 of the "You can do Valentine's Day at home" collection!
 
Creamy Mushroom Fettuccini
chefjennylyn.com

9 oz. refrigerated fresh fettuccini
1 1/2 tbsp. olive oil
3/4 cup chopped onion
16 oz. sliced mushrooms
3 garlic cloves, minced
3/4 tsp. salt, divided (1/4 and 1/2)
1/4 tsp. freshly ground black pepper
1/4 white wine (I sub chicken stock.)
1 tsp. chopped fresh thyme
1/2 cup half-and-half
1 oz. Parmesan cheese, grated (about 1/4 cup)

Heat a large, nonstick skillet over medium-high heat.  Add oil; swirl to coat.
Add onion, mushrooms, garlic, 1/4 tsp. salt, and pepper.  Sauté 12 minutes or until mushrooms are browned and have released their liquid. Add wine and thyme; cook 2 minutes or until liquid evaporates, stirring occasionally.  Remove pan from heat.

Cook pasta according to package directions.  Once drained, add mushroom mixture, 1/2 tsp. salt, half-and-half, and Parmesan cheese to pan, tossing to combine.  Serve immediately.

* This is from Cooking Light, but I tweaked a few things.  More mushrooms, more onion, and more garlic, specifically.


I've shown this before, but this is the quickest way to coarsely chop an onion.  Cut one end off, keeping the fuzzy end.  Then slice it down the middle.  I'm using the 5" Santoku and the Large Cutting Board, my two most often used tools.


Slice the onion into strips, and then slice across, ending at the fuzzy spot.  You'll end up with small, dices pieces, and you won't even have to chase slippery onion around the cutting board.  Safety first!


I never get sick of seeing the Garlic Press do its thing.  You don't have to peel the garlic!  If you're not cooking with fresh garlic, you're missing out. It's ridiculously inexpensive, and it adds so much to every recipe!  Garlic is going into a Pinch Bowl here.


I like to combine ingredients that are going at the same time during prep because it makes things a bit more efficient when the heat is up, and you're adding things in stages.  So just grind the pepper right on top of the garlic.  Looking around, I've got the mushrooms in a Stainless Mesh Colander, the onion in a 1-Cup Prep Bowl, the oil in a Mini Easy-Read Measuring Cup, and my garlic mixture in a Pinch Bowl.


I've found that keeping the Mini Mix 'n Scraper handy for adding ingredients is awesome!  This thing fits right inside my Prep Bowls, Pinch Bowls, and Measuring Cups, so I don't fumble around trying to get things out while what's in the pan continues to cook.  (You can burn garlic in hot oil really quickly while you're trying to get the onion to pour from its bowl.)


Once everything is in the pan, I switch to the Mix 'n Scraper, my favorite tool for cooking.  This thing is a great size for most jobs, and it won't melt when it's left in the hot skillet.  I'm using the 10-Inch Skillet from the Executive Cookware Collection, and the 8-Qt. Stockpot is behind it.  Here's a tip for a recipe where you need a pasta boiled and added to another mixture.  Start the pasta water while you do everything else, and then move it to a large eye of the stove when it's time to really get going.  If you begin with cold water when you actually need to be cooking the pasta, you're going to be waiting a really long time.


The mushroom mixture cooks for 10 minutes, so I use that time to prep the rest of my ingredients.  Stock and half-and-half are in Easy Read Measuring Cups, Parmesan is in a Measuring Cup, and thyme is in a Measuring Spoon.


You should smell this.  Beautiful!


Fresh pasta only cooks for a minute, so this recipe comes together very quickly once the mushroom mixture is done.


While the pasta cooks, I get everything ready to pour in once it's drained.


The pasta drains in a Stainless Mesh Colander, and then everything is added back to the big, hot pot, and it's stirred together to become a delicious dish that pairs so well with beef that it's scary.

For the steak seen in the first picture: Filet Mignon with Chive-Horseradish Butter
And the broccoli: Roasted Broccoli (with Pampered Chef Rub)

 
Like the products you saw used?
Shop Online 24/7 at pamperedchef.biz/jennylyn
E-mail me: chefjennylyn[at]gmail.com
Call me up: (205) 585-2464



Monday, November 11, 2013

My Favorite Sweet Potato Casserole

 
It's almost Thanksgiving!  That means it's time for me to share one of my favorite recipes, one I think could make a fine addition to your family's table.  Seriously, this is my favorite sweet potato casserole, and I wouldn't be surprised if it becomes yours.
 
My husband and his friends have this awesome tradition of sharing a Thanksgiving meal together one Saturday early in the month.  And by meal, I mean feast.  It's just like when your real family gets together: tons of food, lots of laughter, and plenty of wishing for one's elastic pants.  Anyway, this was my first year joining the festivities, and I wanted to share a couple of my favorites.  Between this casserole and the pumpkin cheesecake I brought, I think I guaranteed my seat at next year's table.
 
Sweet Potato Casserole
chefjennylyn.com
 
4 large sweet potatoes, baked
1 cup half-and-half
3/4 cup packed brown sugar
1 tsp. salt
2 tsp. vanilla extract
2 large eggs
 
Topping
1 1/2 cups miniature marshmallows
1/2 cup all-purpose flour
1/4 cup packed brown sugar
1/4 tsp. salt
2 tbsp. chilled butter, cut into small pieces
1/2 cup chopped pecans, toasted
 
Bake potatoes at 450 degrees for 1 hour or until very soft.
Preheat oven to 375 degrees.
 
Combine peeled potatoes, half-and-half, 3/4 cup brown sugar, 1 tsp. salt, and vanilla.  Beat with a mixer at medium speed until smooth.  Add eggs, and beat well.  (Mixture will be thin.)  Scrape mixture into 9x13-inch baker.
 
For topping, sprinkle top of casserole with miniature marshmallows.  Combine flour, 1/3 cup sugar, and 1/4 tsp. salt in a medium bowl.  Cut in butter with a pastry blender until it resembles coarse meal.  Stir in toasted pecans, and sprinkle topping over marshmallows.
 
Bake at 375 for 30 minutes.


You know how I love prep.  When there are two stages for the same recipe, I like to separate my ingredients into their own stations.  Here, I have everything for the casserole on the Large Cutting Board and what I need for the topping is on the standard Cutting Board.  This just helps me know which brown sugar goes where and all of that good stuff.  There were all kinds of fun things used - Easy Read Measuring Cups, Prep Bowls, Measuring Cups, Pinch Bowls, Measuring Spoons, Stainless Mixing Bowls, and more!


I baked my potatoes the day before since they required zero effort.  All I did was wash them and arrange them on the Medium Bar Pan to catch anything that found its way outside the peel.  No butter.  No foil.  Nothing but potatoes and the pan.  Once they cooled, I threw them in a gallon Ziploc and pulled them out when it was time to make the casserole.  Think about Thanksgiving at your house.  Do you really want the oven at 450 for an hour of potato baking when you've got ten other dishes you're trying to prepare fresh?  If it can be done ahead, go for it.


The original version of this recipe called for peeling, chopping, and boiling the potatoes.  Seriously?  Who has time to do all of that when you can just throw them in the oven?  Besides, I think roasting gives a depth of flavor with which boiling water just can't compete. (Sorry, Cooking Light!)  I put the peeled potatoes in a Stainless Mixing Bowl and used the Mix 'n Chop to roughly combine them with my sugar and salt before adding liquid ingredients.


This is the Small Bar Pan, the one that fits inside a toaster oven.  I chopped my pecans with the Manual Food Processor and threw them in for a quick while I prepared the rest of the topping.


You need a Pastry Blender.  Trust me when I say it just makes life easier.  It's been redesigned since I got this one, but it's the same concept.  The same beautiful, beautiful concept that keeps you from using a dinner fork for something like this.


The potato mixture goes into the Rectangular Baker, and the only thing left is the topping.  I don't bake in anything but Stoneware, and this recipe is a perfect example of why.  None of my marshmallows around the edges got scorched, and there were no hard sides.  Each square inch of this casserole was the exact same as the others.  Even baking is huge, especially when you're talking about cooking for the holidays.


How delicious does this topping look after adding the toasted pecans?  I promise it's one of the most delicious things you'll ever eat!  I mixed it up using the Mini Mix 'n Scraper, but this was also the perfect tool for sprinkling topping over the marshmallows.  The well shape acted as a spoon, so I didn't have to dirty anything else for the job.

Let me know if you add my favorite sweet potato casserole to your family's table this Thanksgiving or Christmas.  I can promise right now that you'll have zero complaints, and you may even have a few people hit you up for the recipe.

One last thing: Can we all just add "desserts that we choose to treat as side dishes" to our list of things for which we're thankful this year?  It's the small things, people.

Like the products you saw used?
Shop Online 24/7 at pamperedchef.biz/jennylyn
E-mail me: chefjennylyn[at]gmail.com
Call me up: (205) 585-2464


Thursday, November 7, 2013

Asian Broccoli


This is a simple side that's sure to please, and the best part is its ease of preparation.  I'll admit that finding the right vegetables to serve with Asian dishes can be tricky for me, and that's why this recipe struck me as such a win.  Betsy and I chose it to go with the Chicken Yakitori Rice Bowls I made in Houston, and it was perfect!  It has lots of flavor, and it's beautiful on the plate.  Enjoy!

Asian Broccoli
chefjennylyn.com

4 cups broccoli florets
2 tsp. peanut oil
1/8 tsp. crushed red pepper
3 garlic cloves, minced
1/4 tsp. kosher salt
1/4 tsp. ground black pepper
1 tbsp. lower-sodium soy sauce
1 tsp. rice wine vinegar
1/2 tsp. sugar
1/2 tsp. sesame oil

Bring 8 cups of water to a boil, and add broccoli.  Boil 2 minutes, and drain.
Heat a stir-fry skillet over medium heat.  Add peanut oil to pan; swirl to coat.
Add crushed red pepper and garlic, stirring for 30 seconds.
Add broccoli florets; cook 2 minutes.
Stir in salt, pepper, and crushed red pepper.
Toss broccoli in remaining ingredients (soy, vinegar, sugar, sesame oil).


Prep. Prep. Prep.  Garlic and spices are in Pinch Bowls, and I'm using the Measuring Spoon Set for things like red pepper.  My Garlic Press is ready to go, and I've got broccoli in the Small Batter Bowl.  Everything is on a Cutting Mat.


Hello, Garlic Press.  I've loved you for 13 years, and I'm going to keep on loving you.  Thanks for keeping stinky garlic off my hands for so long!


I love this step.  Everything is ready to go, and I'm just going to throw it in the Stir-Fry Skillet when the recipe tells me.  See the Mini Easy Read Measuring Cup?  It's not just cute, friends.  That think is so stinking handy!  I promise you need 1-4 tbsp. of liquids in a recipe a lot more often than you realize, and this is just the tool to measure once instead of two, three, or four times.


You may notice a lack of photographs on this post, but I was making Chicken Yakitori Rice Bowls at the same time.  In my defense, there was a lot going on.  That said, I'm really sorry you're not getting to see what boiling broccoli for two minutes looks like.  Make this broccoli!  You'll like it - I promise!

Like the products you saw used?
Shop Online 24/7 at pamperedchef.biz/jennylyn
E-mail me: chefjennylyn[at]gmail.com
Call me up: (205) 585-2464


Saturday, October 26, 2013

Parmesan Roasted Potatoes


I doubt I'm the only person whose heart flutters a bit when she sees a nice pile of perfectly roasted potatoes on her plate.  I mean, who doesn't like hot, delicious, perfectly seasoned spuds?  Add some cheese to the equation, and we're talking heavenly!  My sister and I enjoy sharing recipes with one another, and as much as we appreciate a main dish suggestion, we find ourselves indebted to one another over a successful side.  I mean, side dishes are tough!  You can spend a ton of time and energy on them, and what if they're failures?  (This is where I still find myself mourning the butternut squash bread pudding that cost a fortune but tasted horrible... the one that my dad specifically asked me to never make again... the one that taught me a magazine can make a picture look pretty all day long, but pretty doesn't always translate to edible.)  When Betsy told me she'd found a potato dish she knew would be a steady repeat for her, I was sold.  Now it's in my arsenal, and I'd like to extend it to yours.

Parmesan Roasted Potatoes
chefjennylyn.com

4 cups cubed Yukon Gold potatoes
3 tbsp. olive oil
1 tsp. garlic salt
1/2 tsp. salt
2 tsp. paprika
1 tsp. pepper
4 tbsp. Parmesan cheese

Preheat the oven to 425 degrees.
Rub your stoneware with a little bit of olive oil to make sure that beautiful, delicious cheese doesn't stick.  Let's not leave any of it behind, friends.

Cube the potatoes to about 3/4-inch on all sides.  Place them in the dish.
Pour remaining ingredients over the potatoes, and mix everything together, making sure potatoes are coated well.
Bake for 30 minutes.  Then stir everything up, and bake another 15-25 minutes, letting them get golden and crispy.
Add a dusting of sea salt if you'd like.

* From one of Betsy's favorite blogs, What's Gabby Cooking.
 

I'm still at her house, so I had my sister helping on this recipe.  She measured the paprika into a Pinch Bowl while I cubed the potatoes.  She's using a spoon from the Measuring Spoon Set here.  I love how short this ingredient list is because it means I don't have to feel guilty getting help from someone who just had a baby!


Dicing potatoes!  These are on the Large Cutting Board, my favorite cutting board ever!  It has a large surface area, and then it goes right into the dishwasher.  Let's not even get started on its non-slip grippy sides.  Ok, so I'm using the 5" Santoku Knife, which is obviously covered in potato starch, and I'm putting my finished pieces in a Stainless Mixing Bowl.


Big, beautiful pile of potatoes... sign me up!


Potatoes are in the Square Baker, and other ingredients are measured into the Easy Read Mini Measuring Cup, the 1/4-Cup from the Measuring Cup Set, and a Pinch Bowl.


Grab your Mix 'n Scraper, give everything a good toss, and you're done!  Get ready for your house to smell delicious and for your dinner to be divine.  Enjoy!

Like the products you saw used?
Shop Online 24/7 at pamperedchef.biz/jennylyn
E-mail me: chefjennylyn[at]gmail.com
Call me up: (205) 585-2464