Tuesday, November 19, 2013

Dak Bokkeum (Korean Stewed Chicken)


A good Korean recipe is a sure win in my kitchen.  When Cooking Light featured an article in which a Korean woman shared some of her recipes, I was thrilled.  Then I made this, and I was even more thrilled.  This is true Korean food that's made with a healthy dose of gochujang (Korean chile paste), and it's delicious!  Do you enjoy ethnic food?  Are you attending an international potluck soon?  Are you seeking to woo a special Korean man?  Make this.
 
Dak Bokkeum (Korean Stewed Chicken)
chefjennylyn.com
 
1/3 cup gochujang (Korean chile paste)
1 cup sliced green onions
2 1/2 tbsp. lower-sodium soy sauce
2 tbsp. minced fresh garlic
2 tbsp. minced peeled ginger
2 tbsp. dark sesame oil
1 tbsp. brown sugar
3/4 tsp. crushed red pepper
 
2 lb. boneless, skinless chicken thighs, sliced into strips
1/3 cup water
 
Rice or Asian noodles to serve
 
Combine the first 8 ingredients in a large bowl.  Stir in chicken.  Cover and marinate 30 minutes.
 
Bring 1/3 cup water to a boil in a 4-qt. pot.  Add chicken mixture, and bring to a simmer.  Cover, reduce heat, and simmer 20 minutes.  Uncover, and simmer 10 minutes or until thickened, stirring occasionally.  Serve over rice or Asian noodles.


When you're talking about slicing a cup worth of green onions, it's nice to have a good knife.  Enter: 5" Santoku Knife from the Forged Cutlery Collection.  It's my favorite, as you probably already know if you've ever read one of my posts.


All of my prepped ingredients are on the Large Cutting Board.  I've got Adjustable Measuring Spoons, the Easy Read Measuring Cups, an Easy Read Mini Measuring Cup, standard Measuring Spoons, a Kitchen Scraper, and a Vegetable Peeler working hard.


The Measure-All Cup is a Pampered Chef staple.  This thing is amazing!  Load it with a sticky ingredient, pop it out, and scrape it off.  I'm using the Skinny Scraper and the Classic Batter Bowl on this mixture.


Stir all of those beautiful ingredients together, and add the chicken.  This is one of those times I'm really glad the Batter Bowl includes a lid!


Don't skip the 30 minutes to marinate the chicken.  Trust me on this - totally worth the wait!


I'm using the 4-Qt. from the Executive Cookware Collection.  Also, I'm assuming you know this, but put the lid on when you want to bring water to a boil.  It significantly reduces the wait!

 
Notice how the Classic Scraper gets all of that marinade off the sides of the bowl.  Love my scrapers! I can almost taste this through the computer screen...
 
Let me make a couple of quick notes about this recipe.  One: It's spicy.  Two: It doesn't make enough to serve a crowd, so double the recipe if you're inviting company for dinner.  Three: Tell me if you make this!  Four: Enjoy.
 
Like the products you saw used?
Shop Online 24/7 at pamperedchef.biz/jennylyn
E-mail me: chefjennylyn[at]gmail.com
Call me up: (205) 585-2464


Thursday, November 14, 2013

Lighter Philly Cheesesteaks

 
I have a weakness for hot sandwiches, especially when it's cold outside.  There's something so comforting about bread, meat, cheese, vegetables, and more cheese.  When I found this recipe for lightened up cheesesteaks, I knew it was a must-try.  Sure enough, the sandwiches were great, and I knew I'd be making them again.  I promised myself that when I did, I'd take pictures to share with you!  If you're looking for warm comfort food that doesn't leave you feeling heavy and gross, here you go.  Happy cold weather, everyone!
 
Lighter Philly Cheesesteaks
chefjennylyn.com
 
1 flank steak, trimmed (12 oz.)
1/4 tsp. kosher salt
1/4 tsp. freshly ground pepper
8 oz. sliced mushrooms
2 tsp. olive oil, divided
1 cup thinly sliced onion
1 1/2 cups thinly sliced green bell pepper
2 garlic cloves, pressed
1/2 tsp. Worcestershire sauce
1/2 tsp. lower-sodium soy sauce
4 hoagie rolls
Reduced-fat Provolone cheese slices
 
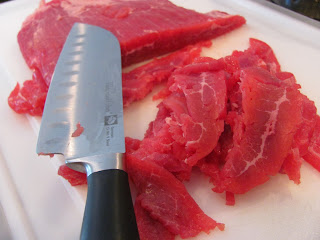
Thinly slice beef across the grain.  Sprinkle with salt and pepper.
Heat a large nonstick skillet over medium-high heat.  Add 1 tsp. olive oil to pan, and sauté beef 2 minutes or until it loses its pink color, stirring constantly.
Remove beef from pan, and cover to keep warm.
Add remaining 1 tsp. oil to pan.  Add onion, and sauté 3 minutes.  Add mushrooms, bell pepper, and garlic.  Sauté 6 minutes.
Return beef to pan with vegetables, and sauté until everything is thoroughly heated, and vegetables are tender.  Remove from heat, and stir in Worcestershire and soy sauces. 
Hollow out the top and bottom halves of bread, leaving a 1/2-inch-thick shell.  Fill with a serving of beef mixture, and top with cheese.  Place under oven broiler until cheese melts.
 

The onion slicing method: Half whole onion.  Cut off bottom, but keep the fuzzy end.  Slice onion vertically.  Cut off the fuzzy end.  Hello, beautiful slices you didn't chase all over the cutting board.  Speaking of that, this is my Large Cutting Board, and that's my 5" Santoku Knife from the Forged Cutlery Collection.  Power team, if you will.

When I've got ingredients going in a recipe at the same time, I like having them in the same bowl.  I rinsed my mushrooms in the smallest of my Stainless Colanders, and I put that in the 2-Qt. Stainless Mixing Bowl.  Then I added my bell peppers once they were sliced, and I'm pressing my garlic directly on top.  No peeling with the Pampered Chef Garlic Press!


To make slicing the beef easier, place in in the freezer fifteen minutes before you're ready for it.  Just stick it in there before you get your other ingredients out and prepped, and you'll be ready for it at the perfect time.  Those few minutes will make a big difference when you're trying to get thin slices.  Again, Large Cutting Board and 5" Santoku Knife.


Last step: Sauces.  The Pinch Bowls are so great for things like this because they've got little pour spouts on them.  (Rabbit chase: The lids for these bowls are just so cute with their little beak looking things that fit around the pour spouts!)  I'm using a spoon from the Measuring Spoon Set, and I'm putting both sauces together at the same time since they'll be added in one step.


Everything is prepped and ready to go, so this is going to be super simple to cook.  Beef is on the Large Cutting Board, sauces are in a Pinch Bowl, mushrooms, peppers, and garlic are in the Small Stainless Colander, onion is in a 2-Cup Prep Bowl, and olive oil is in the Dripless Oil Bottle.


I love the Dripless Oil Bottle because it truly is impossible to drip with it.  The pour is manageable, so you don't have to worry about accidentally dumping 1/4 of oil in your pan when you were aiming for a teaspoon.  This is the 10" Skillet from the Executive Cookware Collection, and it's my go-to pan for most things.  The size is awesome, and the sides are tall enough to keep things from flying when I get crazy stirring.


Bamboo Pepper Grinder!  Freshly ground salt and pepper will make a huge difference in the flavor of your food, and I love these grinders because you can see exactly how much you have left.  Notice I really need to refill this one...


Get those onions in there after the beef, and let them sweat a few minutes before adding peppers and mushrooms.


It just makes me happy to have a skillet full of beautiful vegetables with very little oil.  That's another benefit of the Executive Cookware, one that directly impacts your health.  Less oil and butter because you're not using it to keep your food from sticking to the pan.


Alright - here we go!  I'm slicing a hoagie roll on the Cutting Board (not my favorite large since it just had beef on it), and I'm using the Bread Knife from the Forged Cutlery Collection.  Let me just tell you that you don't know what you're missing by not having a bread knife until you get one.  Then it's kind of like, "Wow - I don't mind slicing loaves of French bread anymore!"  Once you've sliced almost but not all the way through your bread, hollow it out.  Trust me - lots of calories saved here!  (Put the inside bread in the freezer for bread crumbs. Pulse frozen bread through your food processor, and stop buying bread crumbs at the store.)


This is on the Medium Bar Pan, and it's about to become crazy delicious!  About a minute under the broiler, and I've got a sandwich that looks and tastes like $7.00.

One thing I really like about this recipe is that you can just make one sandwich at a time.  Since I work from home, it's nice to have things in my arsenal that are simple, delicious, and produce leftovers for another day.  Score!

Like the products you saw used?
Shop Online 24/7 at pamperedchef.biz/jennylyn
E-mail me: chefjennylyn[at]gmail.com
Call me up: (205) 585-2464


Monday, November 11, 2013

My Favorite Sweet Potato Casserole

 
It's almost Thanksgiving!  That means it's time for me to share one of my favorite recipes, one I think could make a fine addition to your family's table.  Seriously, this is my favorite sweet potato casserole, and I wouldn't be surprised if it becomes yours.
 
My husband and his friends have this awesome tradition of sharing a Thanksgiving meal together one Saturday early in the month.  And by meal, I mean feast.  It's just like when your real family gets together: tons of food, lots of laughter, and plenty of wishing for one's elastic pants.  Anyway, this was my first year joining the festivities, and I wanted to share a couple of my favorites.  Between this casserole and the pumpkin cheesecake I brought, I think I guaranteed my seat at next year's table.
 
Sweet Potato Casserole
chefjennylyn.com
 
4 large sweet potatoes, baked
1 cup half-and-half
3/4 cup packed brown sugar
1 tsp. salt
2 tsp. vanilla extract
2 large eggs
 
Topping
1 1/2 cups miniature marshmallows
1/2 cup all-purpose flour
1/4 cup packed brown sugar
1/4 tsp. salt
2 tbsp. chilled butter, cut into small pieces
1/2 cup chopped pecans, toasted
 
Bake potatoes at 450 degrees for 1 hour or until very soft.
Preheat oven to 375 degrees.
 
Combine peeled potatoes, half-and-half, 3/4 cup brown sugar, 1 tsp. salt, and vanilla.  Beat with a mixer at medium speed until smooth.  Add eggs, and beat well.  (Mixture will be thin.)  Scrape mixture into 9x13-inch baker.
 
For topping, sprinkle top of casserole with miniature marshmallows.  Combine flour, 1/3 cup sugar, and 1/4 tsp. salt in a medium bowl.  Cut in butter with a pastry blender until it resembles coarse meal.  Stir in toasted pecans, and sprinkle topping over marshmallows.
 
Bake at 375 for 30 minutes.


You know how I love prep.  When there are two stages for the same recipe, I like to separate my ingredients into their own stations.  Here, I have everything for the casserole on the Large Cutting Board and what I need for the topping is on the standard Cutting Board.  This just helps me know which brown sugar goes where and all of that good stuff.  There were all kinds of fun things used - Easy Read Measuring Cups, Prep Bowls, Measuring Cups, Pinch Bowls, Measuring Spoons, Stainless Mixing Bowls, and more!


I baked my potatoes the day before since they required zero effort.  All I did was wash them and arrange them on the Medium Bar Pan to catch anything that found its way outside the peel.  No butter.  No foil.  Nothing but potatoes and the pan.  Once they cooled, I threw them in a gallon Ziploc and pulled them out when it was time to make the casserole.  Think about Thanksgiving at your house.  Do you really want the oven at 450 for an hour of potato baking when you've got ten other dishes you're trying to prepare fresh?  If it can be done ahead, go for it.


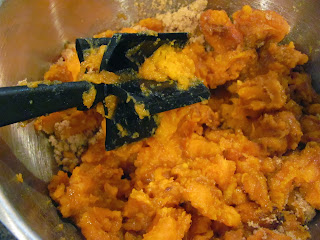
The original version of this recipe called for peeling, chopping, and boiling the potatoes.  Seriously?  Who has time to do all of that when you can just throw them in the oven?  Besides, I think roasting gives a depth of flavor with which boiling water just can't compete. (Sorry, Cooking Light!)  I put the peeled potatoes in a Stainless Mixing Bowl and used the Mix 'n Chop to roughly combine them with my sugar and salt before adding liquid ingredients.


This is the Small Bar Pan, the one that fits inside a toaster oven.  I chopped my pecans with the Manual Food Processor and threw them in for a quick while I prepared the rest of the topping.


You need a Pastry Blender.  Trust me when I say it just makes life easier.  It's been redesigned since I got this one, but it's the same concept.  The same beautiful, beautiful concept that keeps you from using a dinner fork for something like this.


The potato mixture goes into the Rectangular Baker, and the only thing left is the topping.  I don't bake in anything but Stoneware, and this recipe is a perfect example of why.  None of my marshmallows around the edges got scorched, and there were no hard sides.  Each square inch of this casserole was the exact same as the others.  Even baking is huge, especially when you're talking about cooking for the holidays.


How delicious does this topping look after adding the toasted pecans?  I promise it's one of the most delicious things you'll ever eat!  I mixed it up using the Mini Mix 'n Scraper, but this was also the perfect tool for sprinkling topping over the marshmallows.  The well shape acted as a spoon, so I didn't have to dirty anything else for the job.

Let me know if you add my favorite sweet potato casserole to your family's table this Thanksgiving or Christmas.  I can promise right now that you'll have zero complaints, and you may even have a few people hit you up for the recipe.

One last thing: Can we all just add "desserts that we choose to treat as side dishes" to our list of things for which we're thankful this year?  It's the small things, people.

Like the products you saw used?
Shop Online 24/7 at pamperedchef.biz/jennylyn
E-mail me: chefjennylyn[at]gmail.com
Call me up: (205) 585-2464


Friday, November 8, 2013

Twix Cheesecake


As hard as this is for me to believe, I've reached my 100th blog post!  That means I have to share something truly special, something I know will get you rave reviews should you decide to take it to an upcoming holiday gathering, something I believe will become a recurring presence in your dreams.  Deep breath... This is the world's best cheesecake.

In order for me to repeat a recipe with what I consider a pricey ingredient list and several hours baking/cooling/refrigerating, I ask myself this question: "Would I pay for this at a restaurant?  Would I order one slice for between six and ten dollars?"  If the answer is yes, I keep it.  This, my friends, is a clear and resounding yes.  Welcome to the best cheesecake I've ever eaten in my life.  Happy 100th blog post.

Twix Cheesecake
chefjennylyn.com

Crust:
2 cups graham cracker crumbs
1 stick butter, melted
3 tbsp. sugar
1/2 tsp. salt

Cheesecake:
4 8-oz. blocks of cream cheese, softened
1 1/4 cup granulated sugar
4 large eggs
3/4 cup heavy whipping cream
1 tbsp. pure vanilla extract

Topping:
10 miniature Twix bars
Caramel syrup


Preheat the oven to 350 degrees.
Mix together the crust ingredients and press in Springform Pan.  Bake 7 minutes, and cool.
In the bowl of your stand mixer fitted with your paddle attachment, combine the sugar and cream cheese; cream until smooth. Add eggs, one at a time, fully incorporating each before adding the next. Make sure to scrape down the bowl in between each egg. Add heavy cream and vanilla and, mix until smooth.
Pour batter into prepared crust.
Bake 45 to 55 minutes, until edges are set, and center has a slight jiggle. Turn the oven off, and crack the door.  Leave the cheesecake in there for 1 hour.
Cool cheesecake completely, and refrigerate at least five hours.
Top with Twix bars and caramel.

I got the base recipe for this cheesecake at My Baking Addiction.


Let's get started on the crust.  I used a saucepan from the Executive Cookware Collection for my butter, and the great thing is that I could stick it right in the oven while it preheated.  The Quikut Paring Knife is so simple, but it's the one I always reach for when I'm cutting up butter.  By slicing it, it softens pretty quickly for cakes and cookies, and it definitely melts more quickly in a case like this.  Of course I'm using my favorite Large Cutting Board, too.


The Manual Food Processor is great for making quick work of the graham cracker crumbs, but here's a tip: When you put the crackers in, go ahead and break them up a little bit.  I'm placing them in the Small Batter Bowl where I'll use my Mini Mix 'n Scraper to stir the crust ingredients.


This is the Springform Pan, and it's incredible.  A lot of cheesecake recipes will explain water baths and all these extra steps you need to keep your cheesecake from cracking.  Let me just tell you that with this pan, I've never had cracks.  The handles are great for getting the pan in or out of the oven, and the glass plate at the bottom makes a beautiful presentation when you serve the finished product.


I used the Measuring Cup Set for sugar measurements, and of course I leveled them off using the tool that comes with the cups.  So handy!  My Mix 'n Scraper is in the bowl with the cream cheese, and it's just what I need for scraping the sides during mixing.


This picture makes me feel all warm and fuzzy because it's me using my new stand mixer!  Someone I love a lot a lot a lot gave this to Soo-Young and me for our wedding, and all I can say is that making cheesecake is much easier than it once was.  Moving on - the egg is in a 3-Cup Prep Bowl, which I chose because I could grip it easily.  Crack eggs one at a time for any recipe to make sure they're still good, there's no blood, and shell isn't making its way into your batter.  Let me be honest: Cracking a bad egg directly into eight dollars worth of cream cheese that I softened for hours would make me cry.  Don't shortcut.


Cream is in an Easy Read Measuring Cup, and vanilla is in a spoon from the Measuring Spoon Set.  Things are about to taste delicious!


Once the cheesecake has baked and rested in the cooling oven, remove it to cooling rack to cool completely before refrigerating.  I have three of the Stackable Cooling Racks in my kitchen, and it's pretty common for me to use them all at the same time.  Notice what I'm doing here.  The Springform Pan comes with a little tool that you run along the edges of your cheesecake to make sure it comes out nice and clean.  How cool is that?


Time for the candy!  I cut the Twix bars into fourths using my 3 1/2-inch Paring Knife from the Forged Cutlery Collection, and I did the job on a Bar Board, which is just a little brother to the Large Cutting Board.  Finished pieces go in a 2-Cup Prep Bowl, and then...


Snap the collar off the cheesecake, and enjoy the beautifully golden crust.


Put a layer of warm caramel directly on the cheesecake, add the candy, and drizzle with a bit more caramel.  Then slice and enjoy!  Oh, my - so beautiful!


I can't emphasize enough how delicious this cheesecake is.  It's rich and creamy, but it doesn't punch you in the face.  Take it to your next gathering, and enjoy it when the buzz becomes, "Who made the cheesecake?"

Like the products you saw used?
Shop Online 24/7 at pamperedchef.biz/jennylyn
E-mail me: chefjennylyn[at]gmail.com
Call me up: (205) 585-2464


Thursday, November 7, 2013

Asian Broccoli


This is a simple side that's sure to please, and the best part is its ease of preparation.  I'll admit that finding the right vegetables to serve with Asian dishes can be tricky for me, and that's why this recipe struck me as such a win.  Betsy and I chose it to go with the Chicken Yakitori Rice Bowls I made in Houston, and it was perfect!  It has lots of flavor, and it's beautiful on the plate.  Enjoy!

Asian Broccoli
chefjennylyn.com

4 cups broccoli florets
2 tsp. peanut oil
1/8 tsp. crushed red pepper
3 garlic cloves, minced
1/4 tsp. kosher salt
1/4 tsp. ground black pepper
1 tbsp. lower-sodium soy sauce
1 tsp. rice wine vinegar
1/2 tsp. sugar
1/2 tsp. sesame oil

Bring 8 cups of water to a boil, and add broccoli.  Boil 2 minutes, and drain.
Heat a stir-fry skillet over medium heat.  Add peanut oil to pan; swirl to coat.
Add crushed red pepper and garlic, stirring for 30 seconds.
Add broccoli florets; cook 2 minutes.
Stir in salt, pepper, and crushed red pepper.
Toss broccoli in remaining ingredients (soy, vinegar, sugar, sesame oil).


Prep. Prep. Prep.  Garlic and spices are in Pinch Bowls, and I'm using the Measuring Spoon Set for things like red pepper.  My Garlic Press is ready to go, and I've got broccoli in the Small Batter Bowl.  Everything is on a Cutting Mat.


Hello, Garlic Press.  I've loved you for 13 years, and I'm going to keep on loving you.  Thanks for keeping stinky garlic off my hands for so long!


I love this step.  Everything is ready to go, and I'm just going to throw it in the Stir-Fry Skillet when the recipe tells me.  See the Mini Easy Read Measuring Cup?  It's not just cute, friends.  That think is so stinking handy!  I promise you need 1-4 tbsp. of liquids in a recipe a lot more often than you realize, and this is just the tool to measure once instead of two, three, or four times.


You may notice a lack of photographs on this post, but I was making Chicken Yakitori Rice Bowls at the same time.  In my defense, there was a lot going on.  That said, I'm really sorry you're not getting to see what boiling broccoli for two minutes looks like.  Make this broccoli!  You'll like it - I promise!

Like the products you saw used?
Shop Online 24/7 at pamperedchef.biz/jennylyn
E-mail me: chefjennylyn[at]gmail.com
Call me up: (205) 585-2464


Tuesday, November 5, 2013

Nutty Caramel Brownies


There are a lot of brownie recipes out there.  A quick Google search, and you'll have pages upon pages of options.  When that's the case, how do you decide which ones are worth your time and effort?  Well, that's where I come in.  As the voice of reason, let me just show you the above picture and say, "These are worth it.  Make these because you, well, you're worth it, too!"
 
Warm Nutty Caramel Brownies
chefjennylyn.com
 
1 tsp. vegetable oil
1/2 cups chocolate chips
1 box brownie mix (plus ingredients)
3/4 cup packed brown sugar, divided (1/4 and 1/2)
1 cup salted mixed nuts, divided (1/2, 1/2)
40 Rolos (16 in quarters, 24 whole)
 
Preheat oven to 375 degrees
Lightly brush Large Bar Pan with oil.
Chop chocolate chips using Food Chopper.  Combine brownie mix, water, oil, eggs, and 1/4 cup brown sugar; mix well.  Fold in chopped chocolate; pour batter into bar pan, spreading evenly.
Chop nuts using Manual Food Processor.
Combine remaining 1/2 cup brown sugar with half of the nuts, and sprinkle over brownie batter.
Bake 20-22 minutes.
While brownies bake, cut 16 Rolos into quarters.
Remove bar pan to cooling rack, and immediately press 24 candies evenly into brownie in four rows of six.  Sprinkle quartered caramels and remaining nuts over brownies.
 
Note: This recipe also calls for melting and drizzling chocolate over the top, but I skipped that since my brownie mix contained a fudge packet.  No need to kill people.


As always, my ingredients are prepped and ready on the Large Cutting Board.  Sugar and nuts are in Measuring Cups, oil is in an Easy Read Measuring Cup, and my egg is in a 2-Cup Prep Bowl.  Then I've got chocolate chips in the Manual Food Processor (scroll down), and Rolos are in the 2-Qt. Stainless Mixing Bowl.  Notice that all of my bags of leftover ingredients are sealed using Twixit! Clips.  Honestly, those things end up on every package in my kitchen, even those in the freezer.


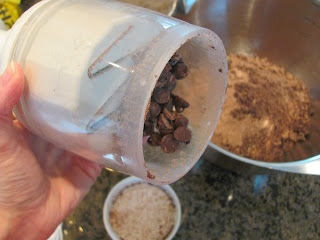
The Food Chopper is a better choice for chopping chocolate chips.  I started with the Manual Food Processor and quickly decided this was more of an, "I'm getting a rotating blade to come down directly on the chocolate" situation.  I've had this chopper for thirteen years, and it's still awesome.


A Stainless Mixing Bowl has all of my delicious brownie ingredients and add-ins ready to go, and I'll just give it a good stir with the Stainless Whisk.


Stoneware!!!  I love the Large Bar Pan for all kinds of things - meats, brownies, cookies, etc.  It's especially good for sausage balls because the lip catches the grease.  When stoneware is seasoned, it typically doesn't need to be brushed with oil.  This recipe, however, calls for a light coat.  The chocolate that's added to the brownie batter tends to want to stick if you don't help it out a little.  Check out the Silicone Basting Brush - beautiful, heat safe, hangy-on-a-bowl-y...


Now the Silicone Basting Brush is just showing off!  Anyway, I'm one of those people who doesn't like to waste any batter, so I love the way the Mix 'n Scraper gets everything off the sides of the bowl.  For people who like to have that bit of extra to themselves, no one is stopping you.  And there's even a HUGE spoon to lick!


The Manual Food Processor is a perfect choice for chopping the nuts, and it puts zero pressure on my hand or wrist.  Love this tool!


The nut/sugar mixture is sprinkled on the brownie batter, and that's all ready for the oven!  I used my Mini Mix 'n Scraper for sprinkling, and it worked like a charm.


Excuse me while I drool.  I think Rolos are beautiful, and that's helpful when you're so sick of unwrapping them that you want to scream.  Cutting the candies into quarters would be kind of annoying if I didn't have a good, sharp knife.  I used the 3 1/2" Paring Knife from the Forged Cutlery Collection, and it worked like a charm.  Just look at those precise slices! 


Huge bowl of Rolos, Stainless Colander (don't ask) of wrappers, and one happy Bar Board.  I think we're ready for those brownies to come out of the oven!


One more picture...


Stick the whole Rolos in the baked brownies, and then sprinkle the whole deal with the remaining candy and nuts.  Then you get this!  Ah, it's just so delicious!!!  Also, check out the edges of the brownies.  This is what people are trying to tell you about baking in stoneware.  You don't get the hard edges you get in metal or glass.  Read: The pan of brownies doesn't become a ring of hard crust with its entire center missing when you serve them. 
 
Here's my promise to you: If you make these, you will really, really, really like them.  Can't get any better than that!
 
Like the products you saw used?
Shop Online 24/7 at pamperedchef.biz/jennylyn
E-mail me: chefjennylyn[at]gmail.com
Call me up: (205) 585-2464