I do love a whoopie pie! Take two cakey cookies, sandwich amazing filling between them, and say it's a single serving? Yes, please! The new Chocolate Cookbook was just released this month, and all I can say is wow. I mean, there are some truly delectable desserts in this thing, and I'm looking forward to trying them all! With so many options, why did I choose Dark German Chocolate Whoopie Pies first? Put simply, I had most of the ingredients in my pantry. Call me uninspired, but that's how I figure out what's at the top of my "stuff to try" list.
I took these to my friends Christopher and Elizabeth, and they wholeheartedly approved. Not only were these delicious, but they made for a beautiful presentation. Definitely worthy of gifting for others! The recipe makes 32 pies - seriously - so make them with several people in mind, and feel free to indulge yourself.
Dark German Chocolate Whoopie Pies
chefjennylyn.com
2 cups flour
5 tbsp. dark chocolate cocoa powder
1 1/4 tsp. baking powder
1 tsp. baking soda
1/2 cup butter, softened
1 cup sugar
2 egg yolks
1 tbsp. vanilla
1 cup milk
Filling
1 cup sugar
1/4 tsp. salt
3/4 cup evaporated milk
2 egg yolks
1 1/2 tsp. vanilla
3/4 cup butter, cut in pieces
2 cups sweetened flaked coconut, toasted
2 cups pecan halves, toasted and finely chopped
Ganache
1 cup bittersweet chocolate morsels
1/2 cup heavy whipping cream
Preheat oven to 375 degrees. Line pans with parchment paper.
Combine flour, cocoa, baking powder, and baking soda.
In a separate bowl, combine butter, sugar, egg yolks, and vanilla. Beat on medium-high speed of electric mixer until well blended. On low speed, add flour mixture in three additions, alternating with milk in two additions. Mix well.
Using level Small Scoop, scoop batter onto prepared pans 2 inches apart. Bake 7-9 minutes or until cookies spring back when lightly pressed. Slide parchment and cookies onto cooling racks.
For filling, combine sugar and salt in saucepan. Gradually whisk in evaporated milk, egg yolks, and vanilla. Add butter. Cook over medium heat, stirring constantly, 8-10 minutes or until temperature reaches 160 degrees. Pour into bowl, and add coconut and pecans. Mix well, and refrigerate 1 hour or until cool. Meanwhile, prepare ganache.
For ganache, melt chocolate and cream together over low heat. Cool about 15 minutes or until spreadable.
To assemble, turn cookies bottom side up. Using slightly scant Medium Scoop, scoop filling onto one half, pressing down slightly so filling spreads almost to edge. Spoon 1 tsp. ganache on remaining half of cookies, and place one filled cookie on top of ganache, pressing slightly. Garnish with extra ganache, coconut and pecans, if desired.
Yield 32 whoopie pies

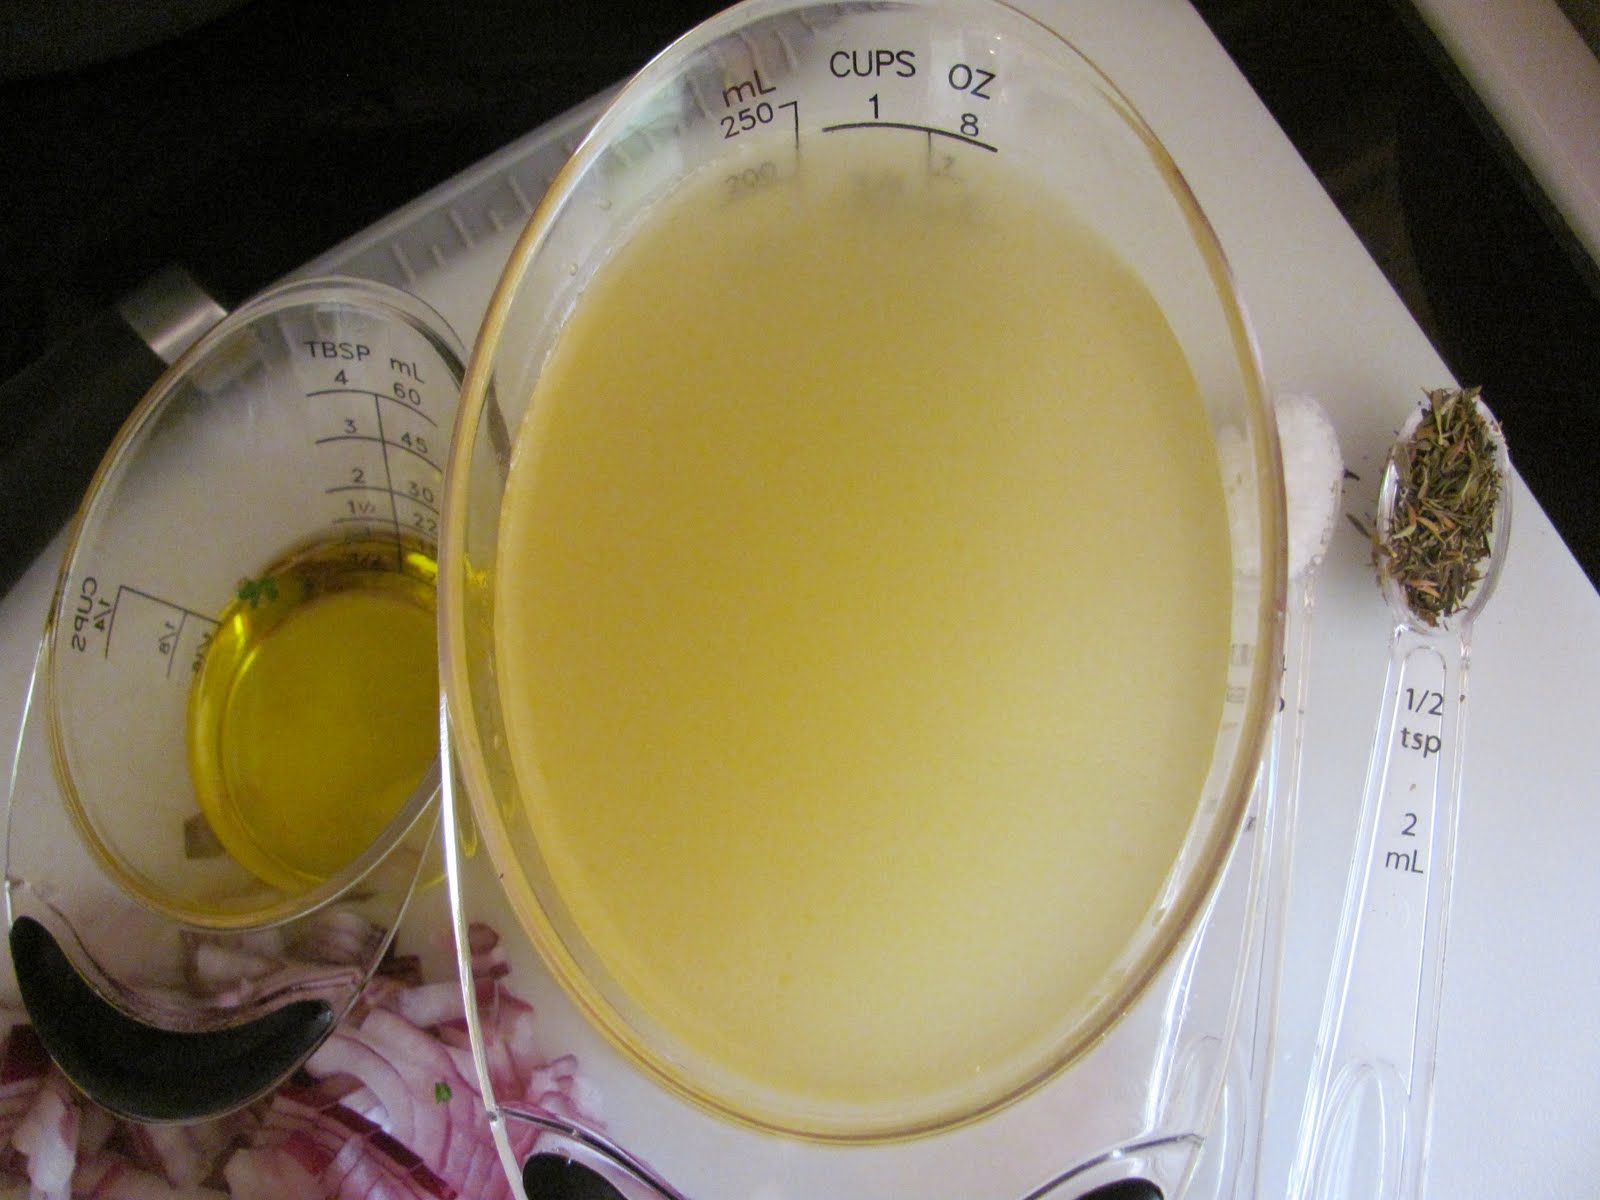
I don't think the flavor would have been nearly the same with a regular cocoa blend, so grab some Hershey's Special Dark, and go to it! (By the way, Hershey's didn't pay or even give me this $3.00 can of cocoa powder for mentioning it. I just like to say Hershey's. Hershey's, Hershey's, Hershey's.) With all the Hershey's talk, it's easy to become distracted from the killer prep work in the background, but here's the rundown: 1-cup Prep Bowl, Measuring Spoon Set, Adjustable Measuring Spoons, Measuring Cup Set, Stainless Mixing Bowl, and Large Cutting Board. I can't stress enough how vital it is to measure everything ahead of time. This recipe takes a while to prepare (fair warning), and it'd be a shame to mess it up because you accidentally doubled the baking soda. I know that seems silly, but things are easily confused once you become distracted by a phone ringing, a child calling, or a Hershey's ad coming on the television. Hershey's.

There is some major egg yolkage going on in this recipe! I mean, I hope you've got a beautiful meringue on your mind because Dark German Chocolate Whoopie Pies are about to leave you with four whites. Here you can see that I'm separating my eggs using the Egg Separator, and I'm doing it over a 2-Cup Prep Bowl. Then I take the yolk, dump it in a 1-Cup Prep Bowl, and get ready for the next egg. I know you're wondering why my larger bowl is full of yellow. Well... because I sometimes make mistakes. I cracked my first egg really hard and stabbed the yolk with the shell. Then I was too lazy to throw it out for the picture. These "whites" will not become a beautiful meringue.

A couple of things here. First of all, I love that the Measuring Spoon Set comes with a 1/2 tbsp. spoon. How great is that? No more 1 1/2 tsp. measurements - just straight for the 1/2 tbsp. from here on out. Second of all, this is the best vanilla you'll ever use in your life, guaranteed. Because the Pampered Pantry's Double-Strength Vanilla goes twice as far as standard brands, you get a huge bang for your buck!

Cookie Sheets are lined with Parchment Paper (which can be used multiple times), and the batter is in a Stainless Mixing Bowl. Dear Small Scoop: Thanks for owning it on all 64 stinking chocolate cookies! I couldn't have remained sane without you.

If you think sweetened coconut is good, try toasting it. Addictive, people! The Medium Bar Pan is good for two cups, but I think I'll spread it in the Large Bar Pan next time for a thinner layer. Coconut is in an Easy-Read Measuring Cup, by the way.

My filling ingredients are ready to go, so now the fun can really begin. Don't you love when your prep area is dominated by a ton of butter? I do. My egg yolks and vanilla are in a 1-Cup Prep Bowl, and I've got evaporated milk in an Easy-Read Measuring Cup. Then sugar in a Measuring Cup along with salt in a Measuring Spoon.

My mixture is in the 3-Qt. Saucepan from the Executive Cookware Collection, and the Silicone Sauce Whisk protects the pan's coating as I "stir constantly 8-10 minutes or until mixture reaches 160 degrees." Speaking of 160 degrees, check out the new Candy Thermometer! This is one thing I was really eager to add to the product line, so I was thrilled to see it introduced! It's got a silicone clip to keep from scratching non-stick pans, and there are other great features I'll let you see for yourself.

The Manual Food Processor makes quick work of chopping the pecans, and they're ready to go in the Stainless Mixing Bowl full of filling. Warning: This filling is absolutely addictive. If you don't watch yourself, you'll eat half the bowl and end up with a mere 16 whoopie pies. Don't do that.

So I know it looks pretty to have this big pile of cookies on the Dots Dinner Plate, but I'm suggesting you avoid piling these on top of one another. They stick and create craters in the unfortunates underneath. This was my first time with this recipe, so I didn't know any better. Regrets!!!

Get all your ingredients together, and get ready to fill whoopie pies! Cookies are on a Dots Dinner Plate, filling is in a Stainless Mixing Bowl with the Medium Scoop, and ganache is in a 2-Cup Prep Bowl. Garnishes are in a 1-Cup Prep Bowl and Pinch Bowl on top of a Cooling Rack.

Settle in, and let assembly begin. These are beautiful, but they
taste even better than they look. Make yourself a whoopie pie, and throw one together for each of your thirty-one closest friends while you're at it!
Like the products you saw used?
Shop Online 24/7 at pamperedchef.biz/jennylyn
E-mail me: chefjennylyn[at]gmail.com
Call me up: (205) 585-2464

 You know what's delicious? Food that contains a pound of cheddar cheese. In the South, cheese straws are a bit of a staple, and no one questions the ratio of cheese to flour. I'm convinced the only reason this recipe calls for any flour is simply to hold the cheese together, but that's part of its beauty. If you Google "cheese straws," you'll come up with countless recipes, and I don't know that any one is better than the others. I came across this one at Belle of the Kitchen, and I was convinced it was worth trying because they were the blog's author's grandfather's signature recipe. Did you get all that? If a recipe is worth passing through generations, it's a keeper.
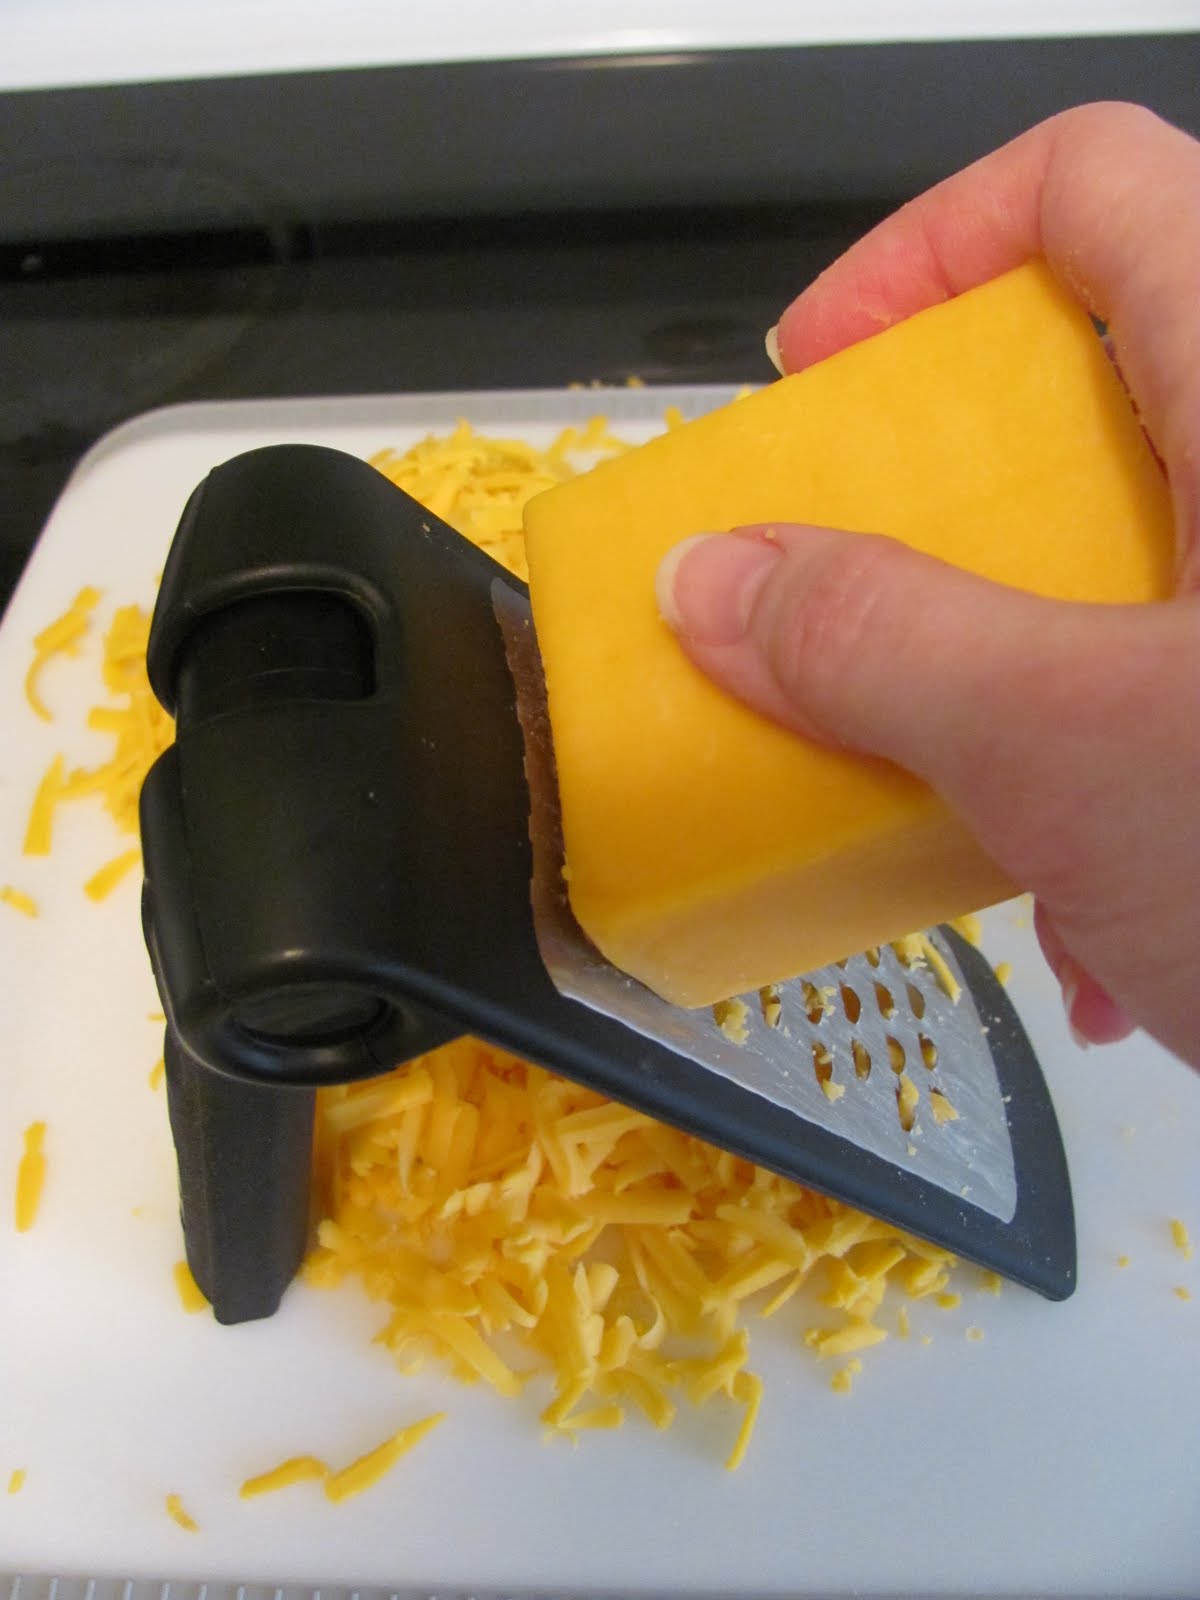 A pound of cheddar is no joking matter. Fortunately, I was using my Microplane Course Grater, which made quick work of the "shred cheese" step. I love that this tool adjusts, and it comes with a protective sleeve to spare my knuckles when I reach in kitchen drawers. When cooking, it's worth it to use block cheese because it doesn't contain the wax that keeps pre-shredded cheese from sticking to itself when packaged.
 My cheese, etc. is on the Large Cutting Board, and the arsenal of tools is as follows: Cheese Knife, Adjustable Measuring Spoon, Dots Pasta Bowl, Measuring Cup Set, Microplane Coarse Grater, and Stainless Mixing Bowl. Things are about to get crazy.
 I don't have a food processor, so every recipe that calls for one requires a second look before I can commit. In this case, I knew I could simply knead my dough by hand after doing what I could with a hand mixer. Welcome to a whole lot of cheese with a little bit of flour.
 The Small Scoop is seriously the greatest thing ever. Just scoop out the dough, press it slightly with your hand, and you're set! I used the Large Bar Pan with Parchment Paper, and I also used a Cookie Sheet.
 Before becoming the baked perfection that is a Southern cheese straw.
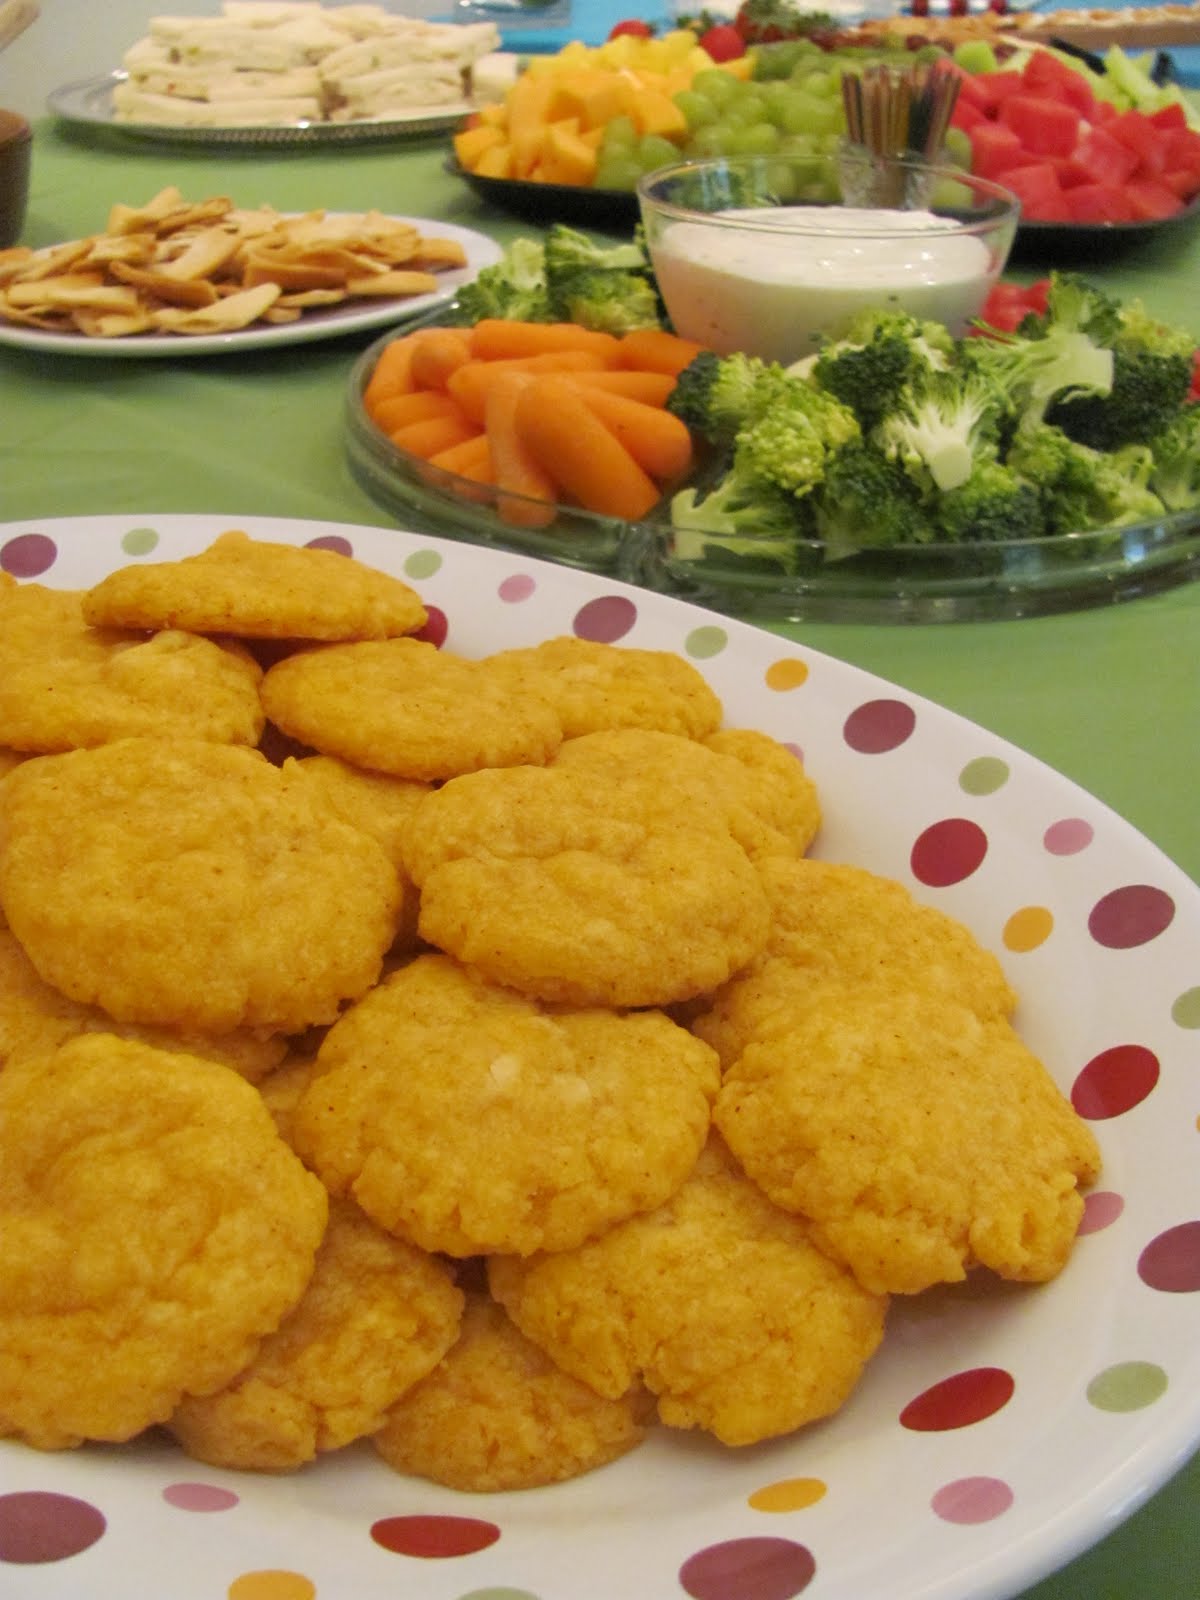 These were successful. They may not have been the correct shape, but the flavor was there, and I came out with a go-to recipe for the future. These are displayed on the Dots Oval Platter from the Simple Additions Collection, and they're perfectly complemented by a beautiful spread of shower food. Someone else want to have a bridal tea so I can try this again?