Showing posts with label strawberries. Show all posts

Tuesday, May 27, 2014

Mile-High Strawberry Pie


This really happened!  Our friends Paul and Jenn had us over for Memorial Day dinner outside, and their table really was this beautiful!  Wouldn't you think it was straight out of a magazine?  I mean, Jenn knocked this thing out of the park, and it made me glad I brought my pie in a true presentation piece instead of a foil pan.  Yowsa!

When I knew I was leaving Alabama, I knew I'd be leaving my grandmother's stash of Southern Living magazines behind.  What did that mean?  I needed to become a subscriber myself.  You know, grow up, pay for the publication instead of mooching off your grandmother with her old copies, that sort of thing.  I now enjoy getting my little bit of South in the mail every few weeks, but I have to admit that I read very little.  Instead, I skip to the recipe section and rip out everything I want to make.  These mini pies were in the April issue, and I had a feeling they'd make it to my Memorial Day table.  I was correct, but I moved to the Mega Strawberry Pie version at the last minute when I ran out of time.  The result was a huge, delicious strawberry dessert that I'll be sure to repeat sometime.  For now, let me share it with you. 

Mile-High Mini Strawberry Pie
chefjennylyn.com

Pastry Crusts
1/4 cup powdered sugar
2 (14.1-oz.) packages refrigerated piecrusts
Creamy Lemon Filling
1 1/2 (8-oz.) packages cream cheese, softened                            
1 tablespoon sour cream                               
1/2 cup granulated sugar                             
2 teaspoons lemon zest                              
1 tablespoon fresh lemon juice                

Strawberry Topping
1 1/2 cups coarsely chopped fresh strawberries                
1 cup granulated sugar                
2 tablespoons cornstarch                               
1 tablespoon butter
10 cup hulled fresh strawberries                       

Vanilla Cream
1 cup heavy cream
1/4 teaspoon vanilla extract                
3 tablespoons powdered sugar                

1. Prepare Crust: Preheat oven to 425°. Sprinkle work surface with 1 Tbsp. powdered sugar. Roll 1 piecrust into a 12 1/2-inch circle on surface, and cut into 3 (6-inch) rounds. Repeat with remaining 3 piecrusts and 3 Tbsp. powdered sugar to make 12 rounds. Fit 6 rounds, sugar sides down, into each mold of a 6-cavity mini pie pan; fold edges under, and crimp. Prick bottom and sides with a fork. Chill remaining 6 rounds.

2. Bake at 425° for 8 minutes or until golden brown. Cool on a wire rack 5 minutes. Remove crusts from pan to wire rack, and cool completely. Cool pan completely. Repeat procedure with remaining 6 piecrust rounds.

3. Prepare Creamy Lemon Filling: Beat cream cheese and sour cream at medium speed with an electric mixer until smooth. Add 1/2 cup granulated sugar and next 2 ingredients; beat until smooth and fluffy. Spread about 2 1/2 Tbsp. filling into each cooled piecrust; cover with plastic wrap, and chill until ready to serve (up to 24 hours).

4. Prepare Strawberry Topping: Process 1 1/2 cups chopped strawberries in a blender or food processor until smooth, and press through a wire-mesh strainer into a 3-qt. saucepan, using back of a spoon to squeeze out juice; discard pulp. Stir 1 cup granulated sugar into juice in pan.

5. Whisk together cornstarch and 1/4 cup water; gradually whisk cornstarch mixture into strawberry mixture. Bring to a boil over medium heat, and cook, whisking constantly, 1 minute. Remove from heat, and whisk in butter. Cool 15 minutes.

6. Toss together strawberry mixture and 10 cups hulled strawberries gently in a large bowl until coated. (Halve some berries; leave others whole.) Cover; chill 3 hours or until cold.

7. Prepare Vanilla Cream: Beat heavy cream and vanilla at medium-high speed until foamy; gradually add powdered sugar, beating until soft peaks form.

8. Spoon about 1/2 cup Strawberry Topping into each pie; top with Vanilla Cream. Serve immediately.

Mega Strawberry Pie: Preheat oven to 425°. Reduce 1/4 cup powdered sugar to 2 Tbsp. and piecrusts to 1/2 (14.1-oz.) package. Sprinkle surface with 2 Tbsp. powdered sugar. Roll 1 piecrust into an 11-inch circle on prepared surface. Fit piecrust, sugar side down, in a 9-inch pie plate; fold edges under, and crimp. Prick bottom and sides with a fork. Bake 10 minutes or until golden. Cool completely on a wire rack. Proceed with recipe as directed in Steps 3 through 8, spooning all of Creamy Lemon Filling into prepared crust, and topping with all of Strawberry Topping and Vanilla Cream. Makes 8 to 10 servings Hands-on 40 min.; Total 4 hours, 50 min.

This recipe is from Southern Living.  If you subscribe, you won't regret it.


There are few things that make me smile like a huge colander full of perfect strawberries.  Add the fact that said berries were on sale, and I'll downright beam.  Take it in, friends... just take. it. in.


The best thing to do on a recipe with several steps is simply to get everything out and dive in.  Strawberries are washed and drained in a Stainless Mesh Colander.  I have scrapers, the Measuring Cup Set, the Measuring Spoon Set, and the Large Grooved Cutting Board ready to go.  My bottle of water also wandered into this shot because hydration is important.  Yeah... that.


I adore the Microplane Zester.  This is a size made specifically for the Pampered Chef, and let me just tell you that it's amazing!  I can get my zest right into my Pinch Bowl with this, and I don't have anything going willy-nilly on me.  I have other ingredients measured into a cup and spoons beside me.


Ok, so my lemon was massive.  It was so large that I cut the ends off to maximize my juice when I put it in the Citrus Press.  Since the juice and zest are going in the recipe at the same time, I put both in the same Pinch Bowl.


Why do the Pinch Bowls have pour spouts?  Because pouring an ingredient into a stand mixer on medium speed is no time to make a mess.  It's the little things.


Settle in because it takes a while to chop cups upon cups of strawberries.  The good news is that you can make it a lot more fun by using an awesome knife that doesn't require sawing.  My go-to for berries, grapes, and other small items is the 3 1/2" Paring Knife from the Forged Cutlery Collection.  More on that in a bit.


We have to make a strawberry puree.  Enter: Manual Food Processor.


A few presses on the lever, and you're done.  Just take the blade out, and use the base as your bowl.


This is a case where it's soooo nice to have the right tool for the job!  I'm using the 5" Strainer, which has a double-fine mesh design, over a 3-Quart Saucepan from the Executive Cookware Collection.  Notice that my strainer has a lip that hugs my pan so I can be hands-free.  Also notice that the lip is covered in silicone to avoid scratching my cookware's surface.  Have I told you how much I love Pampered Chef products?  14 years in the business, and these things still excite me!  That's the Mini Mix 'n Scraper that I'm using to strain the puree. 


A 2-Cup Prep Bowl and the Stainless Mini Whisk pair perfectly for the cornstarch concoction.  I've got a 1-Cup Prep Bowl there with the strawberry pulp my recipe told me to discard.  I interpreted that as, "Save pulp for your next smoothie."


Dicing strawberries is serious business.  Here's my method: Cut tops off all berries.  Quarter berries.  Go back through tops, using stems as handles, and cut off usable parts.  Most people don't do this last part, but if you've got a good knife, it doesn't take long, and in the case of this pie, I was able to yield an extra cup of berries.  Another option is to just core all of the berries before slicing them, but I've found that I just like doing the whole job with my 3 1/2" Paring Knife.  Love this thing!


My berries are in a Stainless Mixing Bowl, and I'm pouring the cooked liquid from the 3-Qt. Saucepan.  Notice the Stainless/Silicone Sauce Whisk in the background.  With that, I was able to whisk the mixture without scratching my pan.  Next, I'll gently toss the whole deal with the Mix 'n Scraper.
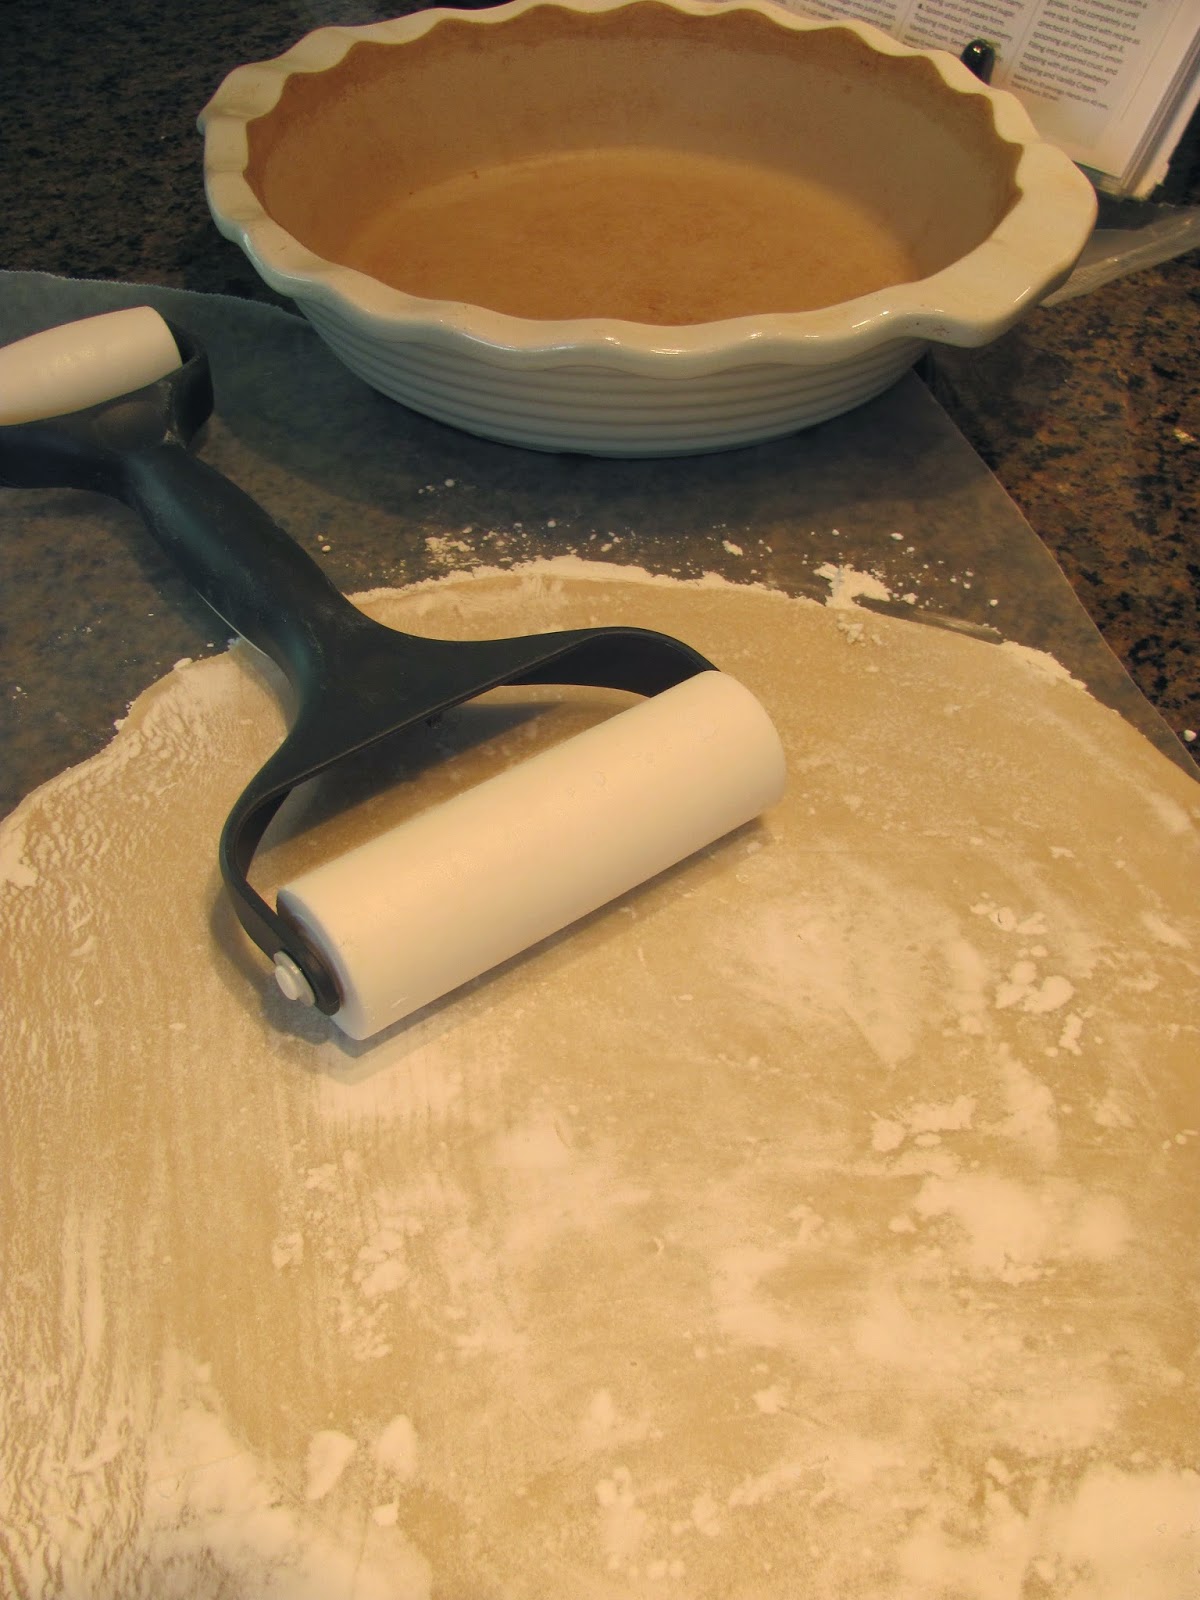

It's time for the Deep Dish Pie Plate from the Stoneware Collection! I love, love, love this piece!  I use it for pies and quiches, but I also do side dishes in it because it's so deep and makes a beautiful presentation.  Stoneware heats evenly throughout, so I don't ever have to worry about scorching in here.  That's a good thing when your finished product is going to your friends' house for a holiday meal.  You can see that I used my Baker's Roller to roll out my pie crust.  Then there's a pokey tool that clips inside the handle to poke holes in the crust before baking.


Ok, so all of the parts are ready and cooled or refrigerated, so now it's just about the assembly.  Oh, and the licking of the bowls.  That's an important step, too... Anyway, my cream and strawberries are in Stainless Mixing Bowls, and my lemon cream is in the stand mixer bowl.  Each has a Mix 'n Scraper, Mini Mix 'n Scraper, or Classic Scraper inside.  Ok, take a deep breath, and...


Happy Memorial Day, and happy dessert making all summer long, friends!


Like the products used?
Shop Online 24/7 at pamperedchef.biz/jennylyn
E-mail me: chefjennylyn[at]gmail.com
Call me up: (205) 585-2464


Monday, March 26, 2012

Strawberry Shortcake Cookies

Hi, it's me - Jenny. Remember me? You know, the girl who used to be pretty consistent with this blog and then fell off the face of the earth? All I know is that when a blogger I follow goes MIA for no less than five months, I won't assume she has lost interest. Instead, I'll say, "Well, maybe her sister got married, and then she wrecked her car, and then she was Thanksgivinged, and then she moved, and then Christmas came, and then she had to ring in the New Year, and then she needed the entire month of January to get her head on straight again, and then she got ridiculously lazy in February and March because so many huge events took place the previous months, and she finally got a wake-up call and realized her blog was boasting pumpkin desserts two weeks before Easter." Yes, that's definitely the assumption I'll make in the future.

Shall we move on to the cookies? This recipe came from Amandeleine, one of the many blogs I follow-ish. Much thanks to Amanda, the chef behind the scenes, for a huge win!


Strawberry Shortcake Cookies
chefjennylyn.com

12 ounces strawberries, hulled and cut into 1/4-inch dice (2 cups)
1 teaspoon fresh lemon juice
1/2 cup plus 2 tablespoons granulated sugar
2 cups all-purpose flour
2 teaspoons baking powder
1/2 teaspoon coarse salt
3 ounces (6 tablespoons) cold unsalted butter, cut into small pieces
2/3 cup heavy cream
Sanding sugar, for sprinkling
3 oz. white chocolate, roughly chopped

Preheat oven to 375 degrees.

Combine strawberries, lemon juice, and 2 tablespoons granulated sugar.

Whisk together flour, baking powder, salt, and remaining 1/2 cup granulated sugar in a large bowl. Rub in butter with your fingers, until mixture resembles coarse crumbs. Stir in cream until dough starts to come together, then stir in strawberry mixture.

Using a Small Scoop or a tablespoon, drop dough onto baking sheets lined with parchment, spacing evenly apart. Sprinkle with sanding sugar, and bake until golden brown, 24 to 25 minutes. Transfer to a wire rack, and let cool.

Melt white chocolate, and drizzle over cooled cookies.

My best friend Elizabeth and I take great joy in picking strawberries in the summer. The ones pictured here are from our 2011 excursion because these cookies were made in the summer of 2011. Yes, I've had the pictures loaded that long. What can I say? Strawberry season got away from me. Now I just look like I'm ahead of the game for 2012, right? Moving on: I sliced my berries using the 5" Utility Knife from the Forged Cutlery Collection, and then I put them in the Medium Square Bowl from the Simple Additions Collection. Unfortunately, neither that bowl nor the Large Colander seen here are available any longer. Don't worry - you can still get the Large Grooved Cutting Board!

I'm in love with the Citrus Press. This thing is amazing for several reasons, but I guess its best feature is simply its ability to get all the juice out of lemons and limes. I used an Adjustable Measuring Spoon for the sugar. (P.S. Were these berries not just gorgeous?)

Ok, time to make things come together. The flour mixture is in a Stainless Mixing Bowl, and I'm cutting butter into it using the Pastry Blender. Then I've got milk, butter cubes, and a Quikut Paring Knife on the Cutting Board. The milk is in an Easy Read Measuring Cup, and all I can say is that people go nuts over these after they try these. My bowl of strawberries has been perfectly tossed using the Mini Mix 'n Scraper. Of everything here, I've been most impressed by the Pastry Blender. It's one of those things where you say, "Eh, I don't know that I need that." Then when you use it you say, "What did I do before I had this?!?"

Did you know the chunky sugar is just raw sugar? I've always seen it listed as something with a "t," and I could never find it at the store. Then I read somewhere that it was raw sugar, and the somewhere I read it was correct! Why am I telling you this? To prove that I'm not amazing in the kitchen. I'm the girl who bumbles around the grocery store going, "Well, I guess I don't get to use that special t-sugar again." Moving on: The sugar is in a Pinch Bowl, and the cookies are on Parchment Paper I've placed on a Cookie Sheet.

Big Stainless Mixing Bowl full of dough with a Medium Scoop and Mix 'n Scraper sticking out? Yes, please.

Melting chocolate is tricky, especially if you choose to do it directly on the eye. Make sure you watch it closely, and stir often. This is the 1.5-Qt. Saucepan from the Executive Cookware Collection, and I used the Skinny Scraper for stirring.

My favorite trick for chocolate, etc.: Put it in the corner of a plastic bag, and seal it with a Twixit! Clip. Then you can pipe away without making a mess.

These cookies were good. In fact, they were so good that I took home nothing but an empty plate after a friend's birthday party. And trust me - the plate had been way full. I don't know how to describe these except to say they're like strawberry shortcake in a cookie... good strawberry shortcake. Make some.

Like the products you saw used?
Shop Online 24/7 at pamperedchef.biz/jennylyn
E-mail me: chefjennylyn[at]gmail.com
Call me up: (205) 585-2464


Saturday, August 27, 2011

Strawberry Lime Cupcakes

These cupcakes are amazing. The recipe is no-fail, and the result leaves you with a sense of summer bliss. A buttery cupcake topped with pureed strawberries and a lime/powdered sugar mixture? Yes, please. Ok, so I first had these a few years ago when my sister and I decided to bake for the next door neighbor who was kind enough to cut our grass. The Sis picked this recipe from the Food Network and... did everything. This was before I had an appreciation for baking, so I think my contribution was limited to tasting (and loving). Four years later, things have changed. My sister is no longer my roommate, the neighbors are gone, and I understand that baking is a beautiful thing. This is the first time I've made these cupcakes myself, but don't think they haven't been on my mind for four. solid. years. When Ashleigh's bridal shower came along, I knew I'd found the perfect occasion to retrieve this recipe from my arsenal. According to everyone who ate one or five of these beauties, I was right. This is my version of the recipe, which is a little different from the original, which is for jumbo cupcakes with strawberry stuffed inside.
(Displayed on Trifle Bowl pedestal)

Strawberry Lime Cupcakes
chefjennylyn.com

1 1/2 cups all-purpose flour
1 1/2 tsp. baking powder
1/4 tsp. fine salt
2 large eggs, room temperature
2/3 cup sugar
3/4 cup unsalted butter, melted
2 tsp. vanilla extract
1/2 cup milk

1/2 cup pureed strawberries

Icing
1 1/3 cups powdered sugar, sifted
1 1/2 tbsp. finely grated lime zest
2 tbsp. fresh lime juice


Preheat oven to 350 degrees.

Whisk flour, baking powder, and salt together in a medium bowl.
In another medium bowl, beat eggs and sugar with an electric mixer until light and foamy, about 2 minutes. While beating, gradually pour in the butter and then vanilla. While mixing slowly, add half the dry ingredients, all of the milk, and the remaining dry ingredients. Take care not to over mix the batter.

Divide among cupcake liners, and bake until tester inserted in center comes out clean.
Jumbo (yield 6): about 30 minutes
Standard (yield 12): about 18-22 minutes
2-Bite (yield 25): about 13-15 minutes

For icing:
Mix powdered sugar and lime zest in a medium bowl. Add the juice, and mix with an electric mixer to make a firm but pourable icing. (Add up to 1 tsp. more juice if needed.)

Assembly:
Top each cooled cupcake with 1 tsp. strawberry puree and a dollop of icing.


One thing I love about this recipe is that it calls for melted butter. Forget softening and just melt it! I put the butter in a 2-Cup Prep Bowl and stuck it in the oven while it pre-heated. The Quikut Paring Knife is my favorite tool for slicing sticks of butter, and I actually keep one in my refrigerator's butter holder. True story. The eggs are supposed to be room temperature, but I didn't notice that until go-time, so here's a trick. Stick your eggs in a Small Batter Bowl, and fill it with warm water. By the time you need them, they'll be warmed up. (P.S. I doubled the recipe, which is why you're going, "I thought it said two eggs, not four.")

Stainless Mixing Bowls, Measuring Cup Set, Easy Read Measuring Cups, Measuring Spoon Set, Adjustable Measuring Spoons, Pinch Bowls, and Large Cutting Board. Welcome to prep work, my friends. This is a happy place.

The recipe calls for a lot of butter, but don't be a jerk and substitute anything else. This cake's feature is its buttery flavor, and you're not getting that with anything but the real deal. I'm pouring from a 2-cup Prep Bowl into a Stainless Mixing Bowl, thus creating the best cake batter in the history of cake batter.

Look at that thick, beautiful cake batter! I'm using a Medium Scoop to make 2-bite cupcakes, and the liners are directly on my Cookie Sheet. Isn't it great how you don't even need a muffin pan for these? If you want to do standard size cupcakes, you can use the Stoneware Muffin Pan or the standard Muffin Pan. My batter is in a Stainless Mixing Bowl with the Mix 'n Scraper.

Don't you love recipes that use strawberries? They're so pretty, and they taste like a little bit of heaven. I've got my berries draining in a Stainless Mesh Colander, and I'm coring them with the Core 'n More. A quick whirl in the Manual Food Processor, and they're ready to go!

Lots of stuff going on with limes. Step one: Zest limes into a 1-Cup Prep Bowl using the Microplane Zester. (For larger, decorative zest to use on top, grab your Zester/Scorer.) Two: Slice using the 3 1/2-inch Paring Knife. Three: Press using the Citrus Press, and measure into the Easy Read Mini Measuring Cup. Like how I'm using the prep bowl lid to hold the decorative zest? Say yes to fewer dirty dishes!

This icing is incredible. It's got a killer twang because of all that lime, but it's perfect for this recipe. Throw everything in a Stainless Mixing Bowl, and give it a good stir with the Stainless Whisk. The biggest draw here is this icing's simplicity. You know how sometimes you're not in the mood to gradually beat in powdered sugar for ten minutes? Me, too.

The last step is decoration, and I'm almost embarrassed to show how easy it is. I always put my cupcakes in the Cool & Serve Square Tray before decorating because I'm not as likely to get my fingers in the tops. Do that, top them with a little strawberry, and pipe icing using the Easy Accent Decorator. They won't stay looking super pretty, so don't waste your time trying to do them "just right."

See what I mean? After a couple of hours, especially if that time entails a 100-degree car ride, this is what the cupcakes look like. The flavors have blended, and the result is magnificent! These are displayed on the Adjustable Tiered Tower.

The bride approves!!! Ashleigh was not only happy with these for her shower, but she requested the recipe. So happy wedding, Ashleigh, and enjoy making many many a cupcake for that fab man of yours!

As for you, dear reader, join Ashleigh and me in loving strawberry lime cupcakes. Do it.

Like the products you saw used?
Shop Online 24/7 at pamperedchef.biz/jennylyn
E-mail me: chefjennylyn[at]gmail.com
Call me up: (205) 585-2464


Thursday, June 23, 2011

Strawberry Trifle

This is quite possibly the world's easiest trifle recipe, and it could also be the best. People ask for the recipe whenever I serve it, and that's got to mean something, right? If you're looking for a great summer dessert that won't heat up your kitchen, this is for you. Hurry and make a beautiful strawberry trifle before the berries are out of season!
(Displayed in Trifle Bowl)

Strawberry Trifle
chefjennylyn.com

2 pounds strawberries, hulled and sliced
1 angel food or pound cake
8 oz. cream cheese, softened
1 can sweetened condensed milk
1 pint heavy whipping cream

Prepare strawberries, and slice cake. Mix together remaining ingredients.
Layers: Cake, strawberries, cream mixture. Repeat twice, and top with strawberries.
Refrigerate.
As with most trifles, this is best if prepared several hours in advance.


Lots of big, beautiful strawberries will put you in a great mood every time! These are in the large colander from the Colander & Bowl Set.

When I slice large berries like this, I use the stems as handles to keep my fingers away from my knife. Then I just give a quick cut to the area surrounding the stem so I don't waste anything. I'm using the Large Cutting Board with the 3 1/2" Paring Knife, and my sliced berries are in the Small Batter Bowl. The batter bowls are convenient because their lids can be used if you slice berries ahead of time and assemble the trifle later.

This is just a frozen pound cake I let thaw. I'm sorry, but I'm not going to the trouble of making a pound cake that's going to be cut apart and covered in enough stuff to make people wonder what kind of cake it is anyway. I'm using the 5" Utility Knife from the Forged Cutlery Collection.

The Smooth-Edge Can Opener will be one of your favorite things if you try it. I can't get over how it removes the entire lid, leaving everything smooth and clean. This is especially nice when the ingredient is, oh... I don't know... insanely thick and sticky.

Time for assembly! I beat the cream mixture together in the large bowl from the Colander & Bowl Set, and I'm about to layer it with everything else in the Trifle Bowl. The Mix 'n Scraper will ensure I don't waste any of this creamy, rich goop because that would be tragic. Notice the thick sides of the Trifle Bowl - no chipping here! Also, it's off its removable base so you can see how easily it will fit in the dishwasher. I truly enjoy the Trifle Bowl, and I think every kitchen needs one.

Enter: Trifle Bowl lid awesomeness. The lid and removable base make this a convenient bowl to use for anything you can imagine. It's also got a larger capacity than standard trifle bowls to keep your recipes from hitting the lid and ruining whatever prettiness you've got going on top.

This is a rich trifle, and it's perfect for summer. Layer in some blueberries, and you've got a perfect Fourth of July dessert. Enjoy!

Like the products you saw used?
Shop Online 24/7 at pamperedchef.biz/jennylyn
E-mail me: chefjennylyn[at]gmail.com
Call me up: (205) 585-2464

Friday, June 10, 2011

Strawberry Cream Cake

This cake was a good decision. The fact that I was going to have a fab dinner with friends the week after picking a gallon of strawberries inspired me to go in the direction of, well, something that used two pounds of berries. This is a Cooks Illustrated recipe, and let me just tell you it's legit. Cook's Illustrated, when followed completely, is a no-fail source for recipes. When they say this is the best way to make a strawberry cream cake, I believe them. If you make this, prepare to do it exactly as the recipe directs. I promise you'll come out with a cake that is, in the words of my friend Christopher, "good enough to be sold in a high-end restaurant."
(Cake is displayed on the Cake Pedestal.)


Strawberry Cream Cake
chefjennylyn.com

Cake
1 1/4 cups cake flour (5 oz.)
1 1/2 tsp. baking powder
1/4 tsp. salt
1 cup sugar
5 large eggs (2 whole and 3 separated), room temperature
6 tablespoons unsalted butter, melted and cooled slightly
2 tbsp. water
2 tsp. vanilla extract

Strawberry Filling
2 pounds fresh strawberries, washed, dried, and stemmed
4-6 tbsp. sugar
2 tbsp. Kirsch
Pinch salt

Whipped Cream
8 oz. cream cheese, room temperature
1/2 cup sugar
1 tsp. vanilla extract
1/8 tsp. salt
2 cups heavy cream

Adjust oven rack to lower-middle position, and heat oven to 325 degrees.
Grease and flour Springform Pan, and line with parchment paper.

Whisk flour, baking powder, salt, and all but 3 tbsp. sugar in mixing bowl. Whisk in 2 whole eggs and 3 yolks (reserving whites), butter, water, and vanilla. Whisk until smooth.

In a clean bowl, beat remaining 3 egg whites at medium-low speed until frothy, about two minutes. Gradually add remaining 3 tablespoons of sugar, and increase mixer speed to medium-high. Beat until soft peaks form, 60 to 90 seconds. Stir one-third of whites into batter to lighten; add remaining whites, and gently fold into batter until no white streaks remain. Pour batter into prepared pan, and bake until toothpick or wooden skewer inserted in center comes out clean, 30 - 40 minutes. Cool in pan 10 minutes, and release cake onto a wire rack to cool completely. Peel off and discard parchment paper, and cool completely (about 2 hours), top side up.

For Strawberry Filling:
Half 24 of the best-looking berries, and reserve. Quarter remaining berries, and toss with 4-6 tbsp. sugar (depending on berries' sweetness) in medium bowl, and let sit one hour, stirring occasionally. Strain juices from berries, and reserve (should yield about 1/2 cup). In food processor, pulse macerated berries to give about 1 1/2 cups. In a small saucepan over medium-high heat, simmer reserved juices and Kirsch until syrupy and reduced to about 3 tablespoons, 3-5 minutes. Pour reduced syrup over macerated berries, add pinch of salt, and toss to combine. Set aside until cake has cooled.

For Whipped Cream:
When cake has cooled, place cream cheese, sugar, vanilla, and salt in a clean bowl, and beat on medium-high speed until light and fluffy, 1 to 2 minute, scraping down bowl with rubber spatula as needed. Reduce speed to low, and add heavy cream in slow, steady stream; when almost fully combined, increase speed to medium-high and beat until mixture holds stiff peaks, 2 to 2 1/2 minutes more, scraping bowl as needed. This should yield about 4 1/2 cups.

To Assemble:
Using a large serrated knife, slice cake into three even layers. Place bottom layer on cake plate, and arrange ring of 20 strawberry halves, cut sides down and stem ends facing out, around perimeter of cake layer. Pour one half of pureed berry mixture (about 3/4 cup) in center, and spread to cover any exposed cake. Gently spread about 1/3 of whipped cream (about 1 1/2 cups) over berry layer, leaving 1/2-inch border from edge. Place middle layer on top, and press down gently (whipped cream underneath should become flush with cake layer). Repeat with 20 additional strawberry halves, remaining berry mixture, and half of remaining whipped cream. Gently press last cake layer on top, and spread with remaining whipped cream. Decorate with remaining cut strawberries. Serve, or chill up to 4 hours.

------
As I said, I got this recipe from Cooks Illustrated, thanks to the subscription my brother and sister-in-law gave me for my birthday. Excellent gift idea, by the way!

I didn't use the Kirsch in my strawberry syrup because I didn't have it. From what I read, it wasn't going to make a significant enough difference to justify the expense.


Know going in that two pounds of strawberries is a lot. Get comfortable, because it will take a while to stem, slice, dice, etc. all of them. Do this while the cake bakes, and you won't feel like you're spending an entire day in the kitchen. My station: Strawberries in the Colander & Bowl Set, Large Cutting Board over the sink, Dots Small Bowl with my "24 best-looking berries," and Classic Batter Bowl for everything else. The 3 1/2" Paring Knife is my favorite for working with strawberries, so I've become best friends with it for the summer. If it wasn't for an efficient knife, I'd have spent forever cutting strawberries.

To prep a pan for cake, don't take shortcuts. I rub mine with Crisco and use the Flour/Sugar Shaker to add the flour layer. This is the Springform Pan, and you'll see in a bit what great results it delivers. See the glass base? How about that for nice cheesecake presentation? If you don't have a springform pan, you can use a cake pan, but make sure it's at least 2 inches deep, or you'll have this time-consuming cake batter running all over your oven. How sad would that be?

I should have put the cake together and then worked on strawberries, but I didn't realize the eggs needed to be room temperature. Hi, I'm Jenny, and sometimes I break the common sense rule of reading an entire recipe before starting anything. My eggs are in a Dots Pasta Bowl, and ingredients are measured into Measuring Spoons, Adjustable Measuring Spoons, Stainless Mixing Bowls, Measuring Cups, and an Easy Read Mini Measuring Cup. I'm using Madagascar Double-Strength Vanilla, and the butter is in the 1.5-Qt. Saucepan from the Executive Cookware Collection. I've got the Mini Mix 'n Scraper in that, and the Stainless Whisk is in the flour mixture. Again, strawberries are in the Classic Batter Bowl. Most ingredients are on the Large Cutting Board.

The term "soft peaks" used to confuse me when it came to frothing egg whites. Here's the deal: A soft peak will remain standing when you pull the beaters back, but it will fall back into the bowl if given a little shake. A stiff peak, however, will remain standing when given a little shake. (That's what you would use to top a pie or banana pudding.) Egg whites are tricky to work with, but they're worth the effort. Make sure they're room temperature, and avoid rainy days. Weird, right? Apparently you'll never get them to form peaks on a rainy day, but I haven't put that to the test. I'm using the Stainless Mixing Bowls here along with the Stainless Whisk.

This is why you don't take shortcuts when baking. It's a lot more scientific than people realize, but you can get amazing results if you're patient and follow directions. Look at how beautifully this cake baked! A beautifully golden cake, and a perfect release from the Springform Pan. It's going to cool on a Cooling Rack for a while, and I'm going to either work on the next step or sit on the couch a while. Most likely the latter because I just spent forever and a day slicing strawberries and baking a cake.


I love the Colander & Bowl Set. The small colander nests inside the small bowl, so I can just pour my strawberries in there and turn my attention to other things while they drain. Plus, this guarantees that I reserve the juice instead of pouring it down the sink. This set also comes with a large colander, a large bowl, and lids. All of the bowls nest together for easy storage. That's the Small Mix 'n Scraper lying there.


The Manual Food Processor is seriously one of the best inventions of all time. It's so simple to use, and it has measurements on the side! Oh, spoil me!

A good test to make sure your reserved strawberry juice is syrupy is to see if it sticks to the bottom of the pan without a little help. If it runs easily, it's not quite ready to use. The Skinny Scraper and 1.5 Qt. Saucepan are a killer combination for strawberry juice reduction.

Slicing cake layers intimidates a lot of people, so here's how you do it. Get a long, serrated knife. This is the Color-Coated Bread Knife before it became color-coated, or you can use the 9" Bread Knife from the Forged Cutlery Collection. For slicing one cake into three layers, which is rare, mark the width of each layer before starting. Then slice each layer towards the middle a little ways. Rotate the cake, and slice again. Rotate, slice, repeat, until you've sliced all the way around. Trying to to straight across instead of following the rotation method is a recipe for disaster. Disaster = slanted layers, especially on a cake when the sides aren't covered by icing. This is on the Cake Pedestal, which makes it easy to rotate for slicing.

Strawberry halves around the outside, compote mixture in the middle and spread to cover crevices between berries, and then cream to top. I'm using the Classic Scraper to spread the cream. This picture reminds me just how good this was. The cream mixture is worth making by itself as a fruit dip.

See how this was worth the time and effort? The pictures don't explain how rich and decadent this cake was, but just know you won't be left wanting after eating it. My sweet friends Christopher and Elizabeth treated me to a dinner of grilled pork tenderloin, fried green tomatoes, and roasted vegetables (I know - they spoil me), and I was happy to share a special dessert with them afterwards. You know when you have friends who understand food and enjoy discussing what makes a good recipe? That's so fun for me! Cooks Illustrated Strawberry Cream Cake equals summer dessert bliss.

Here are a few little tips to save you some blood, sweat, and tears:

Don't substitute another cake. This requires a cake that's dense enough to stand up to the strawberry compote. If you throw in a typical recipe, you're going to end up with a big, soggy mess.

Allow time. The eggs need to be room temperature. The cream cheese needs to soften. The cake needs to bake close to 40 minutes and then cool about two hours. The strawberries need to be prepared and then left to marinate in sugar about an hour. In other words, this isn't a recipe you can just throw together in a couple of hours.

Don't make this too far ahead of serving time. There's a certain "soggy factor" that comes with any type of shortcake recipe. Given how much work goes into this recipe, don't allow time for it to fall victim to the sog. If you'd like (what I did), bake the cake and prepare the strawberry compote ahead of time, and then finish the cream and put the cake together a couple of hours before it's being served.

Enjoy!

Like the products you saw used?
Shop Online 24/7 at pamperedchef.biz/jennylyn
E-mail me: chefjennylyn[at]gmail.com
Call me up: (205) 585-2464