Wednesday, October 19, 2011

Grilled Stuffed Jalapeños

It's football season, and that means football food. These grilled stuffed jalapeños will do two things for you: 1) Make you wish you'd seen this recipe sooner and 2) Lead your team to victory. At least that's the case if you're an Alabama fan in 2011. I made these; my team won. Correlation? My dad and I threw these on the grill a few weeks ago, and we were thrilled with the result. Seriously, these are good.

Grilled Stuffed Jalapeños
chefjennylyn.com

2 slices center-cut bacon
1/2 cup (4 ounces) cream cheese, softened
1/2 cup (4 ounces) fat-free cream cheese, softened
1/4 cup (1 ounce) shredded extra-sharp cheddar cheese
1/4 cup minced green onions
1 teaspoon fresh lime juice
1/4 teaspoon kosher salt
1 small garlic clove, minced
14 jalapeño peppers, halved lengthwise and seeded (GLOVES!!!)
2 tablespoons chopped fresh cilantro
2 tablespoons chopped seeded tomato
Cooking spray


1. Preheat grill to medium-high heat.

2. Cook the bacon in a skillet over medium heat until crisp. Remove bacon from pan, and drain on paper towels. Crumble bacon. Combine crumbled bacon, cheeses, and next 4 ingredients (through garlic) in a bowl, stirring to combine. Divide cheese evenly and fill the pepper halves.

3. Place peppers, cheese side up, on grill rack or grill grate coated with cooking spray. Cover and grill peppers 8 minutes or until bottoms of peppers are charred and cheese mixture is lightly browned.

4. Place the peppers on a serving platter. Sprinkle with cilantro and tomato.

There are a lot of jalapeños to slice and seed, so let me go ahead and warn you to wear gloves. Not a glove but gloves. It was because of my stubborn "oh, I can just wear one glove for getting the seeds out" attitude that led me to soak my left hand in milk a couple of hours later. Unless you enjoy burning pain under your fingernails, glove both your hands. Bad memories. Moving on! My whole peppers are in a Stainless Mesh Colander, and the seeds are in a 2-Cup Prep Bowl. The 5" Santoku from the Forged Cutlery Collection is laid out on the Large Grooved Cutting Board, and everything is over the sink to maximize counter space.

I love a simple recipe, especially when it leads to amazing appetizers. I'm using the Citrus Press, the Coarse Grater, the Garlic Press, the Measure-All Cup, and an Adjustable Measuring Spoon for my filling.

The Classic Batter Bowl is perfect for this mixture, and its clear sides let you see all the pretty colors through the bowl. You know, pretty like the color of bacon. Give this a good stir with the Mix 'n Scraper, and you'll be ready to fill the peppers in no time.

I used the scoop and spread method to fill the peppers: Small Scoop of filling and then spread later. Put them on the Grill Tray as you fill them, and get ready for magic.

Unless you have a brand new grill, it's difficult to make a grilling picture look pretty. Cover the Grill Tray with foil, and let these babies cook. The Grilling Tongs are helpful for checking the peppers, and they're long enough to keep your hands and arms away from the heat.

Roll Tide, and make peppers. Wear gloves.

Like the products you saw used?
Shop Online 24/7 at pamperedchef.biz/jennylyn
E-mail me: chefjennylyn[at]gmail.com
Call me up: (205) 585-2464


Tuesday, October 18, 2011

Brown Butter Chocolate Chip Cookies

What should you do when you're sitting at home craving sweets but trying to resist? Work on a blog post for your favorite chocolate chip cookie recipe, of course! I made these for someone last week, and I've longed for them each day since. This recipe is from Cook's Illustrated, so that alone tells you they're worth trying. I'll leave the professionals to explain why this is technically the best recipe ever, but let me just say these cookies are game changers. I don't have a go-to chocolate chip cookie recipe because I'm one of those weirdies who bakes by mood, but if I had to choose just one to stick with from here out, this would be the one. These are rich, decadent, and worthy of gifting. I guess what I'm saying is that if you do something awesome for me, I'll bake you some fab chocolate chip cookies.


Brown Butter Chocolate Chip Cookies
chefjennylyn.com

1 3/4 cups unbleached all-purpose flour (8 3/4 ounces)
1/2 teaspoon baking soda
14 tablespoons unsalted butter (1 3/4 sticks)
1/2 cup granulated sugar (3 1/2 ounces)
3/4 cups packed dark brown sugar (5 1/4 ounces)
1 teaspoon table salt
2 teaspoons vanilla extract
1 large egg
1 large egg yolk
2 cups semisweet chocolate chips or chunks


1. Adjust oven rack to middle position and heat oven to 375 degrees. Line 2 large (18- by 12-inch) baking sheets with parchment paper. Whisk flour and baking soda together in medium bowl; set aside.

2. Heat 10 tablespoons butter in 10-inch skillet over medium-high heat until melted, about 2 minutes. Continue cooking, swirling pan constantly until butter is dark golden brown and has nutty aroma, 1 to 3 minutes. Remove skillet from heat and, using heatproof spatula, transfer browned butter to large heatproof bowl. Stir remaining 4 tablespoons butter into hot butter until completely melted.

3. Add both sugars, salt, and vanilla to bowl with butter and whisk until fully incorporated. Add egg and yolk and whisk until mixture is smooth with no sugar lumps remaining, about 30 seconds. Let mixture stand 3 minutes, then whisk for 30 seconds. Repeat process of resting and whisking 2 more times until mixture is thick, smooth, and shiny. Using rubber spatula or wooden spoon, stir in flour mixture until just combined, about 1 minute. Stir in chocolate chips and nuts (if using), giving dough final stir to ensure no flour pockets remain.

4. Divide dough into 16 portions, each about 3 tablespoons (use scoop). Arrange 2 inches apart on prepared baking sheets, 8 dough balls per sheet. (Smaller baking sheets can be used, but will require 3 batches.)

5. Bake cookies 1 tray at a time until cookies are golden brown and still puffy, and edges have begun to set but centers are still soft, 10 to 14 minutes, rotating baking sheet halfway through baking. Transfer baking sheet to wire rack; cool cookies completely before serving.

Hello, beautifully measured ingredients! Brown sugar, could you get your act together and avoid spilling on the Cutting Board? You're embarrassing. Ok, so here's the rundown on what I'm using: Measuring Cup Set, Easy Read Measuring Cups, Measuring Spoon Set, Pinch Bowls, 1-Cup Prep Bowls, Stainless Mixing Bowls, Stainless Whisk, 10" Executive Skillet, Mix 'n Scraper. I love making sure I have everything needed before getting started. Ever begin mixing batter only to realize you're out of eggs? Thought so.

Browning butter isn't difficult, but it's easy to second guess yourself if you've never done it. Just add your butter to a pan over medium-high heat, and let the butter cook. Continue swirling the pan, but don't stir it with a spoon. The butter will sizzle, and then it will stop. The color will turn brown, and the butter will smell nutty. At this point, take it off the heat to avoid burning it. I'm cooking this in the 10" Skillet from the Executive Cookware Collection.

This is the mix 30 seconds / rest 3 minutes / repeat 2 times step. Notice you don't need a hand mixer, just a Stainless Whisk. I know it might be tempting to short cut here, but let me discourage you. By following this recipe exactly, you'll end up with perfect cookies that don't dry out the next day. Part of the magic is whatever goes on while this batter mixes, rests, and mixes again.

I baked my cookies six at a time on Cookie Sheets to give them plenty of space. When it comes to baking from scratch, don't shortcut on your tools. The Pampered Chef's baking products will blow your mind, whether you're using our line of metal or Stoneware.

3 stages: Scooped cookies, baked cookies, cooled cookies. The ones on the Cooling Rack tempted me like crazy, but you'll be happy to know they made it to their new home untouched.

If you're looking for a new chocolate chip cookie recipe to try, don't ignore this one! I'd say they're the absolute most satisfying cookies I've ever had, and trust me - I've had a lot of cookies.

Like the products you saw used?
Shop Online 24/7 at pamperedchef.biz/jennylyn
E-mail me: chefjennylyn[at]gmail.com
Call me up: (205) 585-2464


Thursday, October 13, 2011

Dirt 'n Worms

Dirt cake: Layers of chocolate or vanilla pudding with crushed Oreos
Best dirt cake: This recipe
Dirt 'n worms: Dirt cake (any way you make it) with gummy worms added

I still remember the first time I had dirt 'n worms. I was in preschool, and a classmate's mother brought clear plastic cups of it for everyone. Maybe it was a birthday or Halloween, but the details don't matter. What matters is that I was five years old, and my food had gummy worms in it! Since then, I've had a few different versions of this dessert, and the one I'm posting is hands down my favorite. The extra rich pudding mixture takes this from kid food to adult delicacy. My friend Chas is the original source for this recipe, and all I can do is say thanks. I owe you big!

(Displayed in the Trifle Bowl)

Dirt 'n Worms
chefjennylyn.com

Package of Oreos, finely chopped
2 small packs of vanilla pudding
8 oz. cream cheese, softened
3 1/2 cups milk
1 cup powdered sugar
2 tbs. butter
16 oz. cool whip
Gummy worms


Chop cookies and set aside.
In LARGE bowl, combine softened cream cheese, butter, and sugar.
In a different bowl, combine pudding mix and milk and beat thoroughly.
Mix two combinations in the larger bowl, and beat.
Fold in Cool Whip
Layer pudding mixture with cookies and gummy worms in trifle bowl.


Ingredient #1: An entire package of Oreos. How did I make it through this without eating a single cookie? Well, I have obsessive tendencies, and I knew I could do stacks of three if I didn't ruin it by disturbing the cookie count. So it was either eat zero cookies, three cookies, six cookies, etc., and I opted for zero. Too much information about myself?

The Food Chopper really does make quick work of the cookie crushing, and it's also a great stress reliever. Place cookies in the base, and pound away! Then everything comes apart to go in the dishwasher. My chopper is on the Cutting Board, and my cookie crumbs are in a Small Batter Bowl.

If you don't have a bowl of these guys, don't call your recipe dirt 'n worms. It's not a problem, but you need to use the term "dirt cake." That said, always have a bowl of these guys; it's the right thing to do. My worms are in a 2-Cup Prep Bowl, and I've got milk in an Easy Read Measuring Cup in the background.

It's about to get good! Let the layering begin... The pudding mixture is in a Stainless Mixing Bowl with the Mix 'n Scraper, and it's going to be the first layer in the Trifle Bowl. Layers are as follows: pudding, Oreos, worms - repeat.

You don't have to get crazy with the worms. Just add them on top of each cookie layer, and then throw a few on top. Use as many or as few as you want, but add extra when serving to five-year-olds. Trust me.

The Trifle Bowl is one of my favorite products for many reasons, but I guess my favorite feature is its ability to go baseless. It locks on the base for presentation, but then it comes off for cleaning (hi, dishwasher) and storage. Also, how about that lid? This is all on top of the fact that it's a heavy glass bowl that won't chip and boasts a 20-cup capacity to handle all standard trifle recipes without spilling over. Need I say more?

Ok, it's October, and Halloween is around the corner. I know everyone will have kids' parties to attend and all kinds of things. This is a really simple dessert that comes together quickly and makes kids think they're eating something special. Plus, as proven my my friends and me at every event we had between the years 2002 and 2007, adults love it, too. Welcome to your new addiction.

Like the products you saw used?
Shop Online 24/7 at pamperedchef.biz/jennylyn
E-mail me: chefjennylyn[at]gmail.com
Call me up: (205) 585-2464


Wednesday, October 12, 2011

Brown Butter Pumpkin Cupcakes

Dear Fall,
Welcome to my life. You've been missed the last several months as I've suffered Alabama's heat and humidity. Please get legit quickly, and feel free to stay a while.
Hearts,
Jenny-Lyn

These are my favorite pumpkin cupcakes, and I think they'll be yours if you try them. Two key players: brown butter and cinnamon cream cheese icing. I discovered this recipe at Baked Perfection last fall, and it's served me well since then. When my friend Rachel and I planned a dinner for the singles group at our church this week, we figured pumpkin dessert would be a great finishing touch. We were right because there were only three of the seventy-five cupcakes left at the end of the night. Granted, these were two-bite size, but that's still some serious cupcake consumption! Several people at the dinner requested the recipe, so this post is for them... and for you. Because I like you.


Brown Butter Pumpkin Cupcakes
chefjennylyn.com

3/4 cup (1 1/2 sticks) unsalted butter, room temperature
1 2/3 cups all-purpose flour
2 teaspoons baking powder
1 teaspoon salt
1/2 teaspoon ground cinnamon
1/4 teaspoon freshly grated nutmeg
1/8 teaspoon ground gloves
1 cup canned pumpkin puree (not pie filling)
1 cup packed light brown sugar
1/2 cup granulated sugar
2 large eggs

Preheat oven to 325 degrees Fahrenheit. Line muffin tins with paper liners. In a saucepan, melt the butter over medium-low heat and continue to cook, swirling occasionally, until butter turns golden brown, Skim foam from top, and remove from heat. Pour into a bowl to stop the cooking, leaving any burned sediment behind; let cool.

Whisk together flour, baking powder, salt, cinnamon, nutmeg, and cloves. In another bowl, whisk together the pumpkin puree, both sugars, eggs, and brown-butter mixture. Add the flour mixture, and whisk until just combined.

Divide batter evenly among lined cups, filling each three-quarters full. Bake, until a cake tester inserted in centers comes out clean, about 18-20 minutes. Transfer tins to wire racks to cool completely before removing cupcakes. (For two-bite size, bake 13-15 minutes.)

Yield: 15 standard cupcakes

Cinnamon Cream Cheese Frosting

1 stick unsalted butter, room temperature
8 ounces cream cheese, room temperature
3 cups powdered sugar, sifted
1 teaspoon cinnamon
1 teaspoon pure vanilla extract

Beat butter and cream cheese with a mixer on medium-high speed until fluffy, 2 to 3 minutes. Reduce speed to low. Add sugar, 1 cup at a time, and then cinnamon and vanilla; mix until smooth.

The flour mixture contains my favorite spices of the season, so it's an automatic win. Everything is measured using the Measuring Spoon Set and the Measuring Cup Set, and I've got a Pinch Bowl and the Cutting Board each doing its thing.

Brown butter is just butter that's cooked until it turns brown and smells nutty. The rich smell will send you into a state of bliss, but there's nothing like the flavor hit inside the cupcakes. Anyway, Rachel is using the 8-Qt. Casserole from the Executive Cookware Collection and the Mix 'n Scraper. What a pro!

Every time I mix a batter, I'm shocked by how disgusting it looks. That's why I included this picture - I want to shock you. One nice thing about this recipe, however, is that it doesn't require a mixer, just a Stainless Whisk, a Stainless Mixing Bowl, and a little T.L.C.

The cupcakes are divided into liners with the Medium Scoop, and they're going to bake up beautifully on a Cookie Sheet. From here, the kitchen will begin to smell amazing, and Rachel and I will have to offer one another accountability to keep from eating all the cupcakes before the evening's feast. That's what friends are for, after all.

Fall vegetables and half an old banana set the mood for baking. These guys are cooling to perfection on a Cooling Rack, but I have to admit one of them didn't make it to see the icing. No, he was eaten by two girls who just couldn't take the temptation any longer. That's all I'll say about that.

Rachel and I worked like fiends on our Sunday meal. It was a huge undertaking, but we said early on that when everything was finished and the kitchen was cleaned we would get one cupcake each. Five hours later, after what I can only describe as organized chaos, we loaded the car, got ready to transport the food, and sat down to enjoy our reward. I don't think I've ever savored anything like each of the four bites I squeezed out of my dessert, and I'm assuming the same for Rachel. At least, that's the impression I got when I glanced over to see her closed eyes and content face. The aching feet and tired backs stopped for a couple of minutes, and all was right with the world.


Like the products you saw used?
Shop Online 24/7 at pamperedchef.biz/jennylyn
E-mail me: chefjennylyn[at]gmail.com
Call me up: (205) 585-2464


Tuesday, October 11, 2011

Shrimp and Grits

My friends Bob and Courtney got married two years ago this month, and I still think about the fabulous shrimp and grits I had at their St. Simon's wedding. I now associate this Southern dish with two of my dearest friends and the perfect weekend I got to spend with them. So many happy memories equal one Big. Warm. Fuzzy.

This recipe is from Southern Living, and it's perfect. If something is good enough to be sold in North Carolina, it's good enough for me to try at home. All I can say is my expectations were met, and my friend Ashleigh and I ended up with a dinner during which we were each found speechless. I would drive to North Carolina, hunt down Crook's Corner, and hug Bill Smith if I wasn't afraid of scaring him to death. Mr. Smith, you're my hero. I owe you big, so hit me up if you're ever in Birmingham. I'll bake you some cookies or something.


Shrimp and Grits
chefjennylyn.com

The original recipe is from Bill Smith, executive chef at Crook's Corner, the landmark Southern restaurant in Chapel Hill, North Carolina.
Preparation Time: 20 minutes
Cooking Time: 21 minutes
Yield: Makes 4 to 6 servings

2 bacon slices
1 pound unpeeled, medium-size raw shrimp
1/8 teaspoon salt
1/4 teaspoon pepper
1/4 cup all-purpose flour
1 cup sliced fresh mushrooms
2 teaspoons canola oil
1/2 cup chopped green onions
2 garlic cloves, minced
1 cup low-sodium, fat-free chicken broth
2 tablespoons fresh lemon juice
1/4 teaspoon hot sauce
Cheese Grits (Below)

1. Cook bacon in a large nonstick skillet over medium heat 10 minutes or until crisp; remove bacon, and drain on paper towels, reserving 1 tsp. drippings in skillet. Crumble bacon.

2. Peel shrimp; devein, if desired. Sprinkle shrimp with salt and pepper; dredge in flour.

3. Sauté mushrooms in hot drippings with oil in skillet 5 minutes or until tender. Add green onions, and sauté 2 minutes. Add shrimp and garlic, and sauté 2 minutes or until shrimp are lightly browned. Stir in chicken broth, lemon juice, and hot sauce, and cook 2 more minutes, stirring to loosen particles from bottom of skillet. Spoon shrimp mixture over hot Cheese Grits; sprinkle with crumbled bacon.

Cheese Grits
1 (14-oz.) can low-sodium fat-free chicken broth
1 cup fat-free milk
1/2 teaspoon salt
1 cup uncooked quick-cooking grits
3/4 cup (3 oz.) shredded 2% reduced-fat sharp Cheddar cheese
1/4 cup freshly grated Parmesan cheese
1/2 teaspoon hot sauce
1/4 teaspoon ground white pepper


1. Bring first 3 ingredients and 1 1/3 cups water to a boil in a medium saucepan over medium-high heat; gradually whisk in grits. Reduce heat to low, and simmer, stirring occasionally, 10 minutes or until thickened. Stir in Cheddar cheese and next 3 ingredients.


Everyone loves bacon, but only a small percentage of us are willing to admit it. I am seriously in love with this stuff, and I have become a master at cooking it. The secret? "Bacon, meet my stoneware and my oven." Thick-sliced bacon. 425 degrees. 15-20 minutes depending on how crispy you like it. Drain. Try to avoid eating. Serve. For a full pack of bacon, I use the Large Bar Pan from the Stoneware Collection, but for fewer pieces (like when I practice self-control), I go with the Medium Bar Pan, seen here. The Chef's Tongs and Dots Dinner Plate served as my sidekicks, but the bacon was the star. Oh, bacon...

I enjoy cooking with friends something fierce, but I go absolutely nuts when I do the thing with someone who knows his or her way around the kitchen. Enter: Ashleigh. This girl is a pro in the kitchen, so this meal came together super quickly. Check her out with those green onions! Give her a Large Cutting Board and a 5" Santoku Knife, and she'll show you what's up with a smile!

This recipe, like most main dishes, moves quickly, so it's vital to have everything ready to go. Cooking this way is a blast, but cooking willy-nilly is annoying. You know what I'm talking about. Here's a quick rundown of what Ashleigh and I used: Large Cutting Board, 5" Santoku Knife, Adjustable Measuring Spoons, Garlic Press, Citrus Press, Easy Read Measuring Cups, Easy Read Mini Measuring Cup, Measuring Cup Set, Pinch Bowl Set.

Buy fresh shrimp for maximum awesomeness. I'm sure you can use frozen shrimp in this recipe, but I think it's worth it to buy a pound of these guys to avoid the salty flavor that's so difficult to get out of frozen shrimp. Anyone have a tip for that? Seriously, tell me what to do! Moving on... This is a Stainless Mesh Colander, and I love it.

The Dots Medium Bowl from the Simple Additions Collection is perfect for dredging the shrimp in their flour mixture. That look on my face - the one that seems like sheer bliss - is sheer bliss. You should smell my kitchen at this point! AMAZING!

Things are coming together in the 10" Skillet from the Executive Cookware Collection. It's about to get nuts in my kitchen, and all I can do is try to control the anticipation taking me over.

Ashleigh is bringing the cheese grits together in a 4-Qt. Casserole from the Executive Cookware Collection, and the Stainless Silicone Whisk is keeping her from scratching the non-stick coating. Cooking is fun, but cooking with friends is almost too much for me to take! Soooo great!

The only reason Ashleigh and I were able to pause long enough for this picture was this goat cheese bruschetta we'd just pigged out on. Appetizers are important, right? Anyway, our meal is served in Dots Pasta Bowls from the Simple Additions Collection, and we have Dots Small Beverage Glasses for the white wine which paired oh so well with this dish.

Want to make a date night meal that's easy to do at home and will save you a lot of money? Want to hang out with a friend to discuss life's important things like food and engagements? Want to gorge yourself on food that makes you think of precious friends' weddings and such? Welcome to shrimp and grits. Do this!

Like the products you saw used?
Shop Online 24/7 at pamperedchef.biz/jennylyn
E-mail me: chefjennylyn[at]gmail.com
Call me up: (205) 585-2464


Friday, October 7, 2011

Apple-Cream Cheese Bundt Cake

If you never do anything of value again, make this cake. All I can say about this little beauty is that it truly is every bit as good as it looks, and it will be repeated in my home for years to come. This recipe is a keeper, if ever there were such a thing! My sister was in town for a week, and I asked if she'd be interested in baking something together before she left. That's when she mentioned the cake on a recent Southern Living cover that caught her eye and caused her to buy the magazine. I don't know who to thank more - Southern Living for publishing the magazine or Home Depot for selling it. All I know is that someone somewhere did me a solid by bringing this cake into my life. Welcome to a recipe I hope will blow your mind as it has blown mine.

Apple-Cream Cheese Bundt Cake
chefjennylyn.com


Cream Cheese Filling
1 (8-oz.) package cream cheese, softened
1/4 cup butter, softened
1/2 cup granulated sugar
1 large egg
2 tablespoons all-purpose flour
1 teaspoon vanilla extract

Cake Batter
1 cup finely chopped pecans
3 cups all-purpose flour
1 cup granulated sugar
1 cup firmly packed light brown sugar
2 teaspoons ground cinnamon
1 teaspoon salt
1 teaspoon baking soda
1 teaspoon ground nutmeg
1/2 teaspoon ground allspice
3 large eggs, lightly beaten
3/4 cup canola oil
3/4 cup applesauce
1 teaspoon vanilla extract
3 cups peeled and finely chopped Gala apples (about 1 1/2 lb.)

Praline Frosting
1/2 cup firmly packed light brown sugar
1/4 cup butter
3 tablespoons milk
1 teaspoon vanilla extract
1 cup powdered sugar (SIFT!)


1. Prepare Filling: Beat first 3 ingredients at medium speed with an electric mixer until blended and smooth. Add egg, flour, and vanilla; beat just until blended.

2. Prepare Batter: Preheat oven to 350º. Bake pecans in a shallow pan 8 to 10 minutes or until toasted and fragrant, stirring halfway through. Stir together 3 cups flour and next 7 ingredients in a large bowl; stir in eggs and next 3 ingredients, stirring just until dry ingredients are moistened. Stir in apples and pecans.

3. Spoon two-thirds of apple mixture into a greased and floured 14-cup Bundt pan. Spoon Cream Cheese Filling over apple mixture, leaving a 1-inch border around edges of pan. Swirl filling through apple mixture using a paring knife. Spoon remaining apple mixture over Cream Cheese Filling.

4. Bake at 350º for 1 hour to 1 hour and 15 minutes or until a long wooden pick inserted in center comes out clean. Cool cake in pan on a wire rack 15 minutes; remove from pan to wire rack, and cool completely (about 2 hours).

5. Prepare Frosting: Bring 1/2 cup brown sugar, 1/4 cup butter, and 3 Tbsp. milk to a boil in a 2-qt. saucepan over medium heat, whisking constantly; boil 1 minute, whisking constantly. Remove from heat; stir in vanilla. Gradually whisk in powdered sugar until smooth; stir gently 3 to 5 minutes or until mixture begins to cool and thickens slightly. Pour immediately over cooled cake.

I've mentioned my sister Betsy in several posts, but now I have photographic evidence that she exists. And now she's a real celeb because she's made it to Real Kitchen. Real Life.! Here, Betsy is using the Measuring Spoon Set to put her 2 tbsp. of flour in a Pinch Bowl for later use. One thing I love about baking with my sister is that she understands me unlike anyone else, and she gets that baking a cake without proper prep work is a no-go in my kitchen. When it comes to a recipe like this, one that's a little complicated and a lot of expensive, it's not worth the risk of adding multiple ingredients or leaving things out. This is especially important when baking with sisters because you get distracted by sister things and lose track of what's been done. Be safe, not sorry, just say no, and don't jump off a bridge just because others are doing it. Proper prep for fab results!

These are pecans. I'm going to toast them in a Medium Bar Pan, and then I'm going to finely chop them in a Manual Food Processor. These pecans, in return, are going to make my house smell like a little piece of heaven... the piece where pecans are toasted.

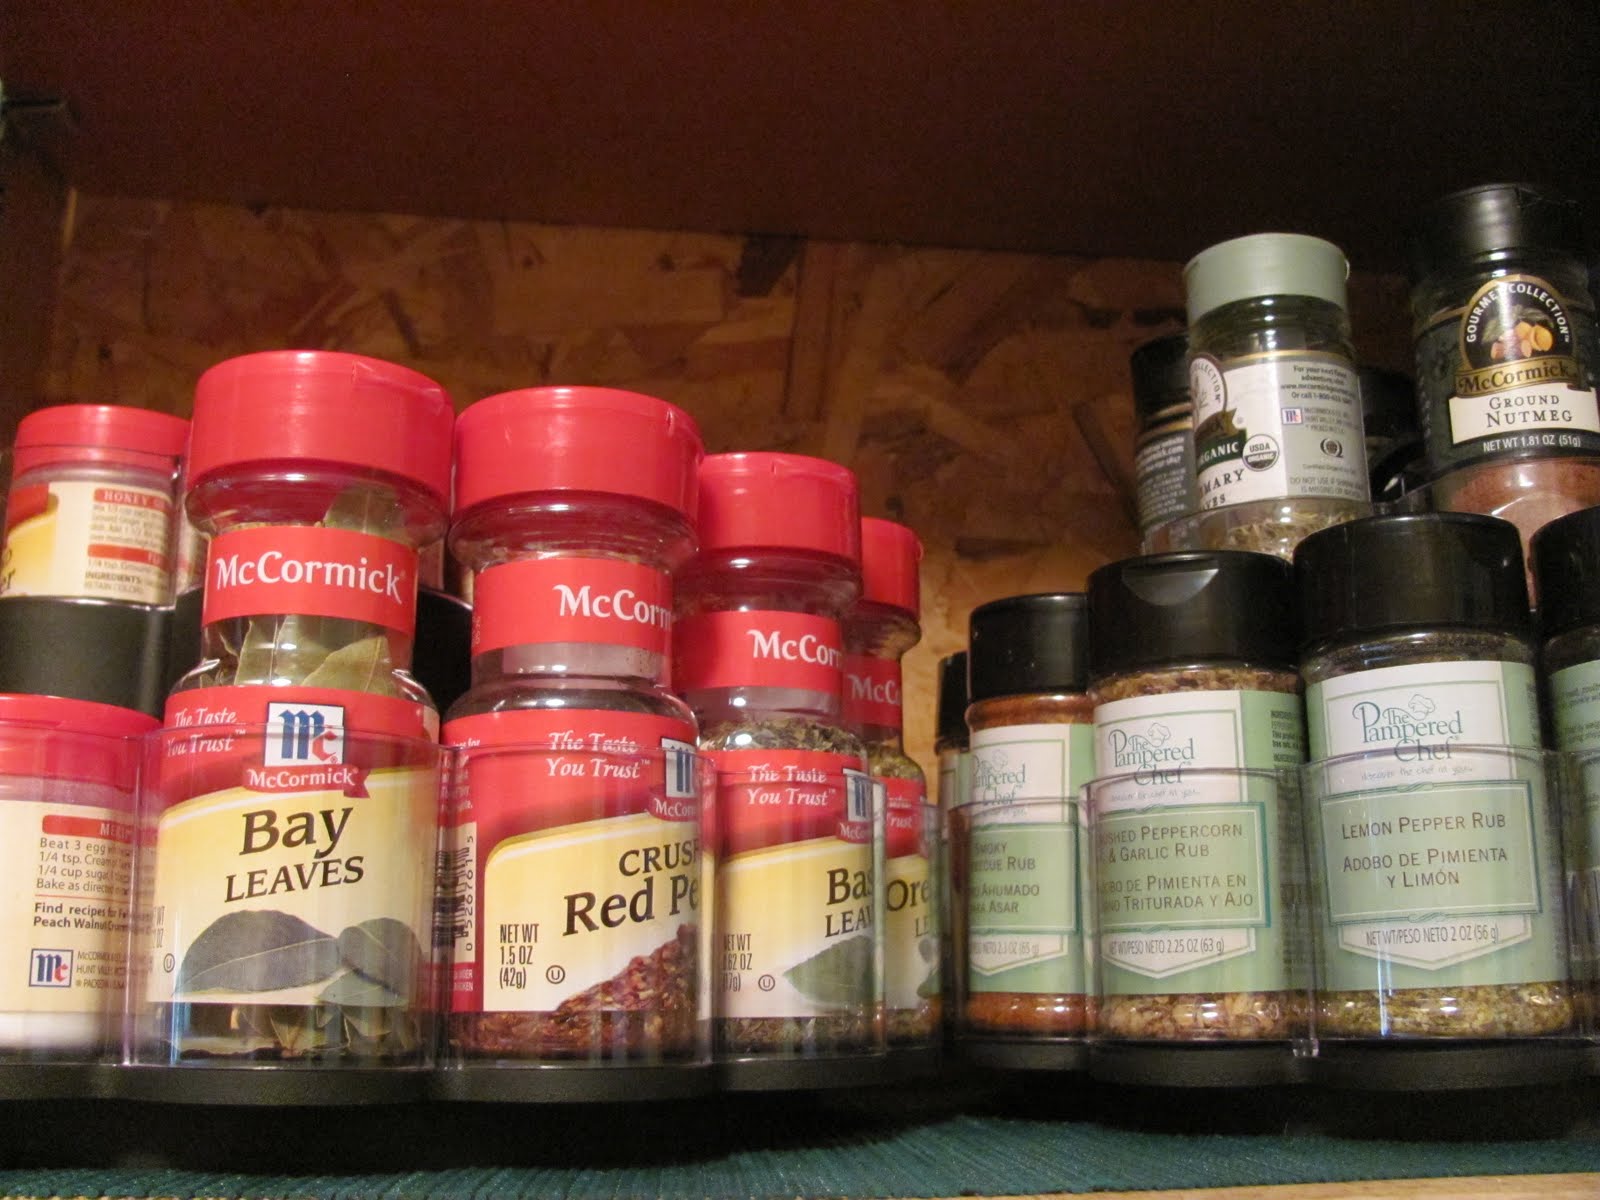
Quick shout-out to the Spice Turn-About! When it comes to recipes like this, the ones where you need multiple spices, it sure is nice when you can just spin until you find them. No more knocking fifty bottles out of the cabinet to find the all-spice!

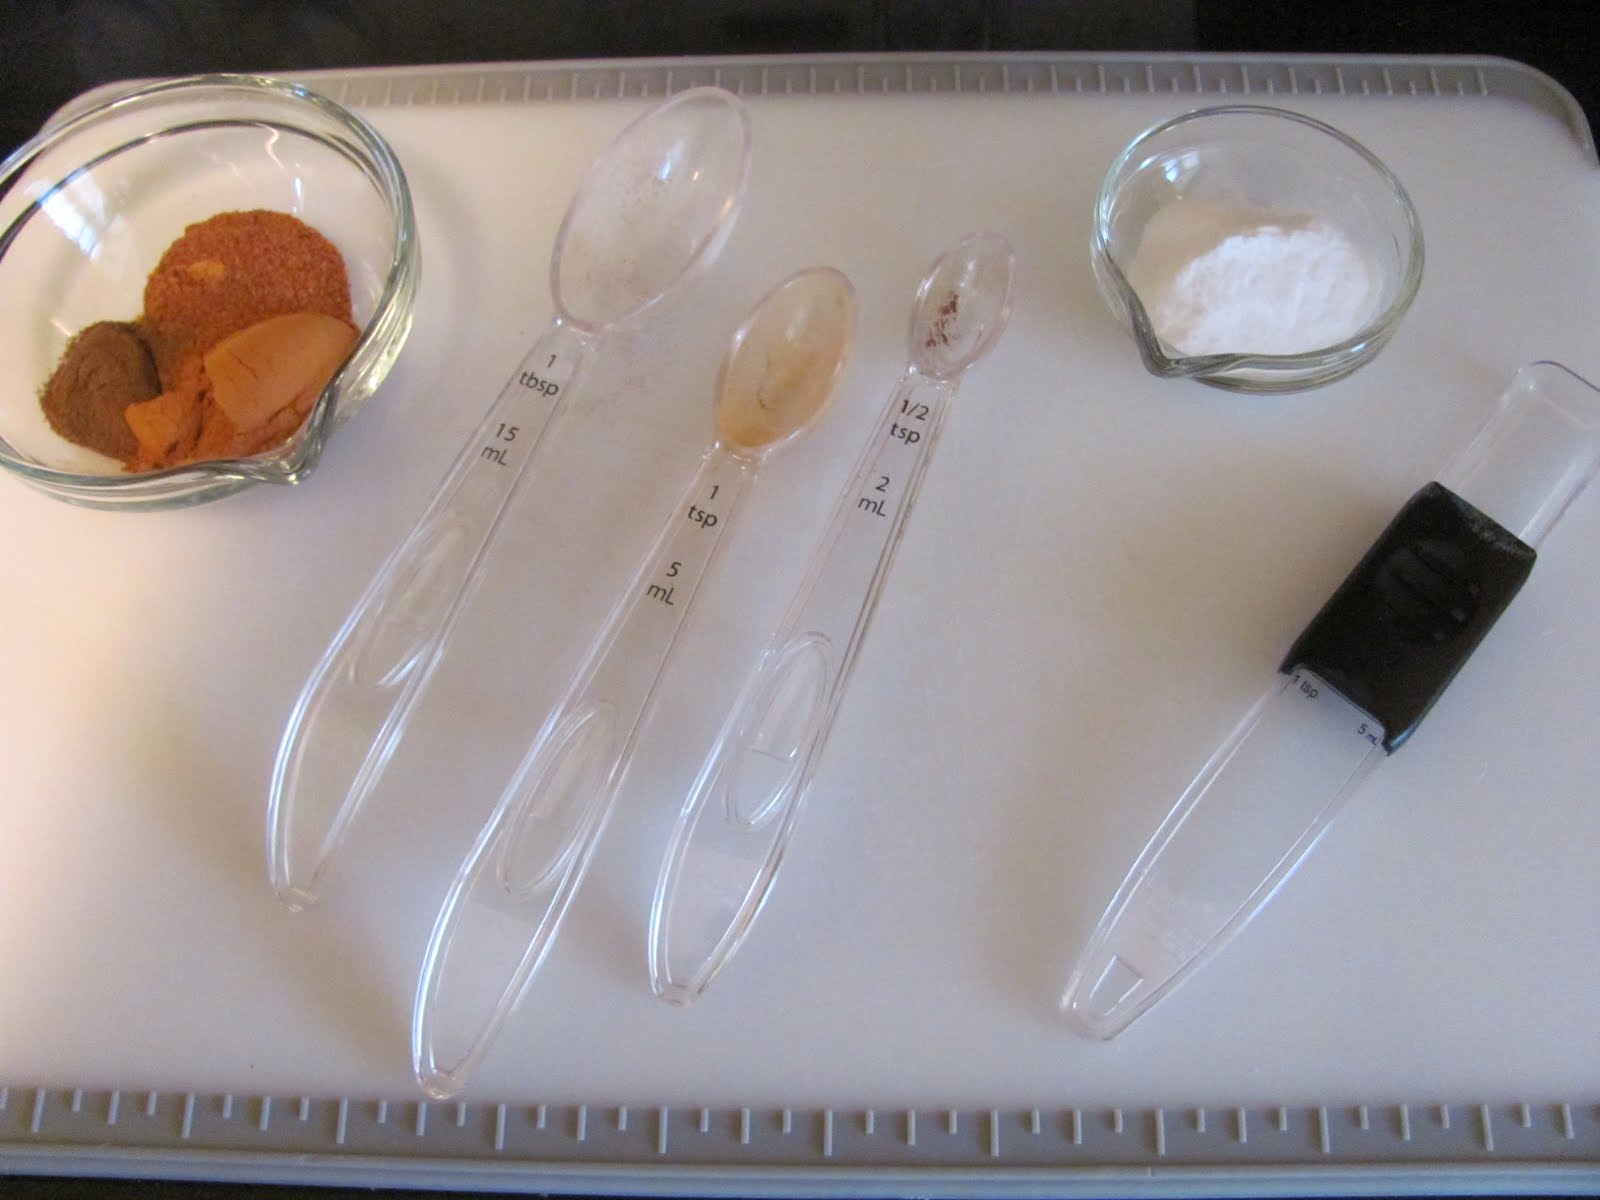
Get your spice blend ready ahead of time, and you're ready to go when it needs to be added. Betsy prepped all of this with Pinch Bowls, Measuring Spoons, and an Adjustable Measuring Spoon. Her station is set up on a Cutting Board for less mess on my limited counter space... AKA: my stove. The cinnamon, by the way, is Korinje Cinnamon from the Pampered Pantry. It's the best cinnamon in the world, and I promise it takes recipes from good to great.

"Betsy, you've got to smell this!"

Apple time!!! Don't you love baking with apples? This is when it really hits that the seasons have changed, and the afternoons are crispy-cool. Ok, so I'm peeling the apples with the Vegetable Peeler, and then I'll move them through the most efficient apple station known to man. Prepare yourself to see 3 cups of chopped apples happen in no time flat!

I peeled the apples, and then Betsy wedged them using the Apple Wedger. Our highly effective station was set up on the Large Cutting Board across my sink. Let me say this about the Apple Wedger: Don't make pie without it. See why?

Apple wedges are in a Stainless Mesh Colander after getting a little touch-up from the 3 1/2-inch Paring Knife, and then they go in the Manual Food Processor to become "finely chopped" before getting dumped in the Small Batter Bowl for measuring. The Mini Mix 'n Scraper in the Small Batter Bowl is specifically designed for the Manual Food Processor, by the way. Hello, cooking with apples!

One thing I like about this recipe is that the cream cheese filling is the only thing for which you need a mixer. The cake batter and icing are just done with spoons and whisks. I'm Jenny, and I'm into the simple things. Ok, so the filling is in a Stainless Mixing Bowl, and I'm adding flour from a Pinch Bowl. Behind this, you can see other ingredients measured into 1-Cup Prep Bowls, 2-Cup Prep Bowls, and Measuring Cups. The Double-Strength Madagascar Vanilla is one reason we got such a good, rich flavor in this filling as well as the frosting. It's amazing, and it only requires half-measurements because it's double-strength... four ounces just became eight.

Thick batter is no match for Betsy or her Bamboo Spoon. This is the point when Betsy and I knew we had a winner because this batter was absolutely amazing! I guess this is when I should mention my disclaimer about consuming raw eggs, but I don't have one of those. Eat this batter, people! It's so good!

Enter: Stoneware Fluted Pan. If you don't have this pan, let me encourage you to get one right now. I've had customer after customer tell me what a difference this has made in their pound cakes, etc. Stoneware = even heat distribution = beautiful, moist cakes = you're someone's hero. Betsy used the Medium Scoop to get the cream cheese batter on top of the cake batter (only 2/3 for now, mind you), and she was able to leave the border around the outside. That's important to keep from having cream cheese stick out the sides of your cake.

See what I mean about the Stoneware Fluted Pan's results? When using this pan, wipe it with a bit of butter or shortening, but don't spray it with Pam. Bake your cake, let it rest about 15-20 minutes in the pan, and run a Skinny Scraper around the sides. Then flip the cake onto a Cooling Rack, and you're good to go! Here I've got the icing ingredients in a 3-Qt. Saucepan from the Executive Cookware Collection, and I'm going to "constantly stir" with the Stainless Silicone Whisk. This thing has saved me many a pan scratch!

I love my sister, but I love her even more when she's holding a Square Plate full of apple-cream cheese bundt cake! This really was a fun cake to make, and it's going to be on repeat in my recipe binder for sure! Grab your sister, have a good laugh, and bake a cake!

Like the products you saw used?
Shop Online 24/7 at pamperedchef.biz/jennylyn
E-mail me: chefjennylyn[at]gmail.com
Call me up: (205) 585-2464


Thursday, October 6, 2011

Southern Cheese Straws

You know what's delicious? Food that contains a pound of cheddar cheese. In the South, cheese straws are a bit of a staple, and no one questions the ratio of cheese to flour. I'm convinced the only reason this recipe calls for any flour is simply to hold the cheese together, but that's part of its beauty. If you Google "cheese straws," you'll come up with countless recipes, and I don't know that any one is better than the others. I came across this one at Belle of the Kitchen, and I was convinced it was worth trying because they were the blog's author's grandfather's signature recipe. Did you get all that? If a recipe is worth passing through generations, it's a keeper.

I made these for one of my sister's wedding showers, and I was very pleased with the result. While my first attempt at cheese straws was more like cheese coins than the beautiful crackers in Belle's post, I figured it just gave me an excuse to try again soon! So here I'll share my adaptation on the original recipe, and you can decide what you'd like to do. Enjoy!


Southern Cheese Straws
chefjennylyn.com

1 pound New York extra sharp cheese
1 stick butter, softened
2 cups flour
3/4 teaspoon cayenne pepper (use a full teaspoon if you like them especially spicy)
dash of paprika

Preheat the oven to 350°. Grate the cheese. Then, using a food processor, mix the cheese and the butter. Add the flour, pepper and paprika a little at a time to the mixture and pulse until well combined and very soft.

Either place the dough in a metal cookie press fitted with a flat disk and squeeze onto an ungreased cookie sheet, or scoop small balls of dough onto sheet, flattening slightly.

Bake for 10-15 minutes, until they just start to darken. Sprinkle with kosher salt when they come out of the oven. If done with a cookie press, cut into pieces when they are still warm.


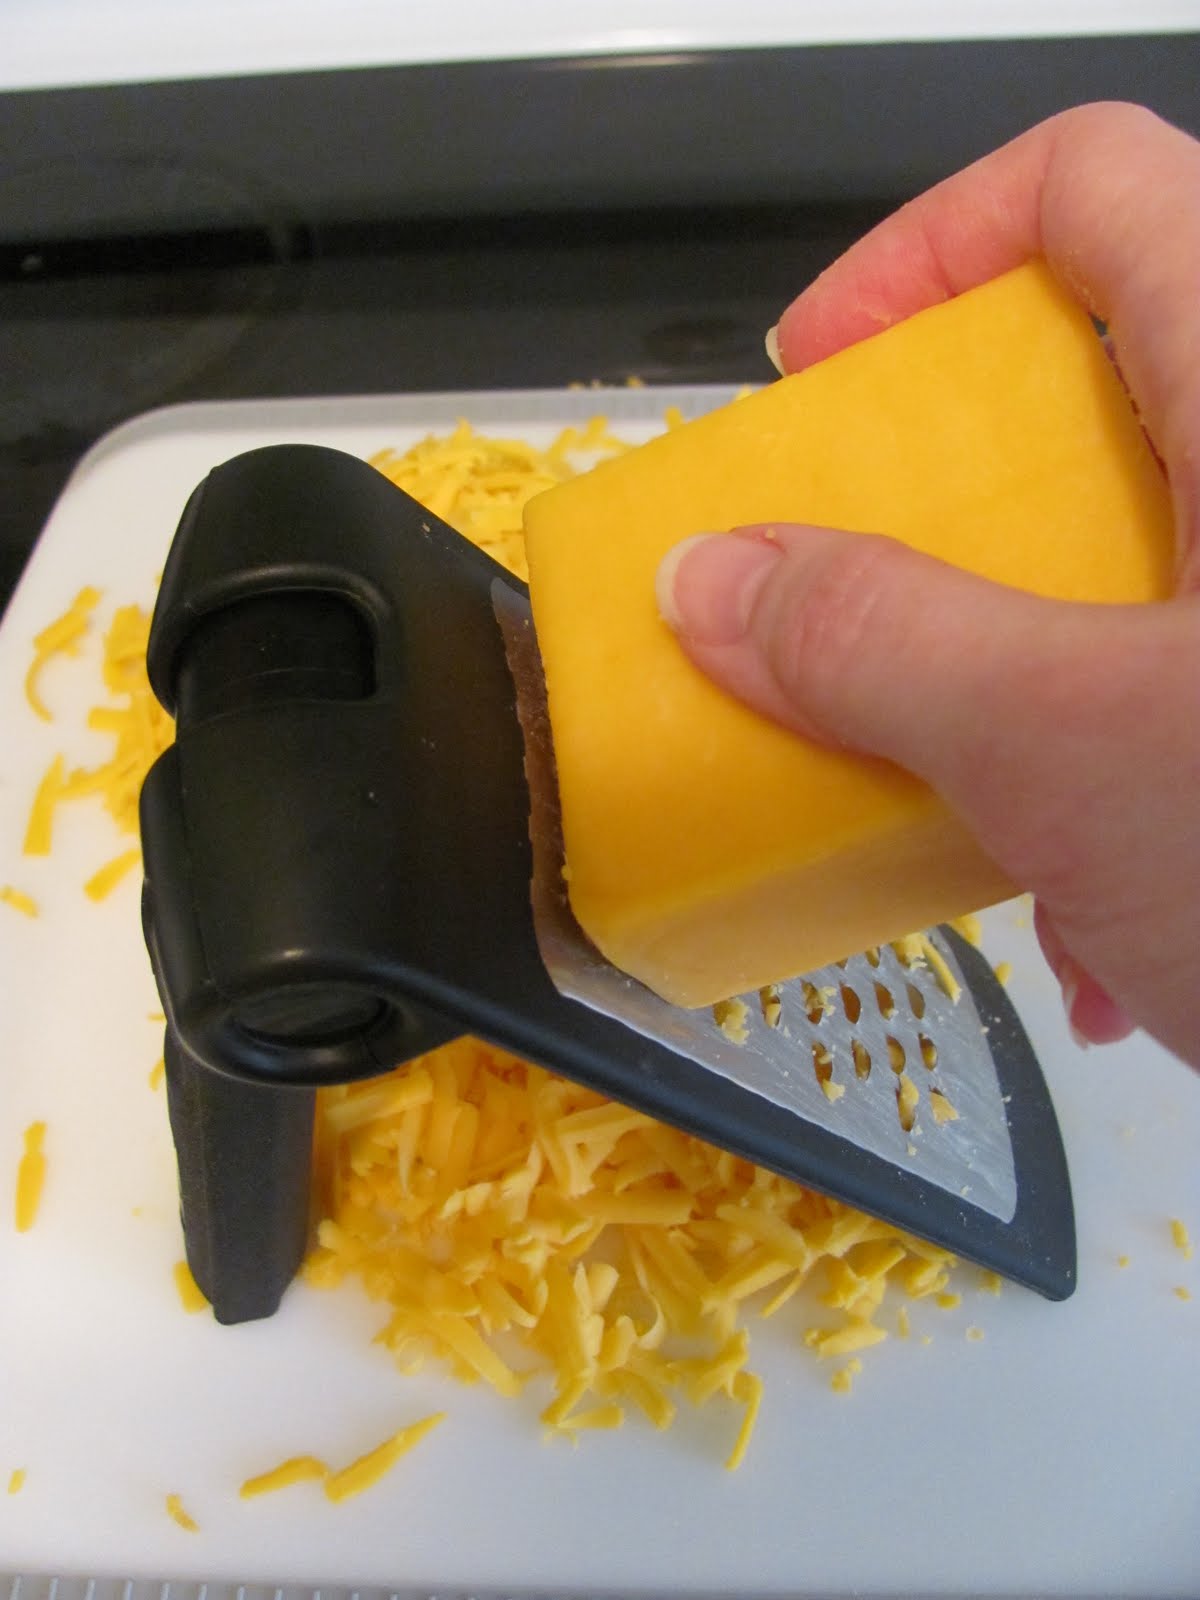
A pound of cheddar is no joking matter. Fortunately, I was using my Microplane Course Grater, which made quick work of the "shred cheese" step. I love that this tool adjusts, and it comes with a protective sleeve to spare my knuckles when I reach in kitchen drawers. When cooking, it's worth it to use block cheese because it doesn't contain the wax that keeps pre-shredded cheese from sticking to itself when packaged.

My cheese, etc. is on the Large Cutting Board, and the arsenal of tools is as follows: Cheese Knife, Adjustable Measuring Spoon, Dots Pasta Bowl, Measuring Cup Set, Microplane Coarse Grater, and Stainless Mixing Bowl. Things are about to get crazy.

I don't have a food processor, so every recipe that calls for one requires a second look before I can commit. In this case, I knew I could simply knead my dough by hand after doing what I could with a hand mixer. Welcome to a whole lot of cheese with a little bit of flour.

The Small Scoop is seriously the greatest thing ever. Just scoop out the dough, press it slightly with your hand, and you're set! I used the Large Bar Pan with Parchment Paper, and I also used a Cookie Sheet.

Before becoming the baked perfection that is a Southern cheese straw.

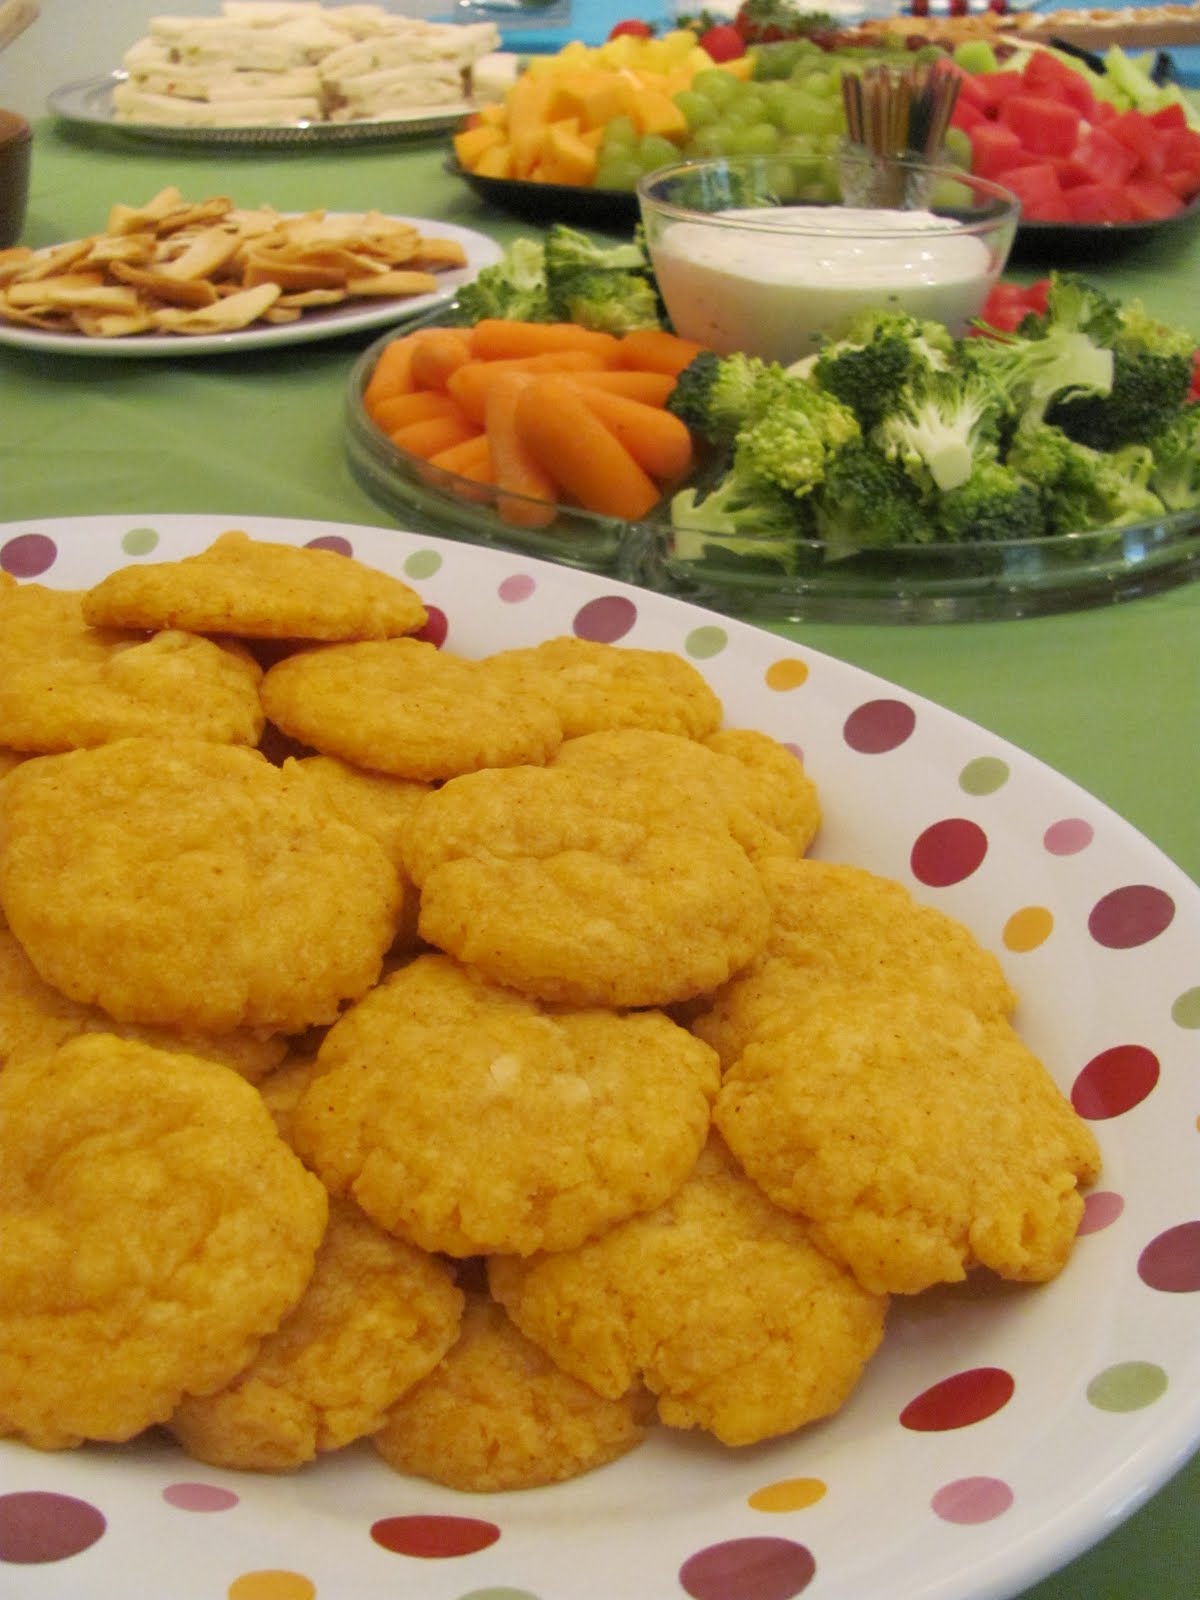
These were successful. They may not have been the correct shape, but the flavor was there, and I came out with a go-to recipe for the future. These are displayed on the Dots Oval Platter from the Simple Additions Collection, and they're perfectly complemented by a beautiful spread of shower food. Someone else want to have a bridal tea so I can try this again?

Like the products you saw used?
Shop Online 24/7 at pamperedchef.biz/jennylyn
E-mail me: chefjennylyn[at]gmail.com
Call me up: (205) 585-2464