Showing posts with label cake. Show all posts

Thursday, February 27, 2014

Texas Sheet Cake


I like cake.  My small group came over last night, and I used it as an opportunity to unleash a new recipe.  A Cooking Light reader recently revealed this as her go-to dessert for church suppers, funerals, and baby births for the past decade, and I knew it had to be good.  I mean, if it's someone's standby for every occasion, something's got to be right with it, right?  Sure enough, this cake was (and is - anyone want to come eat some?) delicious.  With a thin layer of dense chocolate cake topped by cooked fudge icing and pecans, Texas sheet cake has made it into my recipe arsenal, and here's hoping it finds a home in yours.

Texas Sheet Cake
chefjennylyn.com

Oil/Butter/Shortening to prepare pan
2 tsp. flour for pan

Cake
2 cups flour
2 cups sugar
1 tsp. baking soda
1 tsp. cinnamon
1/4 tsp. salt
3/4 cup water
1/2 cup butter
1/4 cup unsweetened cocoa
1/2 cup low-fat buttermilk
1 tsp. vanilla
2 large eggs

Icing
6 tablespoons butter
1/3 cup fat-free milk
1/4 cup cocoa
3 cups powdered sugar
2 tsp. vanilla
1/4 cup chopped pecans, toasted

Preheat oven to 375 degrees.

Coat a 15 x 10-inch pan with oil, butter, or shortening, and dust with flour.  Set aside.

Stir together flour, sugar, soda, cinnamon, and salt in a large bowl.  In a saucepan, combine water, 1/2 cup butter, and 1/4 cup cocoa.  Bring to a boil, stirring, frequently.  Pour into flour mixture, and beat at medium speed until well blended.  Add buttermilk, 1 tsp. vanilla, and eggs; beat well.  Pour batter into prepared pan, and bake for 17-20 minutes or until toothpick inserted in center comes out clean.

For the icing, combine 6 tablespoons butter, milk, and 1/4 cup cocoa in a saucepan.  Bring to a boil, stirring constantly.  Remove from heat, and gradually stir in powdered sugar.  Stir in 2 tsp. vanilla and pecans, and spread mixture over hot cake.  Cool completely on a wire rack.


The Measuring Cup Set is so valuable when baking.  With the Leveler Tool, you can make sure you have exactly what you need in your cup.  Here, I'm measuring into a Stainless Mixing Bowl where I'll whisk my first set of ingredients together.


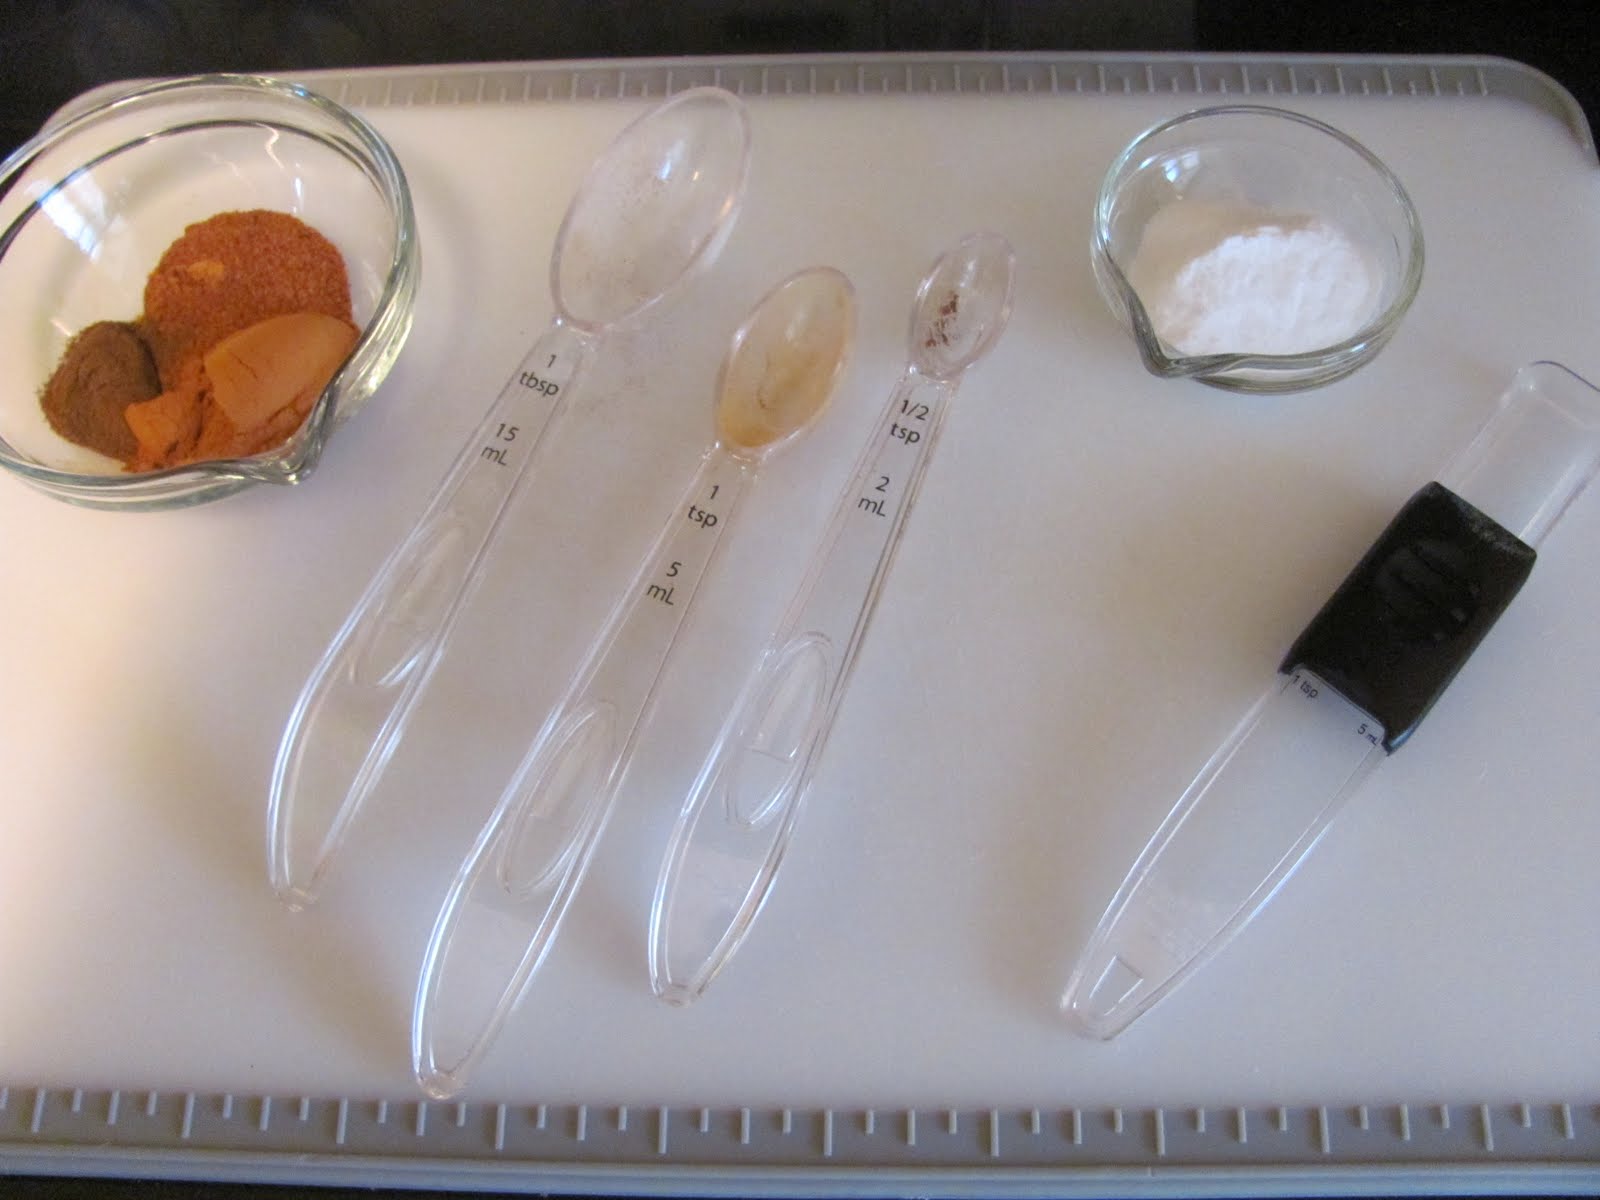
If I'm making a cake from absolute scratch like this, I want to use good ingredients.  Enter: Pampered Chef's Cinnamon from the Pampered Pantry.  All of our seasonings are excellent, but this is my favorite.  It takes a recipe from having a bit of cinnamon to, "Wow, the cinnamon in this adds so much!"  As always, I'm prepping my ingredients before mixing everything together.  That way there's no confusion about whether or not something has already been added.  My flour and sugar are in a Stainless Mixing Bowl, my cinnamon is in a Measuring Spoon, and my baking soda is in a Pinch Bowl.  The trusty Stainless Whisk is ready to combine the dry ingredients perfectly.


This is an excellent use for the Stainless Silicone Whisk.  When you've got a sauce or something you need to stir in your Executive Cookware, you can just hammer away at it without worrying about scratching the pan.  For my chocolate mixture, I have the water in an Easy Read Measuring Cup, butter in a Prep Bowl, and cocoa in a Measuring Cup.  Everything is on the Large Cutting Board, my go-to for all prep work.


One of my favorite features about the Executive Cookware is the lip design.  With this saucepan, I don't have to worry about my chocolate mixture dripping everywhere while I'm trying to pour it in the mixer.  Here's the scenario: Fast mixer, hot pan, liquid chocolate that just came off the boil.  Do you think I want to deal with drips right now?  The Pampered Chef knows this, and they design their products around it.


First of all, 1 tsp. of my vanilla is mixed with the buttermilk already, so don't be scared of that weird concoction.  That's one of my shortcuts when cooking and baking; if multiple ingredients are poured at the same time, go ahead and combine them.  You can see my eggs are already cracked into a 1-Cup Prep Bowl.  Do not skip this step!  If you crack an egg directly into cake batter, you can't salvage anything if there's blood in the egg.  I've only had two bloody eggs in all of my cooking, but the last one was a few weeks ago, and it was bad enough to make me switch brands.  Had I cracked what I found in that egg directly into this cake batter that required me to cook chocolate sauce, I'd have cried.  Then I'd have thrown some things and cried some more.  Truth.


You know I'm excited to use my Large Bar Pan!  This is my favorite piece in the entire Stoneware collection, and you can tell by those beautifully browned sides.  Never use Pam or any other aerosol spray with your Stoneware!  The additives will create a cakey, mucky sludge that's next to impossible to get off, and that's not warrantable for a replacement.  Instead, get the Kitchen Spritzer, add your own oil, and use that it spray pans as needed.  Of course, you can also just brush some oil or butter as needed.  With seasoned stones such as this, I don't add anything to the pan unless I'm doing a cake or bread.  Since those items are finicky about sticking, I take the "Better safe than sorry" approach.


Here's the best system for measuring powdered sugar.  Measure over the Small Batter Bowl, dump into a Stainless Mixing Bowl, and pour what's in the Small Batter Bowl back into your container.  This is so much easier than measuring over your container or bag.  Does it mean one extra dish dirtied?  Yes.  Is it worth it not to have powdered sugar all over your kitchen?  Absolutely.

 
Let me leave you with this because I care.  This is the next morning when I still have 3/4 of my pan full of cake.  Who's coming to help me out?  Thank you, Lord, for freezers.
 
 
Like the products you saw used?
Shop Online 24/7 at pamperedchef.biz/jennylyn
E-mail me: chefjennylyn[at]gmail.com
Call me up: (205) 585-2464

Friday, June 15, 2012

Chocolate Praline Cake


My grandmother and I decided to bake a cake together, and we figured we'd share it with the world while we were at it.  This is a chocolate praline cake with a boxed mix as the base, so don't be intimidated.  The reality is that this is a very easy cake to make, and it delivers impressive results.  It's perfect for making with your grandmother when you want to bake without putting too much thought into  your every move.  A box of devil's food cake mix, a few things to make a praline layer (my favorite part), and sweetened cream as the icing.  I'm talking easy, people!


Chocolate Praline Cake
chefjennylyn.com

8 tbsp. (1 stick) butter, cut up
¼ cup heavy (whipping) cream
1 cup packed light brown sugar
¾ cup chopped pecans
1 box devil’s food cake mix w/pudding
1 cup water
½ cup vegetable oil
3 large eggs
Sweetened cream
1 square (1 oz.) semisweet chocolate

Preheat oven to 325 degrees.

Place butter, cream, and brown sugar in a heavy saucepan.  Cook over low heat, stirring, until the butter is melted, 3 minutes.  Pour the mixture evenly into the cake pans and sprinkle evenly with chopped pecans.  Set pans aside.

Combine cake mix, water, oil, and eggs in a large mixing bowl.  Blend with an electric mixer on low speed 1 minute.  Increase to medium speed and beat 2 more minutes.  Divide batter between pans, smoothing out over pecan mixture.

Bake cakes until they spring back when lightly pressed with a finger, 35-37 minutes.  Cool on wire racks to cool 10 minutes.  Invert and cool completely.

Meanwhile, prepare sweetened cream.  Grate semisweet chocolate for garnish.

Place one cake layer, praline side up, on a serving platter.  Spread half the sweetened cream on top.  Place second layer, praline side up, on top of the first and frost the top with remaining cream.  Scatter grated chocolate on top.


Sweetened Cream
1 cup heavy (whipping cream)
¼ cup powdered sugar

Place a clean, large mixing bowl and electric beaters in the freezer for a few minutes while you assemble cake ingredients.  Pour whipping cream into chilled bowl and beat with the electric mixer on high speed until the cream has thickened, 1 ½ minutes.  Stop the machine and add the sugar.  Beat on high until stiff peaks form, 1 to 2 more minutes.

* To prepare the cake in a 9 x 13, bake 55 minutes.


You may remember my grandmother from "5-Ingredient Pumpkin Cupcakes," and you might thinking she still looks great.  You'd be right.  Grandmother is using a cup from the Measuring Cup Set to add brown sugar to the butter, etc. mixture.  The only problem with this part is that it's hard to keep your hands out of it once it's all cooked together.  I mean, it's a big pot of praline!


Heavy cream is measured into an Easy Read Measuring Cup.  Grandmother really does like these because they don't require picking them up to see measurements.


The recipe says nuts are supposed to be sprinkled on top of this stuff after it's already in the pans, but I jumped the gun and added them to the pan.  Perhaps that's why my gooey layer wanted to stay in the pans...  That's an Easy Read Measuring Cup with pecans, and I've got the Skinny Scraper in the pan.


Hello, Cake Pan Set!  These are wonderful because they've got handles.  I can't stress enough the handiness of handles when popping pans out of a 325-degree oven.


Grandmother suggested she and I take a silly picture to prove that we're human.  (Apparently people who post recipes online are found intimidating by some.)  This didn't turn out quite as Grandmother and I planned, but that's supposed to be me licking the scraper while her face says, "I'm shocked at your lack of sanitation!"  And yes, Grandmother and I licked everything - the beaters, the bowls - everything!  Grandmother said it's the most fun part, and I tend to agree with her wisdom.


Cakes are cooling on the Cooking Rack, but they're simply begging for me to pick at them in all their gooeyness.  Yum!  You may be able to tell here, but be prepared to help spread the praline topping when you flip your cakes.  By nature, it refuses to come out of a cake pan easily.


Sweetened cream: Freeze your Stainless Mixing Bowl with the beaters while the cakes bake, and then whip heavy cream with powdered sugar on high speed.  The cream is in an Easy Read Measuring Cup, and powdered sugar is in a cup from the Measuring Cup Set.  (How about that plate?  It gives me a bit of nostalgia.)


What do do after baking a cake?  How about a trip to the garden to pick an eggplant?  83 with the most impressive garden I've seen.  Welcome to my grandmother.

Me: "Grandmother, I'm happy to see how well your garden is doing this year.  I know it's a lot of hard work."
Grandmother: "You know, I'm happy to hear you say that.  A lot of people think it just grows!"

Have a great day, and make a cake!


Like the products you saw used?
Shop Online 24/7 at pamperedchef.biz/jennylyn
E-mail me: chefjennylyn[at]gmail.com
Call me up: (205) 585-2464


Friday, October 7, 2011

Apple-Cream Cheese Bundt Cake

If you never do anything of value again, make this cake. All I can say about this little beauty is that it truly is every bit as good as it looks, and it will be repeated in my home for years to come. This recipe is a keeper, if ever there were such a thing! My sister was in town for a week, and I asked if she'd be interested in baking something together before she left. That's when she mentioned the cake on a recent Southern Living cover that caught her eye and caused her to buy the magazine. I don't know who to thank more - Southern Living for publishing the magazine or Home Depot for selling it. All I know is that someone somewhere did me a solid by bringing this cake into my life. Welcome to a recipe I hope will blow your mind as it has blown mine.

Apple-Cream Cheese Bundt Cake
chefjennylyn.com


Cream Cheese Filling
1 (8-oz.) package cream cheese, softened
1/4 cup butter, softened
1/2 cup granulated sugar
1 large egg
2 tablespoons all-purpose flour
1 teaspoon vanilla extract

Cake Batter
1 cup finely chopped pecans
3 cups all-purpose flour
1 cup granulated sugar
1 cup firmly packed light brown sugar
2 teaspoons ground cinnamon
1 teaspoon salt
1 teaspoon baking soda
1 teaspoon ground nutmeg
1/2 teaspoon ground allspice
3 large eggs, lightly beaten
3/4 cup canola oil
3/4 cup applesauce
1 teaspoon vanilla extract
3 cups peeled and finely chopped Gala apples (about 1 1/2 lb.)

Praline Frosting
1/2 cup firmly packed light brown sugar
1/4 cup butter
3 tablespoons milk
1 teaspoon vanilla extract
1 cup powdered sugar (SIFT!)


1. Prepare Filling: Beat first 3 ingredients at medium speed with an electric mixer until blended and smooth. Add egg, flour, and vanilla; beat just until blended.

2. Prepare Batter: Preheat oven to 350º. Bake pecans in a shallow pan 8 to 10 minutes or until toasted and fragrant, stirring halfway through. Stir together 3 cups flour and next 7 ingredients in a large bowl; stir in eggs and next 3 ingredients, stirring just until dry ingredients are moistened. Stir in apples and pecans.

3. Spoon two-thirds of apple mixture into a greased and floured 14-cup Bundt pan. Spoon Cream Cheese Filling over apple mixture, leaving a 1-inch border around edges of pan. Swirl filling through apple mixture using a paring knife. Spoon remaining apple mixture over Cream Cheese Filling.

4. Bake at 350º for 1 hour to 1 hour and 15 minutes or until a long wooden pick inserted in center comes out clean. Cool cake in pan on a wire rack 15 minutes; remove from pan to wire rack, and cool completely (about 2 hours).

5. Prepare Frosting: Bring 1/2 cup brown sugar, 1/4 cup butter, and 3 Tbsp. milk to a boil in a 2-qt. saucepan over medium heat, whisking constantly; boil 1 minute, whisking constantly. Remove from heat; stir in vanilla. Gradually whisk in powdered sugar until smooth; stir gently 3 to 5 minutes or until mixture begins to cool and thickens slightly. Pour immediately over cooled cake.

I've mentioned my sister Betsy in several posts, but now I have photographic evidence that she exists. And now she's a real celeb because she's made it to Real Kitchen. Real Life.! Here, Betsy is using the Measuring Spoon Set to put her 2 tbsp. of flour in a Pinch Bowl for later use. One thing I love about baking with my sister is that she understands me unlike anyone else, and she gets that baking a cake without proper prep work is a no-go in my kitchen. When it comes to a recipe like this, one that's a little complicated and a lot of expensive, it's not worth the risk of adding multiple ingredients or leaving things out. This is especially important when baking with sisters because you get distracted by sister things and lose track of what's been done. Be safe, not sorry, just say no, and don't jump off a bridge just because others are doing it. Proper prep for fab results!

These are pecans. I'm going to toast them in a Medium Bar Pan, and then I'm going to finely chop them in a Manual Food Processor. These pecans, in return, are going to make my house smell like a little piece of heaven... the piece where pecans are toasted.

Quick shout-out to the Spice Turn-About! When it comes to recipes like this, the ones where you need multiple spices, it sure is nice when you can just spin until you find them. No more knocking fifty bottles out of the cabinet to find the all-spice!

Get your spice blend ready ahead of time, and you're ready to go when it needs to be added. Betsy prepped all of this with Pinch Bowls, Measuring Spoons, and an Adjustable Measuring Spoon. Her station is set up on a Cutting Board for less mess on my limited counter space... AKA: my stove. The cinnamon, by the way, is Korinje Cinnamon from the Pampered Pantry. It's the best cinnamon in the world, and I promise it takes recipes from good to great.

"Betsy, you've got to smell this!"

Apple time!!! Don't you love baking with apples? This is when it really hits that the seasons have changed, and the afternoons are crispy-cool. Ok, so I'm peeling the apples with the Vegetable Peeler, and then I'll move them through the most efficient apple station known to man. Prepare yourself to see 3 cups of chopped apples happen in no time flat!

I peeled the apples, and then Betsy wedged them using the Apple Wedger. Our highly effective station was set up on the Large Cutting Board across my sink. Let me say this about the Apple Wedger: Don't make pie without it. See why?

Apple wedges are in a Stainless Mesh Colander after getting a little touch-up from the 3 1/2-inch Paring Knife, and then they go in the Manual Food Processor to become "finely chopped" before getting dumped in the Small Batter Bowl for measuring. The Mini Mix 'n Scraper in the Small Batter Bowl is specifically designed for the Manual Food Processor, by the way. Hello, cooking with apples!

One thing I like about this recipe is that the cream cheese filling is the only thing for which you need a mixer. The cake batter and icing are just done with spoons and whisks. I'm Jenny, and I'm into the simple things. Ok, so the filling is in a Stainless Mixing Bowl, and I'm adding flour from a Pinch Bowl. Behind this, you can see other ingredients measured into 1-Cup Prep Bowls, 2-Cup Prep Bowls, and Measuring Cups. The Double-Strength Madagascar Vanilla is one reason we got such a good, rich flavor in this filling as well as the frosting. It's amazing, and it only requires half-measurements because it's double-strength... four ounces just became eight.

Thick batter is no match for Betsy or her Bamboo Spoon. This is the point when Betsy and I knew we had a winner because this batter was absolutely amazing! I guess this is when I should mention my disclaimer about consuming raw eggs, but I don't have one of those. Eat this batter, people! It's so good!

Enter: Stoneware Fluted Pan. If you don't have this pan, let me encourage you to get one right now. I've had customer after customer tell me what a difference this has made in their pound cakes, etc. Stoneware = even heat distribution = beautiful, moist cakes = you're someone's hero. Betsy used the Medium Scoop to get the cream cheese batter on top of the cake batter (only 2/3 for now, mind you), and she was able to leave the border around the outside. That's important to keep from having cream cheese stick out the sides of your cake.

See what I mean about the Stoneware Fluted Pan's results? When using this pan, wipe it with a bit of butter or shortening, but don't spray it with Pam. Bake your cake, let it rest about 15-20 minutes in the pan, and run a Skinny Scraper around the sides. Then flip the cake onto a Cooling Rack, and you're good to go! Here I've got the icing ingredients in a 3-Qt. Saucepan from the Executive Cookware Collection, and I'm going to "constantly stir" with the Stainless Silicone Whisk. This thing has saved me many a pan scratch!

I love my sister, but I love her even more when she's holding a Square Plate full of apple-cream cheese bundt cake! This really was a fun cake to make, and it's going to be on repeat in my recipe binder for sure! Grab your sister, have a good laugh, and bake a cake!

Like the products you saw used?
Shop Online 24/7 at pamperedchef.biz/jennylyn
E-mail me: chefjennylyn[at]gmail.com
Call me up: (205) 585-2464


Thursday, March 17, 2011

Rainbow Cake with Marshmallow Fluff Icing

Happy St. Patrick's Day! To join me in celebration, my best friend came over to bake a cake last night. Not just any cake: A rainbow cake. We could have done something else that was green, but we wanted to branch out to following the rainbow for a pot of gold. So ROY-G-BIV with us, and make a rainbow cake today, tomorrow, or whenever you feel like it!
(The cake is on the Cake Pedestal.)


Rainbow Cake with Marshmallow Fluff Icingchefjennylyn.com


1 White cake mix (plus ingredients on package)
Food coloring
4 cups powdered sugar
2 tbsp. butter, softened
2 tbsp. half-and-half
2 tbsp. milk
1 tsp. vanilla
1 heaping tbsp. marshmallow fluff
1 1/2 tbsp. water


Preheat oven to 350 degrees.

Mix cake mix according to package directions, and split batter into six small bowls. Follow the rainbow with each bowl (ROY-G-BIV) red, orange, yellow, green, blue, indigo, violet. Spread batter in two cake pans, one color at a time. Bake according to package directions, and cool completely.

For icing, beat together butter, sugar, half-and-half, and milk. Add vanilla and marshmallow fluff, beating well. Add water as needed until you get the texture you want. When icing cake, let first layer set a minute before adding second layer. Otherwise, the icing will all squish out because, yes, it's that texture.


No, this isn't actually my serving, but I had you fooled, didn't I? Nothing says Happy St. Patrick's Day like dressing like a moron and eating 1/4 of a cake! This is a Small Square Plate from the Simple Additions Collection.


Here's Elizabeth rocking her green and stirring together the cake mix. Water and oil are measured into Easy Read Measuring Cups, and the eggs are in a Pinch Bowl. Then we've got Prep Bowls ready to go for coloring batter. The Classic Batter Bowl is the perfect size when you're doing a cake or brownie mix, and its best friend is the Stainless Whisk.

There aren't many people you can invite to dress up and bake St. Patrick's Day food to post on the internet, but when you find those people, you keep them. Elizabeth is those people. Anyway, she's whisking the eggs a bit with the Mini-Whipper, and she can just do it right in the Easy Read Measuring Cup - no need to dirty more bowls!

Just sit back, relax, and let the Stainless Whisk and Classic Batter Bowl do their thing.


Look how clean that bowl got thanks to the Mix 'n Scraper! By taking time to scrape the sides of your bowl, you can get a lot more out of your baking effort. Try it sometime, and be amazed! We used the Large Scoop to divide out batter for coloring, and I think we ended up with about four scoops per color.

Elizabeth is an artist, so she's very particular about coloring cake batter. Thanks to her careful analysis, we ended up with the perfect green - not too dark, not too light.

The Prep Bowls and Small Square Bowls were perfect for dividing colors. This was like coloring Easter eggs but for adults - very mature adults.

Carefully add batter to the Cake Pans one color at a time, being careful not to mix everything together. That's the new Mini Mix 'n Scraper in the Small Square Bowl, and I think it might be one of my new favorites. It's so cute and fun! The Cake Pan Set is heavy-duty, and each pan has handles for easy grabbing and flipping.

Run a toothpick through each pan to swirl the batter, and you're ready to bake a cake!


This icing recipe is dangerous. First of all, there are several weird, little measurements. Then there's the fact that this fluffy concoction begs to be eaten, well, not on a cake. For our measurements, Elizabeth and I used the Pinch Bowls, the Easy Read Mini Measuring Cup, the Measuring Spoon Set, and an Adjustable Measuring Spoon. All these items are resting on a Small Square Plate from the Simple Additions Collection, and you can see a muddled mess of something on it. Well, this is proof that you should never measure over your recipe. Let's just say you're pouring milk from a 1-gallon jug into a 1-tbsp. measuring spoon and someone makes you laugh... Disaster could strike. The same is true for vanilla. Good thing no one decided to measure over the icing bowl! Moving on... Elizabeth is mixing icing in a Stainless Mixing Bowl, and she's using the Skinny Scraper to check for sugar lumps.

Now it's time to finish the job! Look at that icing! I promise it's some of the best stuff I've ever eaten, and I've eaten a lot of stuff. Ok, so my icing is in the 4-Qt. Stainless Mixing Bowl, and I'm using the Small Mix 'n Scraper to give it a stir every couple of minutes. That's the Small Spreader I'm using to ice the cake, and I think it might be the greatest thing in the world for this job. Again, my cake is on the Cake Pedestal, a beautiful plate that comes apart for versatile use and easy storage.


Want to see this cake again? Want to make one? That's what I thought! Happy St. Patrick's Day!

Like the products you saw used?
Shop Online 24/7 at pamperedchef.biz/jennylyn
E-mail me: chefjennylyn[at]gmail.com
Call me up: (205) 585-2464


Thursday, February 17, 2011

Mini Chocolate Tiramisu Cakes

These get rave reviews whenever I serve them, so I figured I'd share the recipe. These little cakes are simple yet delicious, easy yet elegant. I guess I'm trying to say I love them. Here's my version. The original calls for a small package of devil's food cake mix, but I buy a normal box and double the recipe. It makes about three pans of cakes, so I typically divide them among a couple of shows for the host to come out dirt cheap on ingredients. Crafty. (Display picture is on the stand of the Trifle Bowl.)

Mini Chocolate Tiramisu Cakes
chefjennylyn.com
1 pkg. devil's food cake mix
1/2 cup sour cream
2 eggs
2 tbsp. instant coffee granules
2 tbsp. water
2/3 cup coffee liqueur (see substitute)
3 cups frozen whipped topping, thawed
8 oz. cream cheese, softened
1/4 cup powdered sugar
2 tsp. vanilla
Cocoa powder (optional)
Preheat oven to 350.
Spray cups of Deluxe Mini-Muffin Pan wiht nonstick cooking spray. For cakes, combine cake mix, sour cream, eggs, coffee, and water. Mix, and divide batter among muffin cups using Small Scoop. Bake 8-10 minutes.
Press tops of cakes with lightly floured Mini-Tart Shaper to make slight indentations. Cool 2 minutes. Remove cakes from pan to cooling rack. Brush tops with coffee liqueur using chef's silicone basting brush; cool completely.
Place whipped topping in large resealable bag; set aside. For filling, combine cheese, sugar, and vanilla, and mix until smooth. Place filling in additional bag. Trim corners of bags, and pipe filling over cakes. Place whipped topping over filling, and sprinkle with cocoa powder.


Coffee Liqueur Substitute:
1/2 cup water, 1/2 cup sugar, 2 tbsp. instant coffee granules, 2 tsp. rum extract
Cook over medium heat until sugar dissolves, stirring occasionally. Cool.
My water is in an Easy Read Measuring Cup, and my coffee granules are in the Easy Read Mini Measuring Cup. As you can see, these are awesome because you can leave them setting on the counter while you pour ingredients. The rum extract is in an Adjustable Measuring Spoon, one of my favorite items. Being able to adjust to two teaspoons instead of measuring twice is very handy! The sugar is in a cup from the Measuring Cup Set. All of this is on the Cutting Board simply because it helps me keep things clean. I cooked the mixture in the 1.5-Qt. Saucepan from the 7-Piece Executive Collection, and that's the Skinny Scraper hanging out inside the pan.

Ok, so the filling mixture is in the Small Batter Bowl, and I'm going to mix it up with the Small Mix 'n Scraper. These pieces go together like peas and carrots... peanut butter and jelly... Fred and Ethel. Notice again that Adjustable Measuring Spoons are incredible.


The Professional Shears are fabulous in the kitchen. They cut everything from packaging to meat, and they'll even cut... through chicken bones. I've never done that simply because it grosses me out, but I've heard it happens. I'm going to mix all of my cake ingredients in the Classic Batter Bowl using the Stainless Whisk, but notice that I've got the eggs cracked into a Prep Bowl. Always do this to prevent a world of problems (bad eggs, shell issues, etc.). Who likes to measure sour cream and other not liquid/not solid substances? That's what I thought, but it's not bad at all with the Measure-All Cup. Love this thing!


See why I love the Measure-All Cup? I just pop ingredients out, scrape them off the outside, and enjoy zero waste with easy clean-up. For the cake part, I have to admit that I've been screwing up for six months now. Um, apparently I didn't read the recipe correctly the first time I made this, and I thought the coffee liqueur (or substitute) went in at this step, and you used extra to brush the cakes. Apparently it's all for brushing the cakes. Interesting that I didn't notice that until I typed it for this blog post. So anyway, I always add 2/3 cups of coffee liqueur into the batter, and I think I'm better for it. That's the Classic Scraper for getting everything out of the bowl, and I'm going to rock batter division out with the Small Scoop.


Small Scoop. Deluxe Mini-Muffin Pan. Pure bliss! If you've been doing jobs like this without scoops, I admire you. I don't think I'd ever make these cakes without this tool. Too messy, aggravating, and "there's got to be a better way"-ing.

The Mini-Tart Shaper can take anything and make it really cool. Example: Buy sugar cookie dough that's already in squares (we all do it), bake them in the Deluxe Mini-Muffin Pan, and shape them into little wells. Fill the wells with a cream cheese/powdered sugar mixture, and add fruit. Miniature fruit pizzas. I could go on and on, but I won't. I'll get back to the task at hand. My flour is in a Pinch Bowl, and I can just put the lid on it when I'm finished. Then I'm ready to go for the next time, which will probably be soon.


Brush the cakes with a little coffee liqueur, pipe in the cream cheese mixture and whipped topping, sprinkle with cocoa, and you're done! This is the Chef's Silicone Basting Brush, an awesome tool that cleans up like a gem. It can go in the dishwasher, and whatever's in it will come right out. I love this for all basting because I never have to worry about bristles coming off in my food. Also, it won't melt when I use it on hot pans. The Cooling Rack, a kichen must-have, ensures everything cools evenly without getting stuck to plates or serving pieces.
If you make these, you should probably do as I do, and add 2/3 cup of coffee liqueur to the cake batter. I don't plan on correcting my error since I've been so happy with my result, but I find it odd that I'm such an idiot. I mean, here I thought I was some kind of kitchen genius or something. Well, I guess this just proves - again - that anyone can be a Pampered Chef consultant. Join my team, and help me be smarter.
Like the products you saw used?
Shop Online 24/7 at pamperedchef.biz/jennylyn
E-mail me: chefjennylyn[at]gmail.com
Call me up: (205) 585-2464