Showing posts with label stoneware. Show all posts

Friday, August 15, 2014

Perfect Beef Tenderloin


Beef tenderloin is a cut of meat you can knock out of the park if you know how to prepare it.  I promise this can happen in your kitchen, and you'll be amazed by the simplicity.  I adore this method for dinner parties or cooking for other people simply because it goes in the oven and stays there until it's finished.  No sauces to prepare, no fancy fillings - just meat, butter, salt, and pepper.  Can it get any easier?

Perfect Beef Tenderloin
chefjennylyn.com

2-lb. beef tenderloin, trimmed
2 tbsp. butter, softened
2-3 tsp. kosher salt
1/2 tsp. freshly ground black pepper

Preheat oven to 425 degrees.
Rub butter all over beef, and sprinkle with salt and pepper.
Bake 25-35 minutes or until a meat thermometer inserted in thickest portion reads 135 degrees (medium rare).  Cover loosely with aluminum foil, and let stand 15 minutes before slicing.


This is a 2-pound tenderloin inside the Medium Bar Pan to show you how perfectly it fits.  It's like this pan was made for delicious cuts of beef!  Here's a tip for the grocery store: Beef tenderloin is often sold in huge hunks that are 5-7 pounds.  Ask the butcher to cut off what you'd like.  Also, if you're shopping at a store without a butcher, they probably don't even carry tenderloin like this. (I'm looking at you, Super Target...)

Ok, my butter is melted in a 1-cup Prep Bowl, and salt is in a Pinch Bowl.  The pepper is in its fabulous Bamboo Grinder home, and everything is hanging out on a Cutting Board.  I wish I could say more, but this recipe is so simple that I'd just be rambling.  Get the styrofoam thingy out of the way, and slather that beef with those wonderful ingredients!


Ok, this is glorious.  Make sure you're using high quality pepper, or don't bother making this at all.  That is all the difference.  Hello, Pampered Pantry with the Peppercorn Medley that never disappoints!


Bake, and test.  Depending on the thickness of your tenderloin, it may take much longer than 30 minutes to cook.  I think this one may have been 45ish because it's simply huge.  All of those wonderful juices will mix with butter, salt, and pepper in the pan.  No one will judge you if you take a slice of the finished beef and rub it all in that deliciousness.  P.S. Your kitchen is going to smell amazing.  You're welcome.


Letting the beef stand a minimum of 15 minutes is a vital part of this recipe.  Do not skip it!  If you do, all of the juices will run out instead of setting up inside the beef.  Good-bye juiciness.  If you wait, however, this happens.  Gorgeous cuts of perfectly medium rare beef that you can serve the finest of guests.  I'm using the 8 1/4" Carving Knife from the Forged Cutlery Collection, and let me tell you it cut this thing like butter.  I did my cutting on the Large Grooved Cutting Board in case there was any run-off.  Once I was finished, I transferred it to the Bamboo Cheese Board and served with the Beaded Serving Spoon.  (Top pic)


Here's one more picture because I care.  In all seriousness, I would love for you to take this treasure of a recipe and make it happen!  You can change the recipe to fit any size tenderloin you want to use.  Just try this sometime soon, and be sure to let me know how it turns out!


Like the products used?
Shop Online 24/7 at pamperedchef.biz/jennylyn
E-mail me: chefjennylyn[at]gmail.com
Call me up: (205) 585-2464


Tuesday, May 27, 2014

Mile-High Strawberry Pie


This really happened!  Our friends Paul and Jenn had us over for Memorial Day dinner outside, and their table really was this beautiful!  Wouldn't you think it was straight out of a magazine?  I mean, Jenn knocked this thing out of the park, and it made me glad I brought my pie in a true presentation piece instead of a foil pan.  Yowsa!

When I knew I was leaving Alabama, I knew I'd be leaving my grandmother's stash of Southern Living magazines behind.  What did that mean?  I needed to become a subscriber myself.  You know, grow up, pay for the publication instead of mooching off your grandmother with her old copies, that sort of thing.  I now enjoy getting my little bit of South in the mail every few weeks, but I have to admit that I read very little.  Instead, I skip to the recipe section and rip out everything I want to make.  These mini pies were in the April issue, and I had a feeling they'd make it to my Memorial Day table.  I was correct, but I moved to the Mega Strawberry Pie version at the last minute when I ran out of time.  The result was a huge, delicious strawberry dessert that I'll be sure to repeat sometime.  For now, let me share it with you. 

Mile-High Mini Strawberry Pie
chefjennylyn.com

Pastry Crusts
1/4 cup powdered sugar
2 (14.1-oz.) packages refrigerated piecrusts
Creamy Lemon Filling
1 1/2 (8-oz.) packages cream cheese, softened                            
1 tablespoon sour cream                               
1/2 cup granulated sugar                             
2 teaspoons lemon zest                              
1 tablespoon fresh lemon juice                

Strawberry Topping
1 1/2 cups coarsely chopped fresh strawberries                
1 cup granulated sugar                
2 tablespoons cornstarch                               
1 tablespoon butter
10 cup hulled fresh strawberries                       

Vanilla Cream
1 cup heavy cream
1/4 teaspoon vanilla extract                
3 tablespoons powdered sugar                

1. Prepare Crust: Preheat oven to 425°. Sprinkle work surface with 1 Tbsp. powdered sugar. Roll 1 piecrust into a 12 1/2-inch circle on surface, and cut into 3 (6-inch) rounds. Repeat with remaining 3 piecrusts and 3 Tbsp. powdered sugar to make 12 rounds. Fit 6 rounds, sugar sides down, into each mold of a 6-cavity mini pie pan; fold edges under, and crimp. Prick bottom and sides with a fork. Chill remaining 6 rounds.

2. Bake at 425° for 8 minutes or until golden brown. Cool on a wire rack 5 minutes. Remove crusts from pan to wire rack, and cool completely. Cool pan completely. Repeat procedure with remaining 6 piecrust rounds.

3. Prepare Creamy Lemon Filling: Beat cream cheese and sour cream at medium speed with an electric mixer until smooth. Add 1/2 cup granulated sugar and next 2 ingredients; beat until smooth and fluffy. Spread about 2 1/2 Tbsp. filling into each cooled piecrust; cover with plastic wrap, and chill until ready to serve (up to 24 hours).

4. Prepare Strawberry Topping: Process 1 1/2 cups chopped strawberries in a blender or food processor until smooth, and press through a wire-mesh strainer into a 3-qt. saucepan, using back of a spoon to squeeze out juice; discard pulp. Stir 1 cup granulated sugar into juice in pan.

5. Whisk together cornstarch and 1/4 cup water; gradually whisk cornstarch mixture into strawberry mixture. Bring to a boil over medium heat, and cook, whisking constantly, 1 minute. Remove from heat, and whisk in butter. Cool 15 minutes.

6. Toss together strawberry mixture and 10 cups hulled strawberries gently in a large bowl until coated. (Halve some berries; leave others whole.) Cover; chill 3 hours or until cold.

7. Prepare Vanilla Cream: Beat heavy cream and vanilla at medium-high speed until foamy; gradually add powdered sugar, beating until soft peaks form.

8. Spoon about 1/2 cup Strawberry Topping into each pie; top with Vanilla Cream. Serve immediately.

Mega Strawberry Pie: Preheat oven to 425°. Reduce 1/4 cup powdered sugar to 2 Tbsp. and piecrusts to 1/2 (14.1-oz.) package. Sprinkle surface with 2 Tbsp. powdered sugar. Roll 1 piecrust into an 11-inch circle on prepared surface. Fit piecrust, sugar side down, in a 9-inch pie plate; fold edges under, and crimp. Prick bottom and sides with a fork. Bake 10 minutes or until golden. Cool completely on a wire rack. Proceed with recipe as directed in Steps 3 through 8, spooning all of Creamy Lemon Filling into prepared crust, and topping with all of Strawberry Topping and Vanilla Cream. Makes 8 to 10 servings Hands-on 40 min.; Total 4 hours, 50 min.

This recipe is from Southern Living.  If you subscribe, you won't regret it.


There are few things that make me smile like a huge colander full of perfect strawberries.  Add the fact that said berries were on sale, and I'll downright beam.  Take it in, friends... just take. it. in.


The best thing to do on a recipe with several steps is simply to get everything out and dive in.  Strawberries are washed and drained in a Stainless Mesh Colander.  I have scrapers, the Measuring Cup Set, the Measuring Spoon Set, and the Large Grooved Cutting Board ready to go.  My bottle of water also wandered into this shot because hydration is important.  Yeah... that.


I adore the Microplane Zester.  This is a size made specifically for the Pampered Chef, and let me just tell you that it's amazing!  I can get my zest right into my Pinch Bowl with this, and I don't have anything going willy-nilly on me.  I have other ingredients measured into a cup and spoons beside me.


Ok, so my lemon was massive.  It was so large that I cut the ends off to maximize my juice when I put it in the Citrus Press.  Since the juice and zest are going in the recipe at the same time, I put both in the same Pinch Bowl.


Why do the Pinch Bowls have pour spouts?  Because pouring an ingredient into a stand mixer on medium speed is no time to make a mess.  It's the little things.


Settle in because it takes a while to chop cups upon cups of strawberries.  The good news is that you can make it a lot more fun by using an awesome knife that doesn't require sawing.  My go-to for berries, grapes, and other small items is the 3 1/2" Paring Knife from the Forged Cutlery Collection.  More on that in a bit.


We have to make a strawberry puree.  Enter: Manual Food Processor.


A few presses on the lever, and you're done.  Just take the blade out, and use the base as your bowl.


This is a case where it's soooo nice to have the right tool for the job!  I'm using the 5" Strainer, which has a double-fine mesh design, over a 3-Quart Saucepan from the Executive Cookware Collection.  Notice that my strainer has a lip that hugs my pan so I can be hands-free.  Also notice that the lip is covered in silicone to avoid scratching my cookware's surface.  Have I told you how much I love Pampered Chef products?  14 years in the business, and these things still excite me!  That's the Mini Mix 'n Scraper that I'm using to strain the puree. 


A 2-Cup Prep Bowl and the Stainless Mini Whisk pair perfectly for the cornstarch concoction.  I've got a 1-Cup Prep Bowl there with the strawberry pulp my recipe told me to discard.  I interpreted that as, "Save pulp for your next smoothie."


Dicing strawberries is serious business.  Here's my method: Cut tops off all berries.  Quarter berries.  Go back through tops, using stems as handles, and cut off usable parts.  Most people don't do this last part, but if you've got a good knife, it doesn't take long, and in the case of this pie, I was able to yield an extra cup of berries.  Another option is to just core all of the berries before slicing them, but I've found that I just like doing the whole job with my 3 1/2" Paring Knife.  Love this thing!


My berries are in a Stainless Mixing Bowl, and I'm pouring the cooked liquid from the 3-Qt. Saucepan.  Notice the Stainless/Silicone Sauce Whisk in the background.  With that, I was able to whisk the mixture without scratching my pan.  Next, I'll gently toss the whole deal with the Mix 'n Scraper.


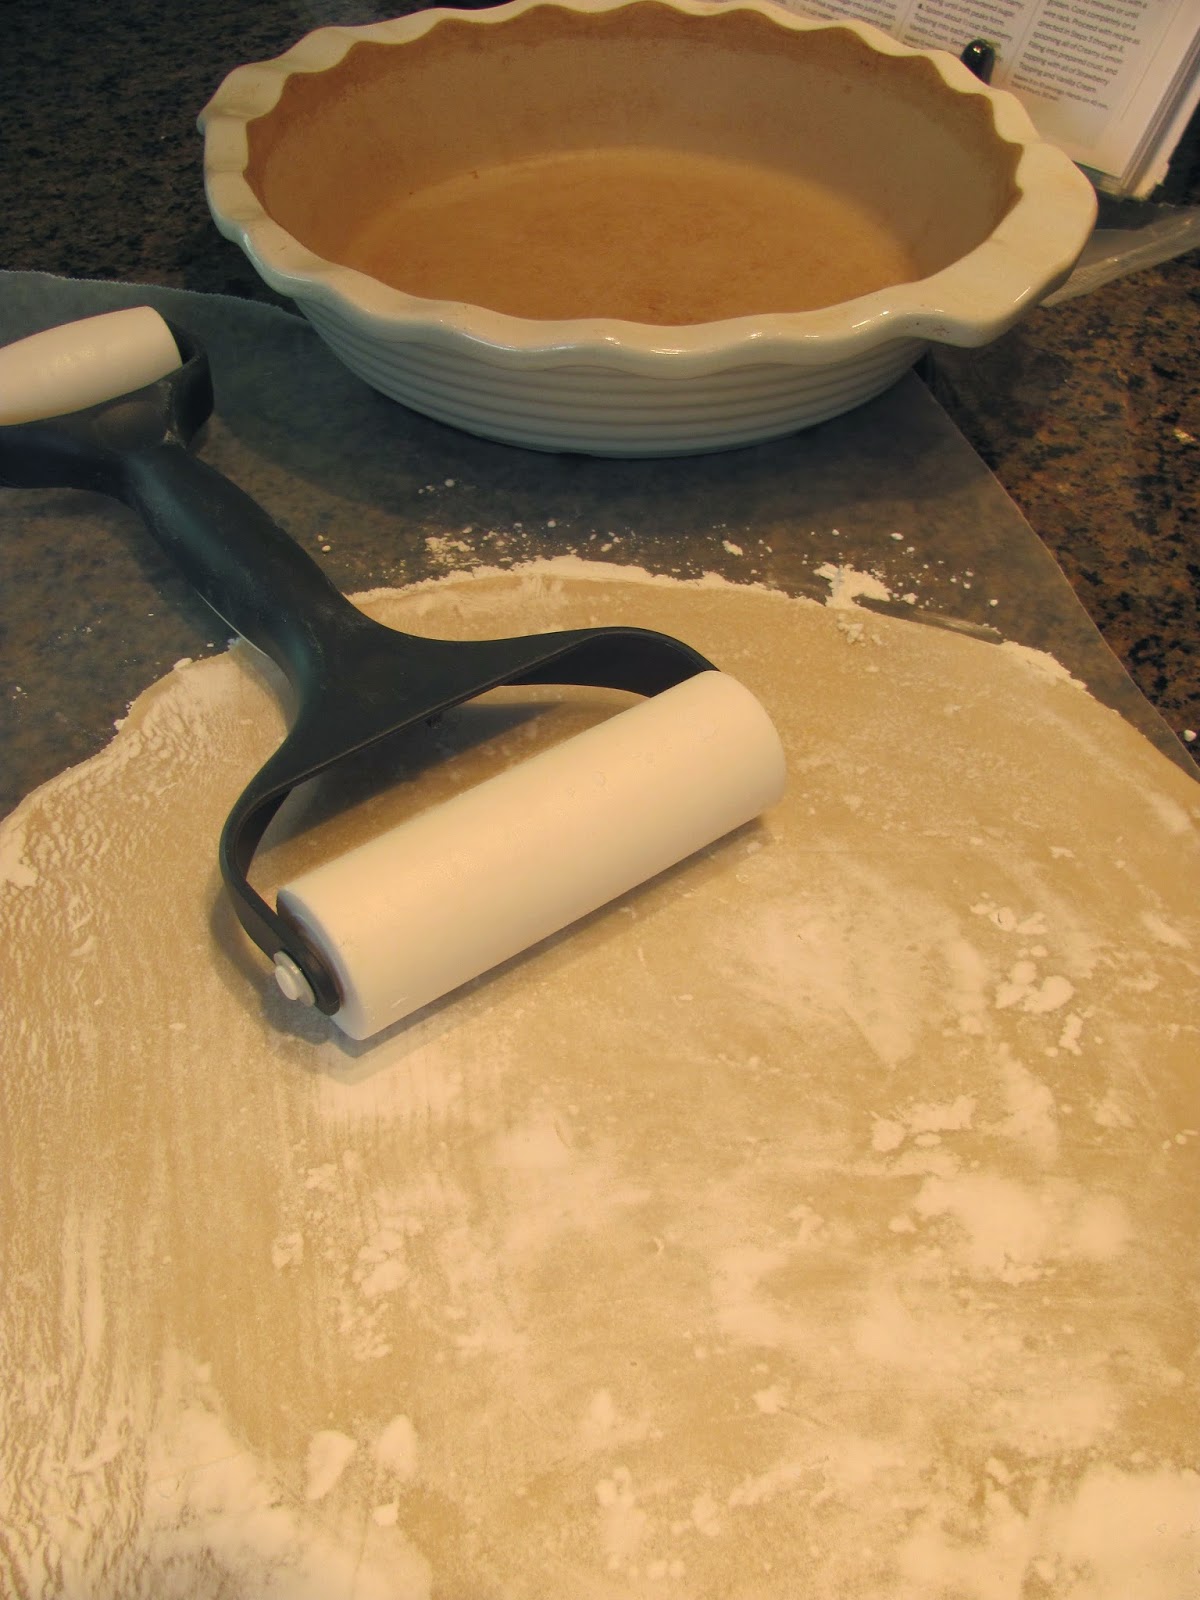
It's time for the Deep Dish Pie Plate from the Stoneware Collection! I love, love, love this piece!  I use it for pies and quiches, but I also do side dishes in it because it's so deep and makes a beautiful presentation.  Stoneware heats evenly throughout, so I don't ever have to worry about scorching in here.  That's a good thing when your finished product is going to your friends' house for a holiday meal.  You can see that I used my Baker's Roller to roll out my pie crust.  Then there's a pokey tool that clips inside the handle to poke holes in the crust before baking.


Ok, so all of the parts are ready and cooled or refrigerated, so now it's just about the assembly.  Oh, and the licking of the bowls.  That's an important step, too... Anyway, my cream and strawberries are in Stainless Mixing Bowls, and my lemon cream is in the stand mixer bowl.  Each has a Mix 'n Scraper, Mini Mix 'n Scraper, or Classic Scraper inside.  Ok, take a deep breath, and...


Happy Memorial Day, and happy dessert making all summer long, friends!


Like the products used?
Shop Online 24/7 at pamperedchef.biz/jennylyn
E-mail me: chefjennylyn[at]gmail.com
Call me up: (205) 585-2464


Thursday, February 27, 2014

Texas Sheet Cake


I like cake.  My small group came over last night, and I used it as an opportunity to unleash a new recipe.  A Cooking Light reader recently revealed this as her go-to dessert for church suppers, funerals, and baby births for the past decade, and I knew it had to be good.  I mean, if it's someone's standby for every occasion, something's got to be right with it, right?  Sure enough, this cake was (and is - anyone want to come eat some?) delicious.  With a thin layer of dense chocolate cake topped by cooked fudge icing and pecans, Texas sheet cake has made it into my recipe arsenal, and here's hoping it finds a home in yours.

Texas Sheet Cake
chefjennylyn.com

Oil/Butter/Shortening to prepare pan
2 tsp. flour for pan

Cake
2 cups flour
2 cups sugar
1 tsp. baking soda
1 tsp. cinnamon
1/4 tsp. salt
3/4 cup water
1/2 cup butter
1/4 cup unsweetened cocoa
1/2 cup low-fat buttermilk
1 tsp. vanilla
2 large eggs

Icing
6 tablespoons butter
1/3 cup fat-free milk
1/4 cup cocoa
3 cups powdered sugar
2 tsp. vanilla
1/4 cup chopped pecans, toasted

Preheat oven to 375 degrees.

Coat a 15 x 10-inch pan with oil, butter, or shortening, and dust with flour.  Set aside.

Stir together flour, sugar, soda, cinnamon, and salt in a large bowl.  In a saucepan, combine water, 1/2 cup butter, and 1/4 cup cocoa.  Bring to a boil, stirring, frequently.  Pour into flour mixture, and beat at medium speed until well blended.  Add buttermilk, 1 tsp. vanilla, and eggs; beat well.  Pour batter into prepared pan, and bake for 17-20 minutes or until toothpick inserted in center comes out clean.

For the icing, combine 6 tablespoons butter, milk, and 1/4 cup cocoa in a saucepan.  Bring to a boil, stirring constantly.  Remove from heat, and gradually stir in powdered sugar.  Stir in 2 tsp. vanilla and pecans, and spread mixture over hot cake.  Cool completely on a wire rack.


The Measuring Cup Set is so valuable when baking.  With the Leveler Tool, you can make sure you have exactly what you need in your cup.  Here, I'm measuring into a Stainless Mixing Bowl where I'll whisk my first set of ingredients together.


If I'm making a cake from absolute scratch like this, I want to use good ingredients.  Enter: Pampered Chef's Cinnamon from the Pampered Pantry.  All of our seasonings are excellent, but this is my favorite.  It takes a recipe from having a bit of cinnamon to, "Wow, the cinnamon in this adds so much!"  As always, I'm prepping my ingredients before mixing everything together.  That way there's no confusion about whether or not something has already been added.  My flour and sugar are in a Stainless Mixing Bowl, my cinnamon is in a Measuring Spoon, and my baking soda is in a Pinch Bowl.  The trusty Stainless Whisk is ready to combine the dry ingredients perfectly.


This is an excellent use for the Stainless Silicone Whisk.  When you've got a sauce or something you need to stir in your Executive Cookware, you can just hammer away at it without worrying about scratching the pan.  For my chocolate mixture, I have the water in an Easy Read Measuring Cup, butter in a Prep Bowl, and cocoa in a Measuring Cup.  Everything is on the Large Cutting Board, my go-to for all prep work.


One of my favorite features about the Executive Cookware is the lip design.  With this saucepan, I don't have to worry about my chocolate mixture dripping everywhere while I'm trying to pour it in the mixer.  Here's the scenario: Fast mixer, hot pan, liquid chocolate that just came off the boil.  Do you think I want to deal with drips right now?  The Pampered Chef knows this, and they design their products around it.


First of all, 1 tsp. of my vanilla is mixed with the buttermilk already, so don't be scared of that weird concoction.  That's one of my shortcuts when cooking and baking; if multiple ingredients are poured at the same time, go ahead and combine them.  You can see my eggs are already cracked into a 1-Cup Prep Bowl.  Do not skip this step!  If you crack an egg directly into cake batter, you can't salvage anything if there's blood in the egg.  I've only had two bloody eggs in all of my cooking, but the last one was a few weeks ago, and it was bad enough to make me switch brands.  Had I cracked what I found in that egg directly into this cake batter that required me to cook chocolate sauce, I'd have cried.  Then I'd have thrown some things and cried some more.  Truth.


You know I'm excited to use my Large Bar Pan!  This is my favorite piece in the entire Stoneware collection, and you can tell by those beautifully browned sides.  Never use Pam or any other aerosol spray with your Stoneware!  The additives will create a cakey, mucky sludge that's next to impossible to get off, and that's not warrantable for a replacement.  Instead, get the Kitchen Spritzer, add your own oil, and use that it spray pans as needed.  Of course, you can also just brush some oil or butter as needed.  With seasoned stones such as this, I don't add anything to the pan unless I'm doing a cake or bread.  Since those items are finicky about sticking, I take the "Better safe than sorry" approach.


Here's the best system for measuring powdered sugar.  Measure over the Small Batter Bowl, dump into a Stainless Mixing Bowl, and pour what's in the Small Batter Bowl back into your container.  This is so much easier than measuring over your container or bag.  Does it mean one extra dish dirtied?  Yes.  Is it worth it not to have powdered sugar all over your kitchen?  Absolutely.

 
Let me leave you with this because I care.  This is the next morning when I still have 3/4 of my pan full of cake.  Who's coming to help me out?  Thank you, Lord, for freezers.
 
 
Like the products you saw used?
Shop Online 24/7 at pamperedchef.biz/jennylyn
E-mail me: chefjennylyn[at]gmail.com
Call me up: (205) 585-2464

Tuesday, February 18, 2014

Creamy Bacon Dip


Take in this top picture, and make a mental note that bacon and green onions on top of a warm, creamy dip should happen in your kitchen soon.  You're welcome.

My husband and I had friends over for a staycation Friday and Saturday, which is just a way of saying we had an adult slumber party.  This was a two-day event, meaning we needed lots of food - "bad for you" food!  This dip had been in my to-do binder, and I had a feeling it would be the perfect appetizer to serve between brunch and lunch.  Turns out, I was right!  With everyone's hearty approval, creamy bacon dip has earned its place as a keeper.  It had us all at bacon.

Creamy Bacon Dip
chefjennylyn.com

8 oz. cream cheese, soft
2 cups sour cream
3 oz. bacon, cooked and crumbled
2 cups cheddar, shredded
1 cup green onion, chopped
Extra bacon and onions for garnish

Preheat oven to 400 degrees.
Mix all ingredients, and place them in a 1-qt. dish.  Cover, and bake 25-30 minutes.


Bacon on stoneware?  Absolutely.  For just a few pieces, I use the Medium Bar Pan, but I go with the Large when I'm cooking more.  Heat the oven to 415 degrees, and cook the bacon 20-30 minutes or until you're desired degree of doneness.  I like mine thick and crispy, so I'm more 35-40 minutes. 


Don't you love simple recipes?  There are just a few ingredients to mix together, and you're done.  Sure, you need to cook the bacon and chop the onions, but those are simple tasks that can even be done ahead of time.  In this picture, cheese and sour cream are in a Stainless Mixing Bowl, and more sour cream is in the Measure-All Cup.  Then I've got cream cheese in the Classic Batter Bowl and onions on the Large Cutting Board with a 1-Cup Prep Bowl ready to receive.  The Round Covered Baker is in the back for the actual baking part.


Produce is pretty, especially when the light is good.


Bacon is also pretty nice, especially when you know you're about to eat it.  I used my 5" Santoku Knife from the Forged Cutlery Collection for all the slicing and dicing in this recipe.  Side note: You might want to cook an extra piece or two of bacon for nibbling.  Just a thought...


Pop the sour cream out of the Measure-All Cup, and you're ready to go!  To be perfectly honest, I think I'd cut the sour cream by 1/4 or 1/2 cup next time around.  Two cups just seems like a lot, and it's slightly overpowering.  Given that I got this recipe from a sour cream company's magazine ad, I can see why there's so much.  (Sorry, I can't remember which brand, but I'm leaning towards Daisy.)


After mixing everything really well with a Mix 'n Scraper, I put it in the Round Covered Baker because the dip is actually supposed to bake covered.  This is a great piece from the Stoneware Collection because you can do so much with it: bake chicken, microwave a delicious risotto, and more.  To finish the dip, bake it, top it with garnish, and serve to friends!  Oh, and get ready to share the recipe!  Enjoy!


Like the products you saw used?
Shop Online 24/7 at pamperedchef.biz/jennylyn
E-mail me: chefjennylyn[at]gmail.com
Call me up: (205) 585-2464


Friday, February 14, 2014

Easy Brussels Sprouts


I have really curbed my impulse purchasing at the grocery store, but I recently bought something I hadn't planned, and I honestly don't know what I was thinking.  That something was a one-pound bag of Brussels sprouts, a vegetable I knew I hated.  There was one time I actually enjoyed these with a meal, and I guess that memory was in the back of my mind when these guys found their way into my cart.  But really - I think I was just feeling kind of fat.

Easy Brussels Sprouts
chefjennylyn.com

1 1/2 pounds Brussels sprouts
3 tbsp. olive oil
3/4 tsp. kosher salt
1/2 tsp. freshly ground pepper

Preheat oven to 400 degrees.
Cut off brown ends of Brussels sprouts, and remove any yellow leaves.  Mix all ingredients in a bowl, and place Brussels sprouts in an oven-proof dish.  Bake 35-45 minutes or until browned and crispy on the outside and tender on the inside.  Shake the pan every now and then to ensure even browning.


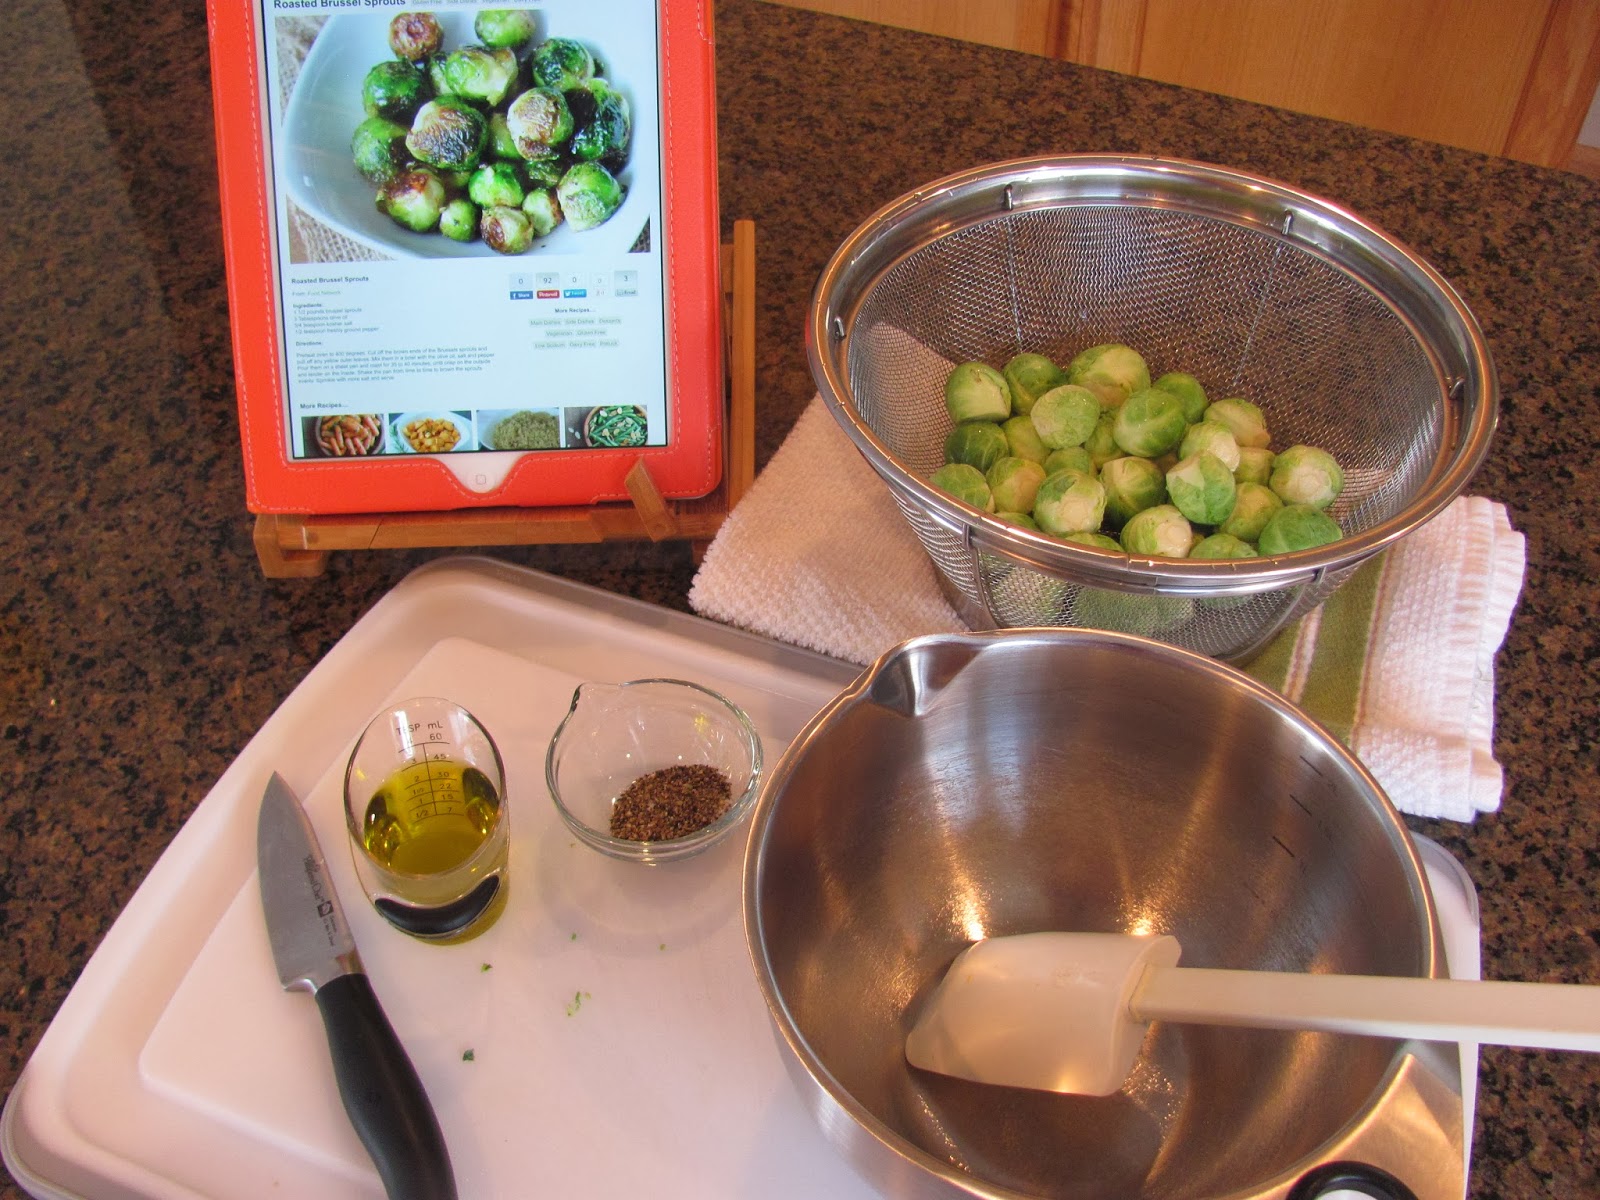
This is a sneak peek at something coming in March - the Bamboo Tablet Stand.  I'm so excited about this item because my current cookbook stand is too big for my iPad, a recipe card, or a single sheet of paper.  Besides, this new stand is gorgeous!  Hats off to the Pampered Chef for hitting us with yet another awesome product!

Moving on - This may be the easiest recipe you'll ever prepare in your life because it's salt, pepper, olive oil - stir, bake.  Do things get any simpler than that?  I have my oil in the Mini Easy Read Measuring cup, and my salt is in an Adjustable Measuring Spoon.  The recipe calls for 3/4 tsp., and guess what?  This spoon adjusts among all of those weird incremental measurements!  I'll mix my salt and pepper in this Pinch Bowl, and of course my Bamboo Grinder Set is poised and ready for action.  There's no pepper like freshly ground pepper, people!


I'm using the Large Cutting Board and the 3 1/2" Paring Knife from the Forged Cutlery Collection to prep my sprouts.  Just cut off the little ends, and the outside leaves will come right off.


Once everything is prepped and ready, you just mix it together!  My prepped, rinsed sprouts are in a Stainless Mesh Colander, and I'll add everything together in a Stainless Mixing Bowl.


I'm sorry all the pictures look a lot alike, but that's what happens when you have four ingredients and oh, I don't know... two steps?  I'm using the Small Mix 'n Scraper to stir the Brussels sprouts, and my Mini Baker is ready to be used.  This is one of my favorite pieces from the Stoneware Collection because it's so versatile!  I use it for dips, etc., but it also holds a good amount when you're making vegetables on the side.  And the results?  Just look at the first picture!

Enjoy your Brussels sprouts tonight!

Like the products you saw used?
Shop Online 24/7 at pamperedchef.biz/jennylyn
E-mail me: chefjennylyn[at]gmail.com
Call me up: (205) 585-2464

Saturday, February 8, 2014

Roasted Broccoli


Roasted Broccoli with Pampered Chef Rub
chefjennylyn.com


Broccoli
Olive oil
Pampered Chef Rub (I used Garlic & Herb)

Preheat oven to 425 degrees.
Cut broccoli crowns from stalks, and rinse thoroughly.  Toss with olive oil and Pampered Chef Rub.
Spread broccoli on Medium Bar Pan, and bake 15 minutes or until crisp-tender.


I often tell people how good the Pampered Chef rubs are on vegetables, but I think it will be helpful to show exactly what I do.  First, choose which Rub you'd like to use.  I'm doing steak with a mushroom fettuccini, so Garlic & Herb seems more appropriate than, say, Buffalo.  Behind my bottle, you can see that I used the 5" Santoku Knife from the Forged Cutlery Collection and the Large Cutting Board to prep my broccoli.


I rinsed the broccoli in a Stainless Mesh Colander and tossed it with my Rub and olive oil in a Stainless Mixing Bowl.  This took place at approximately 6:20 p.m.


I got the perfect amount for the Medium Bar Pan, one of my favorite pieces in the Stoneware Collection.


15 minutes later, I had perfectly crisp-tender broccoli with excellent flavor.  When you're doing a couple of recipes that do take thought, it's great to have a healthy side that just goes in the oven without any measurements, etc.  That's the beauty of the Pampered Chef Rubs - all of the measuring is done for you!  My pan is on the Cooling Rack, and I have a Large Serving Spatula to dish it up.

Here are the other recipes in the picture:
Creamy Mushroom Fettuccini
Filet Mignon with Chive-Horseradish Butter


Like the products you saw used?
Shop Online 24/7 at pamperedchef.biz/jennylyn
E-mail me: chefjennylyn[at]gmail.com
Call me up: (205) 585-2464


Thursday, November 14, 2013

Lighter Philly Cheesesteaks

 
I have a weakness for hot sandwiches, especially when it's cold outside.  There's something so comforting about bread, meat, cheese, vegetables, and more cheese.  When I found this recipe for lightened up cheesesteaks, I knew it was a must-try.  Sure enough, the sandwiches were great, and I knew I'd be making them again.  I promised myself that when I did, I'd take pictures to share with you!  If you're looking for warm comfort food that doesn't leave you feeling heavy and gross, here you go.  Happy cold weather, everyone!
 
Lighter Philly Cheesesteaks
chefjennylyn.com
 
1 flank steak, trimmed (12 oz.)
1/4 tsp. kosher salt
1/4 tsp. freshly ground pepper
8 oz. sliced mushrooms
2 tsp. olive oil, divided
1 cup thinly sliced onion
1 1/2 cups thinly sliced green bell pepper
2 garlic cloves, pressed
1/2 tsp. Worcestershire sauce
1/2 tsp. lower-sodium soy sauce
4 hoagie rolls
Reduced-fat Provolone cheese slices
 
Thinly slice beef across the grain.  Sprinkle with salt and pepper.
Heat a large nonstick skillet over medium-high heat.  Add 1 tsp. olive oil to pan, and sauté beef 2 minutes or until it loses its pink color, stirring constantly.
Remove beef from pan, and cover to keep warm.
Add remaining 1 tsp. oil to pan.  Add onion, and sauté 3 minutes.  Add mushrooms, bell pepper, and garlic.  Sauté 6 minutes.
Return beef to pan with vegetables, and sauté until everything is thoroughly heated, and vegetables are tender.  Remove from heat, and stir in Worcestershire and soy sauces. 
Hollow out the top and bottom halves of bread, leaving a 1/2-inch-thick shell.  Fill with a serving of beef mixture, and top with cheese.  Place under oven broiler until cheese melts.
 

The onion slicing method: Half whole onion.  Cut off bottom, but keep the fuzzy end.  Slice onion vertically.  Cut off the fuzzy end.  Hello, beautiful slices you didn't chase all over the cutting board.  Speaking of that, this is my Large Cutting Board, and that's my 5" Santoku Knife from the Forged Cutlery Collection.  Power team, if you will.

When I've got ingredients going in a recipe at the same time, I like having them in the same bowl.  I rinsed my mushrooms in the smallest of my Stainless Colanders, and I put that in the 2-Qt. Stainless Mixing Bowl.  Then I added my bell peppers once they were sliced, and I'm pressing my garlic directly on top.  No peeling with the Pampered Chef Garlic Press!


To make slicing the beef easier, place in in the freezer fifteen minutes before you're ready for it.  Just stick it in there before you get your other ingredients out and prepped, and you'll be ready for it at the perfect time.  Those few minutes will make a big difference when you're trying to get thin slices.  Again, Large Cutting Board and 5" Santoku Knife.


Last step: Sauces.  The Pinch Bowls are so great for things like this because they've got little pour spouts on them.  (Rabbit chase: The lids for these bowls are just so cute with their little beak looking things that fit around the pour spouts!)  I'm using a spoon from the Measuring Spoon Set, and I'm putting both sauces together at the same time since they'll be added in one step.


Everything is prepped and ready to go, so this is going to be super simple to cook.  Beef is on the Large Cutting Board, sauces are in a Pinch Bowl, mushrooms, peppers, and garlic are in the Small Stainless Colander, onion is in a 2-Cup Prep Bowl, and olive oil is in the Dripless Oil Bottle.


I love the Dripless Oil Bottle because it truly is impossible to drip with it.  The pour is manageable, so you don't have to worry about accidentally dumping 1/4 of oil in your pan when you were aiming for a teaspoon.  This is the 10" Skillet from the Executive Cookware Collection, and it's my go-to pan for most things.  The size is awesome, and the sides are tall enough to keep things from flying when I get crazy stirring.


Bamboo Pepper Grinder!  Freshly ground salt and pepper will make a huge difference in the flavor of your food, and I love these grinders because you can see exactly how much you have left.  Notice I really need to refill this one...


Get those onions in there after the beef, and let them sweat a few minutes before adding peppers and mushrooms.


It just makes me happy to have a skillet full of beautiful vegetables with very little oil.  That's another benefit of the Executive Cookware, one that directly impacts your health.  Less oil and butter because you're not using it to keep your food from sticking to the pan.


Alright - here we go!  I'm slicing a hoagie roll on the Cutting Board (not my favorite large since it just had beef on it), and I'm using the Bread Knife from the Forged Cutlery Collection.  Let me just tell you that you don't know what you're missing by not having a bread knife until you get one.  Then it's kind of like, "Wow - I don't mind slicing loaves of French bread anymore!"  Once you've sliced almost but not all the way through your bread, hollow it out.  Trust me - lots of calories saved here!  (Put the inside bread in the freezer for bread crumbs. Pulse frozen bread through your food processor, and stop buying bread crumbs at the store.)


This is on the Medium Bar Pan, and it's about to become crazy delicious!  About a minute under the broiler, and I've got a sandwich that looks and tastes like $7.00.

One thing I really like about this recipe is that you can just make one sandwich at a time.  Since I work from home, it's nice to have things in my arsenal that are simple, delicious, and produce leftovers for another day.  Score!

Like the products you saw used?
Shop Online 24/7 at pamperedchef.biz/jennylyn
E-mail me: chefjennylyn[at]gmail.com
Call me up: (205) 585-2464