Thursday, May 29, 2014

Grilled Steak Kabobs


Do you remember a couple of posts ago when I made chicken kabobs?  Do you remember how it was mid-April, and my plan was derailed by a snowstorm?  Yeah, I do, too.  Anyway, my husband and I had our FPU friends over for a second "Family Dinner" last night, and we served a new kabob recipe - one that turned out to be amazing!  Guess what?  We even got to cook them outside this time!  Buckle up, my sweeties.  You're going to want steak kabobs tonight.

Grilled Steak Kabobs
chefjennylyn.com

2 tsp. salt
2 tsp. sugar
2-3 lemons, trimmed and sliced into rounds
2/3 cup extra virgin olive oil
1/4 cup grainy mustard
2 tbsp. balsamic vinegar
2 1/4 lb. sirloin steak, but into 1-inch cubes
2 pints grape or cherry tomatoes
8 scallions, white portions only, cut into 1-inch pieces

In a small bowl, mix salt and sugar.  Toss with lemon slices, and let stand one hour.

In a large bowl, whisk together olive oil, mustard, and vinegar.  Transfer one-third of the marinade to a medium bowl.  Marinate beef in remaining marinade, and add tomatoes and scallions to the medium bowl.  Refrigerate for at least one hour.

Thread eight skewers using this pattern:
Beef cube - lemon slice - tomato - beef cube - scallion piece - tomato.

Season kabobs with extra salt and pepper if desired, and grill on medium-high heat for 8-10 minutes, turning occasionally.  (This cooking time is for medium-rare.)

Note: I used a Rachael Ray recipe that I tore out of a magazine a few years ago.  The recipe above is hers doubled with a few tweaks.  She didn't pay me to make her stuff, but that'd be sweet.


Let's start with something very important.  My in-laws grew these green onions.  That means this recipe is made with an extra dose of love, one you won't find just anywhere.  (I married well, right?)

I'm one for getting everything out at the same time.  The ingredients, the tools, everything.  This prevents fumbling around and wasting valuable minutes.  I've got Batter bowls, a Measure-All Cup, a Pinch Bowl, the Stainless Whisk, the Small Mix 'n Scraper, and a Large Cutting Board out and ready to go.


What makes the Measuring Spoon Set so awesome?  Besides the classic design that won't go out of style, the fact that they snap together for easy storage, and the standard and metric measurements, I'd say the way they fit inside spice bottles.  These small conveniences make a big difference when you're in the nitty-gritty of cooking and baking.


Having good knives in your kitchen is important, especially when you want to get solid, uniform slices of lemon.  The Forged Cutlery Collection will blow your mind!  This is the 5" Santoku, my favorite piece.


Meaure-All Cup!  I've shown this many times, but you press it down to the measurement you want, fill it with whatever is gross or inconvenient to measure (mustard, mayonnaise, peanut butter, honey, etc.), and pop it out.  There's no mess, and you're guaranteed to get every bit of the ingredient out of the cup.  I'm measuring into the Classic Batter Bowl, and my oil and vinegar are hanging out in Easy Read Measuring Cups.


I love kabobs.  I love grilling season.  I love the slicing and dicing and the bright, beautiful colors.  Are you with me?


My lemons and beef are in Stainless Mixing Bowls, and I have tomatoes and scallions in the Classic Batter Bowl.  The Small Mix 'n Scraper is being used to toss everything.


Skewering kabobs takes patience, but it's pretty fun if you have the right playlist, beautiful vegetables, and the Pampered Chef BBQ Skewer Set.  Seriously, these things are amazing!  They have tips pointed just enough to aid in stabbing but not so sharp that people are going to get hurt eating dinner.  The stainless steel means heat throughout the meat, resulting in a faster cooking time.  Then there's the sheer length for adult portions.  Honest moment: I don't want a six-inch kabob.


I'm using the BBQ Corn & Skewer Rack, and that's the BBQ Grill Tray underneath.  I know it's weird, but the tray was already on the grill from peppers, and I figured it wouldn't hurt anything to just set the rack on top.  I was right.  And the BBQ Tongs?  Amazing.  (One note: You may see that I did a couple of kabobs with onions.  That's because I ran out of lemons and improvised.)


What a wonderful night with friends!  Kabobs, Take 2 = Success!


Like the products used?
Shop Online 24/7 at pamperedchef.biz/jennylyn
E-mail me: chefjennylyn[at]gmail.com
Call me up: (205) 585-2464


Tuesday, May 27, 2014

Mile-High Strawberry Pie


This really happened!  Our friends Paul and Jenn had us over for Memorial Day dinner outside, and their table really was this beautiful!  Wouldn't you think it was straight out of a magazine?  I mean, Jenn knocked this thing out of the park, and it made me glad I brought my pie in a true presentation piece instead of a foil pan.  Yowsa!

When I knew I was leaving Alabama, I knew I'd be leaving my grandmother's stash of Southern Living magazines behind.  What did that mean?  I needed to become a subscriber myself.  You know, grow up, pay for the publication instead of mooching off your grandmother with her old copies, that sort of thing.  I now enjoy getting my little bit of South in the mail every few weeks, but I have to admit that I read very little.  Instead, I skip to the recipe section and rip out everything I want to make.  These mini pies were in the April issue, and I had a feeling they'd make it to my Memorial Day table.  I was correct, but I moved to the Mega Strawberry Pie version at the last minute when I ran out of time.  The result was a huge, delicious strawberry dessert that I'll be sure to repeat sometime.  For now, let me share it with you. 

Mile-High Mini Strawberry Pie
chefjennylyn.com

Pastry Crusts
1/4 cup powdered sugar
2 (14.1-oz.) packages refrigerated piecrusts
Creamy Lemon Filling
1 1/2 (8-oz.) packages cream cheese, softened                            
1 tablespoon sour cream                               
1/2 cup granulated sugar                             
2 teaspoons lemon zest                              
1 tablespoon fresh lemon juice                

Strawberry Topping
1 1/2 cups coarsely chopped fresh strawberries                
1 cup granulated sugar                
2 tablespoons cornstarch                               
1 tablespoon butter
10 cup hulled fresh strawberries                       

Vanilla Cream
1 cup heavy cream
1/4 teaspoon vanilla extract                
3 tablespoons powdered sugar                

1. Prepare Crust: Preheat oven to 425°. Sprinkle work surface with 1 Tbsp. powdered sugar. Roll 1 piecrust into a 12 1/2-inch circle on surface, and cut into 3 (6-inch) rounds. Repeat with remaining 3 piecrusts and 3 Tbsp. powdered sugar to make 12 rounds. Fit 6 rounds, sugar sides down, into each mold of a 6-cavity mini pie pan; fold edges under, and crimp. Prick bottom and sides with a fork. Chill remaining 6 rounds.

2. Bake at 425° for 8 minutes or until golden brown. Cool on a wire rack 5 minutes. Remove crusts from pan to wire rack, and cool completely. Cool pan completely. Repeat procedure with remaining 6 piecrust rounds.

3. Prepare Creamy Lemon Filling: Beat cream cheese and sour cream at medium speed with an electric mixer until smooth. Add 1/2 cup granulated sugar and next 2 ingredients; beat until smooth and fluffy. Spread about 2 1/2 Tbsp. filling into each cooled piecrust; cover with plastic wrap, and chill until ready to serve (up to 24 hours).

4. Prepare Strawberry Topping: Process 1 1/2 cups chopped strawberries in a blender or food processor until smooth, and press through a wire-mesh strainer into a 3-qt. saucepan, using back of a spoon to squeeze out juice; discard pulp. Stir 1 cup granulated sugar into juice in pan.

5. Whisk together cornstarch and 1/4 cup water; gradually whisk cornstarch mixture into strawberry mixture. Bring to a boil over medium heat, and cook, whisking constantly, 1 minute. Remove from heat, and whisk in butter. Cool 15 minutes.

6. Toss together strawberry mixture and 10 cups hulled strawberries gently in a large bowl until coated. (Halve some berries; leave others whole.) Cover; chill 3 hours or until cold.

7. Prepare Vanilla Cream: Beat heavy cream and vanilla at medium-high speed until foamy; gradually add powdered sugar, beating until soft peaks form.

8. Spoon about 1/2 cup Strawberry Topping into each pie; top with Vanilla Cream. Serve immediately.

Mega Strawberry Pie: Preheat oven to 425°. Reduce 1/4 cup powdered sugar to 2 Tbsp. and piecrusts to 1/2 (14.1-oz.) package. Sprinkle surface with 2 Tbsp. powdered sugar. Roll 1 piecrust into an 11-inch circle on prepared surface. Fit piecrust, sugar side down, in a 9-inch pie plate; fold edges under, and crimp. Prick bottom and sides with a fork. Bake 10 minutes or until golden. Cool completely on a wire rack. Proceed with recipe as directed in Steps 3 through 8, spooning all of Creamy Lemon Filling into prepared crust, and topping with all of Strawberry Topping and Vanilla Cream. Makes 8 to 10 servings Hands-on 40 min.; Total 4 hours, 50 min.

This recipe is from Southern Living.  If you subscribe, you won't regret it.


There are few things that make me smile like a huge colander full of perfect strawberries.  Add the fact that said berries were on sale, and I'll downright beam.  Take it in, friends... just take. it. in.


The best thing to do on a recipe with several steps is simply to get everything out and dive in.  Strawberries are washed and drained in a Stainless Mesh Colander.  I have scrapers, the Measuring Cup Set, the Measuring Spoon Set, and the Large Grooved Cutting Board ready to go.  My bottle of water also wandered into this shot because hydration is important.  Yeah... that.


I adore the Microplane Zester.  This is a size made specifically for the Pampered Chef, and let me just tell you that it's amazing!  I can get my zest right into my Pinch Bowl with this, and I don't have anything going willy-nilly on me.  I have other ingredients measured into a cup and spoons beside me.


Ok, so my lemon was massive.  It was so large that I cut the ends off to maximize my juice when I put it in the Citrus Press.  Since the juice and zest are going in the recipe at the same time, I put both in the same Pinch Bowl.


Why do the Pinch Bowls have pour spouts?  Because pouring an ingredient into a stand mixer on medium speed is no time to make a mess.  It's the little things.


Settle in because it takes a while to chop cups upon cups of strawberries.  The good news is that you can make it a lot more fun by using an awesome knife that doesn't require sawing.  My go-to for berries, grapes, and other small items is the 3 1/2" Paring Knife from the Forged Cutlery Collection.  More on that in a bit.


We have to make a strawberry puree.  Enter: Manual Food Processor.


A few presses on the lever, and you're done.  Just take the blade out, and use the base as your bowl.


This is a case where it's soooo nice to have the right tool for the job!  I'm using the 5" Strainer, which has a double-fine mesh design, over a 3-Quart Saucepan from the Executive Cookware Collection.  Notice that my strainer has a lip that hugs my pan so I can be hands-free.  Also notice that the lip is covered in silicone to avoid scratching my cookware's surface.  Have I told you how much I love Pampered Chef products?  14 years in the business, and these things still excite me!  That's the Mini Mix 'n Scraper that I'm using to strain the puree. 


A 2-Cup Prep Bowl and the Stainless Mini Whisk pair perfectly for the cornstarch concoction.  I've got a 1-Cup Prep Bowl there with the strawberry pulp my recipe told me to discard.  I interpreted that as, "Save pulp for your next smoothie."


Dicing strawberries is serious business.  Here's my method: Cut tops off all berries.  Quarter berries.  Go back through tops, using stems as handles, and cut off usable parts.  Most people don't do this last part, but if you've got a good knife, it doesn't take long, and in the case of this pie, I was able to yield an extra cup of berries.  Another option is to just core all of the berries before slicing them, but I've found that I just like doing the whole job with my 3 1/2" Paring Knife.  Love this thing!


My berries are in a Stainless Mixing Bowl, and I'm pouring the cooked liquid from the 3-Qt. Saucepan.  Notice the Stainless/Silicone Sauce Whisk in the background.  With that, I was able to whisk the mixture without scratching my pan.  Next, I'll gently toss the whole deal with the Mix 'n Scraper.


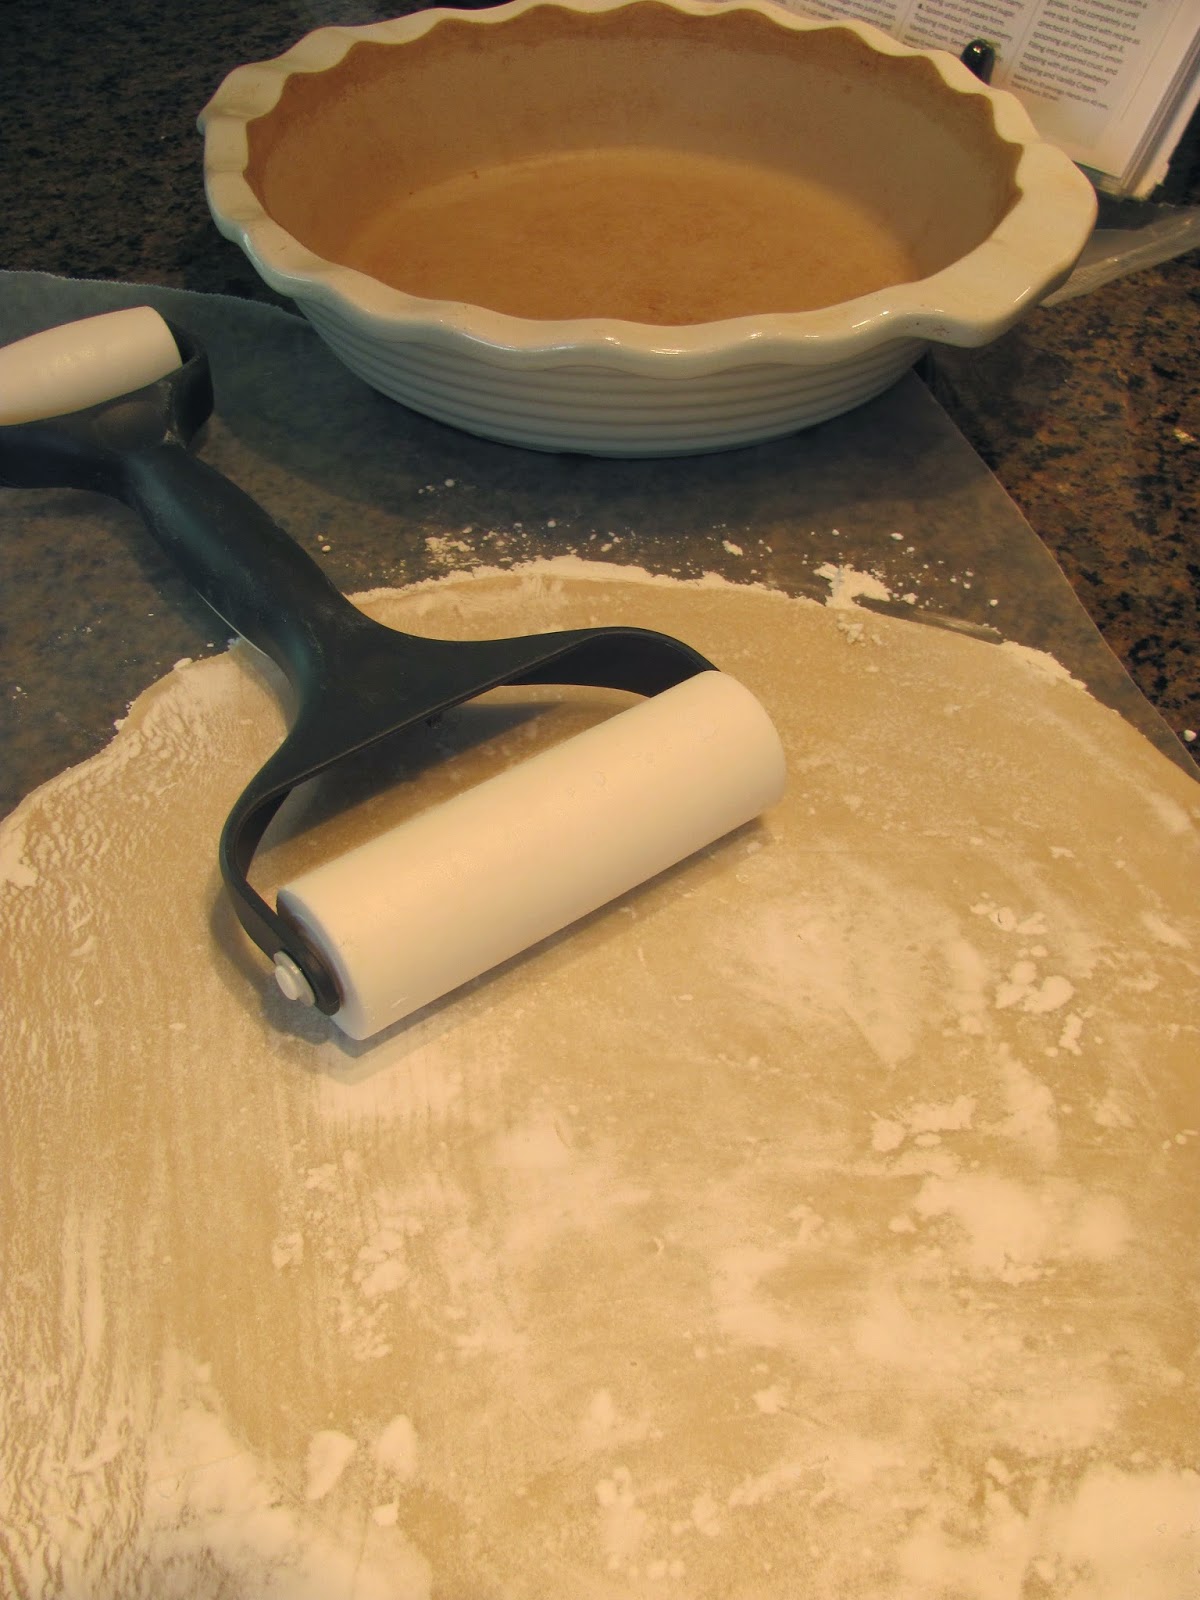
It's time for the Deep Dish Pie Plate from the Stoneware Collection! I love, love, love this piece!  I use it for pies and quiches, but I also do side dishes in it because it's so deep and makes a beautiful presentation.  Stoneware heats evenly throughout, so I don't ever have to worry about scorching in here.  That's a good thing when your finished product is going to your friends' house for a holiday meal.  You can see that I used my Baker's Roller to roll out my pie crust.  Then there's a pokey tool that clips inside the handle to poke holes in the crust before baking.


Ok, so all of the parts are ready and cooled or refrigerated, so now it's just about the assembly.  Oh, and the licking of the bowls.  That's an important step, too... Anyway, my cream and strawberries are in Stainless Mixing Bowls, and my lemon cream is in the stand mixer bowl.  Each has a Mix 'n Scraper, Mini Mix 'n Scraper, or Classic Scraper inside.  Ok, take a deep breath, and...


Happy Memorial Day, and happy dessert making all summer long, friends!


Like the products used?
Shop Online 24/7 at pamperedchef.biz/jennylyn
E-mail me: chefjennylyn[at]gmail.com
Call me up: (205) 585-2464


Thursday, April 17, 2014

Chicken Kabobs... and Plan B


My husband and I recently completed Dave Ramsey's Financial Peace University through our church, and we met some fun friends in the process.  (Side note: The course is worth it for the lessons on insurance and investing alone.)  Last night we had the two couples with whom we were paired for the course over for dinner, and it was awesome!  The plan was to grill, and what a great plan it was!  Then our grill got buried in white stuff.  That's right- April 16th, and a sudden snow.  Welcome to Minnesota.  Fortunately, we had a Plan B: The Pampered Chef Double Burner Grill Pan!  Read on to see how completely salvaged our menu!

Chicken Kabob Marinade
chefjennylyn.com

1 pack Italian salad dressing mix
3 tbsp. olive oil
1/4 cup vinegar
1/2 cup water
1 tsp. freshly ground pepper
1 tsp. pressed garlic
1 tbsp. honey

Whisk all ingredients together, and marinate meat and vegetables a minimum of 3 hours.  (Overnight is great.) 

Intended ratio: 1 lb. chicken / 5 different vegetables / 1 recipe marinade

Note: My meat/vegetable-to-marinade ratio was way off, so I think I ended up with something a lot milder than intended.  I didn't realize it until I was already marinating everything.  Oh, well. 


As always, everything is measured before adding it to the Stainless Mixing Bowl.  I'm using a Measuring Spoon, a Measuring Cup, the Easy Read Mini Measuring Cup, an Easy Read Measuring Cup, and the Garlic Press.  That's the Large Cutting Board, as always.  Then I'll whisk everything with the Stainless Whisk, one of my favorite tools ever!


You know what I love?  Beautiful vegetables.  My mushrooms are in a Stainless Mesh Colander, and you can see the Bamboo Grinder Set ready to go.  How about being able to tell when you're almost out of salt or pepper before, well, you're out of salt or pepper?


Tip: If you're only using half of your bell pepper, leave the seed bulb intact in the reserved half.  It makes it last longer.  Background: 5" Santoku Knife from the Forged Cutlery Collection.  Best.  Knife.  Ever.


Does it not just make you happy to see your healthy dinner coming together?  Veggies are in a Stainless Mixing Bowl with a Mix 'n Scraper, and chicken is in the Classic Batter Bowl with a second Mix 'n Scraper.  Marinate away, delicious food!


Whoa - I stirred in a pound of mushrooms.  Things just got real.


This was the point when I realized the snow wasn't stopping, and I might not be able to get to the grill by the time I needed to cook.  Can you see how hard it's coming down out the window?  Can you see that my grill is already covered?  Yep.


The BBQ Skewer Set comes with four skewers, and they're loooong.  As in, "Thank you, Stoneware Bar Pan for being awesome" long.  I made sure six skewers would fit, and then I portioned my chicken where the Large Cutting Board's well could catch any juices.  P.S. Those are food handling gloves.  So handy for jobs like skewering raw chicken!


These look good!  I put them in the oven and used the broiler for about 15 minutes.  Then I finished them in the Grill Pan because I wanted grilled kabobs.


The Double Burner Grill Pan and a set of Chef's Tongs will be your best friends if you want the grilling experience minus the grill.  Live in an apartment where you're not allowed to have one on your deck?  Problem solved.


I grilled vegetables, too!  My plan was to do these on the Grill Tray out back, but this worked and made the house smell delicious.


Then the corn.  Like the chicken, I started it in the broiler and finished it in the Grill Pan.


Have I told you grilled corn is one of my favorite foods?  It is.


I love, love, love having friends over for dinner parties!  Maybe if I'm super nice to her, Bekah will let me share the recipe for the amazing beer bread she and Jason brought.  The stuff was addictive!


Good times with good friends! Now my heart is all warm and fuzzy, and I need to get the next dinner on the calendar!

 
That's me with the kabob.  I think I was giddy that I didn't ruin dinner due to completely switching gears at the last minute.  How cool is it that my husband will still pose with me when I'm cradling a stinking chicken kabob?  He's the best!

Happy grilling, be it indoor, outdoor, or anything in between!
 
 
Like the products used?
Shop Online 24/7 at pamperedchef.biz/jennylyn
E-mail me: chefjennylyn[at]gmail.com
Call me up: (205) 585-2464


Tuesday, April 15, 2014

Blue Cheese Coleslaw


Guess what?  I hate blue cheese.  Guess what else?  I love this coleslaw.  I don't know how that happens, but I'm pretty sure this is one of my favorite side dishes now.  When my brother and his family moved from Memphis to Birmingham, I started eating at their house a good bit.  I mean, I was single, and I wasn't cooking a whole lot.  Then there was my sister-in-law Shannon and her knack for finding good recipes, so why would I ever turn down an invitation?  (Of course my adorable niece and nephews had nothing to do with my being there so much...)  One meal in particular blew my mind: beef brisket with homemade bbq sauce, some kind of salad, and blue cheese coleslaw.  I don't know - maybe I was just really hungry that night, but yeah, I went pretty nuts on everything.  When my husband and I recently accepted a dinner invitation that involved grilling burgers, I knew the time was right to try my own hand at Shannon's masterpiece.

Blue Cheese Coleslaw
chefjennylyn.com

2 pounds cabbage, shredded (I used coleslaw mix.)
8 oz. blue cheese, crumbled
1/2 cup apple cider vinegar
1/4 tsp. dry mustard
1 1/2 tsp. celery seeds
2 cloves garlic, minced
1/2 tsp. salt
Pepper to taste
2 tbsp. sugar
1/4 cup minced onion
3/4 cup vegetable oil

In a large bowl, toss cabbage and blue cheese together.  Chill one hour.
Whisk remaining ingredients in a separate bowl.  Chill one hour.
Toss together just before serving.
Serves 8-10

Note: I cut the recipe in half to serve 4-5.
Shannon got this recipe from Treebeards, a restaurant she enjoys.


The original recipe serves 8-10, but I decided to cut that in half.  What happens when you want half of 1 1/2 teaspoons of celery seed?  The Adjustable Measuring Spoon does 3/4 tsp.!  How awesome is that?  The above ingredients are organized on the Cutting Board using the Scoop 'n Measure, Measuring Spoons, an Adjustable Measuring Spoon, and an Easy Read Measuring Cup.  I always do this before adding anything to a mixing bowl because I can avoid this scenario: Add a few things.  Phone rings.  Answer.  Don't remember if I already added the sugar/salt/etc.  When it's all right in front of you, you're less likely to make mistakes.


Again, cutting the recipe in half, I ended up with an awkward measurement.  I needed half of 3/4 cup of oil.  Guess what?  This Easy Read Measuring Cup shows that 3/4 cup is 6 oz., so I can just measure to... 3 oz. It's the little things!


This never gets old.  If you don't have the Garlic Press, stop what you're doing, call me, and order one.  You don't have to peel the garlic!


Cabbage mixture + blue cheese = Get ready for awesome!


The cabbage/blue cheese mixture is in the Medium Stainless Mixing Bowl, and everything else is whisked in the Small Stainless Mixing Bowl.  I used a Bamboo Spatula and the Mini Stainless Whisk to get these mixed to perfection.


This is a beautiful, refreshing, adult side dish that you can be proud to take to your next gathering.  The fact that it's insanely easy to put together is just a bonus.  Let me know if you make it!

Like the products used?
Shop Online 24/7 at pamperedchef.biz/jennylyn
E-mail me: chefjennylyn[at]gmail.com
Call me up: (205) 585-2464


Wednesday, March 26, 2014

S'more Cake


If this recipe title made you think of The Sandlot, I consider you an immediate friend.  If not, all I can say is, "You're killing me, Smalls!"  Moving on...

If you're having people over or you're supposed to take a dessert to a function, do you assume baking a pan of boxed brownies or maybe a sheet of slice 'n bake cookies are your two quickest "I made these myself!" options?  If so, you're WRONG!  This cake is absolutely faster than either of those, and if you think I'm nuts for saying that, I totally understand.  I'd been hearing rumors from other Pampered Chef consultants that this cake was amazingly easy and that it only took a few minutes, but I somehow never got around to making it.  That's embarrassing.  Anyway, I tried it for the first time the other night (in front of my show host and her guests, mind you), and I was blown away!  There is no measuring.  There is no pre-heating the oven (Use the broiler for less than a minute.).  There is no mixer.  There is no waiting for anything to cool so that it can be dipped off of or out of a burning hot pan and displayed appropriately.  Read on to find out why I will always have the ingredients for this ridiculously easy cake on hand.

S'more Cake
chefjennylyn.com

3 Hershey bars, broken into pieces
1 small package (9 oz.) devil's food cake mix
     (Use 1 2/3 cups of a standard box if you can't find the small size.)
1 egg
1 8-oz container sour cream
1 bag regular marshmallows or 4 cups mini-marshmallows
3 whole graham crackers, coarsely crushed

Place oven rack in the center of the oven.  Turn on the broiler.

Microwave chocolate in 2-cup Prep Bowl 30-60 seconds or until mostly melted.  Stir until smooth, and set aside.  (I start at 40 seconds, stir, and go 10 more seconds.)

Combine cake mix, egg, and sour cream, and stir until blended.  Pour batter into Rockcrok.

Microwave, covered, on HIGH 4-5 minutes or until center of cake is firm and springs back when pressed.

Remove pan from microwave, arrange marshmallows in an even layer over cake, and broil 30-60 seconds or until marshmallows are golden brown.

Remove cake from broiler, sprinkle with graham crackers, and top with chocolate.

*** Milk warning: You'll need a glass.


See these ingredients?  They're all you'll need for this cake.  Seriously.  Cake mix is in a Stainless Mixing Bowl, and the Rockcrock (2.5-qt.) is sitting there with the marshmallows and Mix 'n Scraper.  Notice the marshmallows are closed with a Twixit! Clip... 14 years as a consultant, and I still get excited about the stinking bag clips.  The egg and chocolate are in 1 and 2-Cup Prep Bowls, and that's the Large Cutting Board underneath.


This batter will be thick, and it won't seem like there's a whole lot of it.  Just trust the recipe, and get ready for this to rise into a delicious base layer for the s'more deliciousness you're after.  The Rockcrok here is the 2.5-Qt. Everyday Pan, but there's also a 4-Qt. Dutch Oven if you're looking for something a little bigger.  These things are awesome!  They go in the microwave, the oven, the freezer, and on the grill!  Did you catch that?  These are your new pans for recipes that start on the stove, move to the oven, and finish on the grill.  (You have a ton of those in your recipe box, right?)


Arrange your marshmallows, and put them under the broiler until they're golden, puffy, and crazy delicious.  Trust me when I say you'll never get marshmallow results like this over a fire.  That's fun and all, but for every one good marshmallow, you get ten that are either charred or in the fire... and extra charred.


I'm sorry for the lack of pictures, but there's just not a lot to show.  I mean, you top with the graham crackers, drizzle the chocolate over the top, and you're done.  Then you can even cover with the Rockcrok lid for easy transport! 

Let me know when you make this... and you're welcome.

Like the products you saw used?
Shop Online 24/7 at pamperedchef.biz/jennylyn
E-mail me: chefjennylyn[at]gmail.com
Call me up: (205) 585-2464