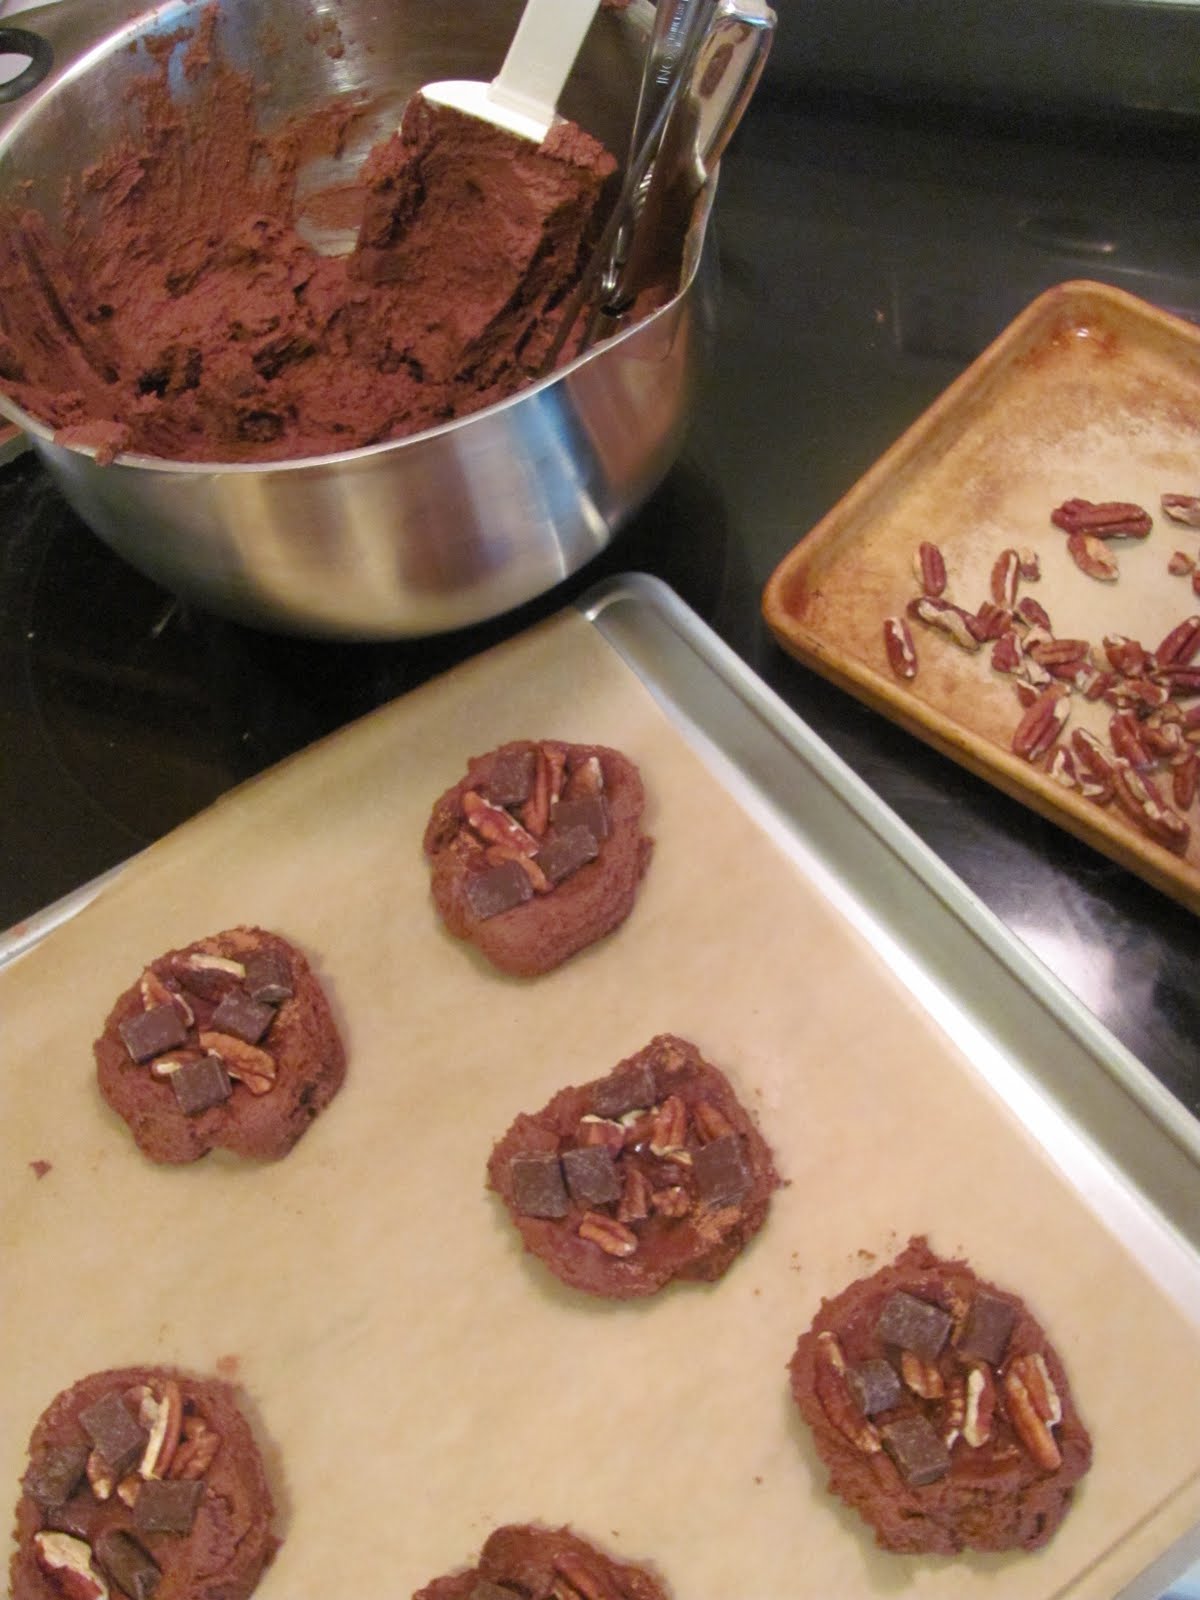
Showing posts with label cookie sheet. Show all posts

Monday, March 26, 2012

Strawberry Shortcake Cookies

Hi, it's me - Jenny. Remember me? You know, the girl who used to be pretty consistent with this blog and then fell off the face of the earth? All I know is that when a blogger I follow goes MIA for no less than five months, I won't assume she has lost interest. Instead, I'll say, "Well, maybe her sister got married, and then she wrecked her car, and then she was Thanksgivinged, and then she moved, and then Christmas came, and then she had to ring in the New Year, and then she needed the entire month of January to get her head on straight again, and then she got ridiculously lazy in February and March because so many huge events took place the previous months, and she finally got a wake-up call and realized her blog was boasting pumpkin desserts two weeks before Easter." Yes, that's definitely the assumption I'll make in the future.

Shall we move on to the cookies? This recipe came from Amandeleine, one of the many blogs I follow-ish. Much thanks to Amanda, the chef behind the scenes, for a huge win!


Strawberry Shortcake Cookies
chefjennylyn.com

12 ounces strawberries, hulled and cut into 1/4-inch dice (2 cups)
1 teaspoon fresh lemon juice
1/2 cup plus 2 tablespoons granulated sugar
2 cups all-purpose flour
2 teaspoons baking powder
1/2 teaspoon coarse salt
3 ounces (6 tablespoons) cold unsalted butter, cut into small pieces
2/3 cup heavy cream
Sanding sugar, for sprinkling
3 oz. white chocolate, roughly chopped

Preheat oven to 375 degrees.

Combine strawberries, lemon juice, and 2 tablespoons granulated sugar.

Whisk together flour, baking powder, salt, and remaining 1/2 cup granulated sugar in a large bowl. Rub in butter with your fingers, until mixture resembles coarse crumbs. Stir in cream until dough starts to come together, then stir in strawberry mixture.

Using a Small Scoop or a tablespoon, drop dough onto baking sheets lined with parchment, spacing evenly apart. Sprinkle with sanding sugar, and bake until golden brown, 24 to 25 minutes. Transfer to a wire rack, and let cool.

Melt white chocolate, and drizzle over cooled cookies.

My best friend Elizabeth and I take great joy in picking strawberries in the summer. The ones pictured here are from our 2011 excursion because these cookies were made in the summer of 2011. Yes, I've had the pictures loaded that long. What can I say? Strawberry season got away from me. Now I just look like I'm ahead of the game for 2012, right? Moving on: I sliced my berries using the 5" Utility Knife from the Forged Cutlery Collection, and then I put them in the Medium Square Bowl from the Simple Additions Collection. Unfortunately, neither that bowl nor the Large Colander seen here are available any longer. Don't worry - you can still get the Large Grooved Cutting Board!

I'm in love with the Citrus Press. This thing is amazing for several reasons, but I guess its best feature is simply its ability to get all the juice out of lemons and limes. I used an Adjustable Measuring Spoon for the sugar. (P.S. Were these berries not just gorgeous?)

Ok, time to make things come together. The flour mixture is in a Stainless Mixing Bowl, and I'm cutting butter into it using the Pastry Blender. Then I've got milk, butter cubes, and a Quikut Paring Knife on the Cutting Board. The milk is in an Easy Read Measuring Cup, and all I can say is that people go nuts over these after they try these. My bowl of strawberries has been perfectly tossed using the Mini Mix 'n Scraper. Of everything here, I've been most impressed by the Pastry Blender. It's one of those things where you say, "Eh, I don't know that I need that." Then when you use it you say, "What did I do before I had this?!?"

Did you know the chunky sugar is just raw sugar? I've always seen it listed as something with a "t," and I could never find it at the store. Then I read somewhere that it was raw sugar, and the somewhere I read it was correct! Why am I telling you this? To prove that I'm not amazing in the kitchen. I'm the girl who bumbles around the grocery store going, "Well, I guess I don't get to use that special t-sugar again." Moving on: The sugar is in a Pinch Bowl, and the cookies are on Parchment Paper I've placed on a Cookie Sheet.

Big Stainless Mixing Bowl full of dough with a Medium Scoop and Mix 'n Scraper sticking out? Yes, please.

Melting chocolate is tricky, especially if you choose to do it directly on the eye. Make sure you watch it closely, and stir often. This is the 1.5-Qt. Saucepan from the Executive Cookware Collection, and I used the Skinny Scraper for stirring.

My favorite trick for chocolate, etc.: Put it in the corner of a plastic bag, and seal it with a Twixit! Clip. Then you can pipe away without making a mess.

These cookies were good. In fact, they were so good that I took home nothing but an empty plate after a friend's birthday party. And trust me - the plate had been way full. I don't know how to describe these except to say they're like strawberry shortcake in a cookie... good strawberry shortcake. Make some.

Like the products you saw used?
Shop Online 24/7 at pamperedchef.biz/jennylyn
E-mail me: chefjennylyn[at]gmail.com
Call me up: (205) 585-2464


Tuesday, October 18, 2011

Brown Butter Chocolate Chip Cookies

What should you do when you're sitting at home craving sweets but trying to resist? Work on a blog post for your favorite chocolate chip cookie recipe, of course! I made these for someone last week, and I've longed for them each day since. This recipe is from Cook's Illustrated, so that alone tells you they're worth trying. I'll leave the professionals to explain why this is technically the best recipe ever, but let me just say these cookies are game changers. I don't have a go-to chocolate chip cookie recipe because I'm one of those weirdies who bakes by mood, but if I had to choose just one to stick with from here out, this would be the one. These are rich, decadent, and worthy of gifting. I guess what I'm saying is that if you do something awesome for me, I'll bake you some fab chocolate chip cookies.


Brown Butter Chocolate Chip Cookies
chefjennylyn.com

1 3/4 cups unbleached all-purpose flour (8 3/4 ounces)
1/2 teaspoon baking soda
14 tablespoons unsalted butter (1 3/4 sticks)
1/2 cup granulated sugar (3 1/2 ounces)
3/4 cups packed dark brown sugar (5 1/4 ounces)
1 teaspoon table salt
2 teaspoons vanilla extract
1 large egg
1 large egg yolk
2 cups semisweet chocolate chips or chunks


1. Adjust oven rack to middle position and heat oven to 375 degrees. Line 2 large (18- by 12-inch) baking sheets with parchment paper. Whisk flour and baking soda together in medium bowl; set aside.

2. Heat 10 tablespoons butter in 10-inch skillet over medium-high heat until melted, about 2 minutes. Continue cooking, swirling pan constantly until butter is dark golden brown and has nutty aroma, 1 to 3 minutes. Remove skillet from heat and, using heatproof spatula, transfer browned butter to large heatproof bowl. Stir remaining 4 tablespoons butter into hot butter until completely melted.

3. Add both sugars, salt, and vanilla to bowl with butter and whisk until fully incorporated. Add egg and yolk and whisk until mixture is smooth with no sugar lumps remaining, about 30 seconds. Let mixture stand 3 minutes, then whisk for 30 seconds. Repeat process of resting and whisking 2 more times until mixture is thick, smooth, and shiny. Using rubber spatula or wooden spoon, stir in flour mixture until just combined, about 1 minute. Stir in chocolate chips and nuts (if using), giving dough final stir to ensure no flour pockets remain.

4. Divide dough into 16 portions, each about 3 tablespoons (use scoop). Arrange 2 inches apart on prepared baking sheets, 8 dough balls per sheet. (Smaller baking sheets can be used, but will require 3 batches.)

5. Bake cookies 1 tray at a time until cookies are golden brown and still puffy, and edges have begun to set but centers are still soft, 10 to 14 minutes, rotating baking sheet halfway through baking. Transfer baking sheet to wire rack; cool cookies completely before serving.

Hello, beautifully measured ingredients! Brown sugar, could you get your act together and avoid spilling on the Cutting Board? You're embarrassing. Ok, so here's the rundown on what I'm using: Measuring Cup Set, Easy Read Measuring Cups, Measuring Spoon Set, Pinch Bowls, 1-Cup Prep Bowls, Stainless Mixing Bowls, Stainless Whisk, 10" Executive Skillet, Mix 'n Scraper. I love making sure I have everything needed before getting started. Ever begin mixing batter only to realize you're out of eggs? Thought so.

Browning butter isn't difficult, but it's easy to second guess yourself if you've never done it. Just add your butter to a pan over medium-high heat, and let the butter cook. Continue swirling the pan, but don't stir it with a spoon. The butter will sizzle, and then it will stop. The color will turn brown, and the butter will smell nutty. At this point, take it off the heat to avoid burning it. I'm cooking this in the 10" Skillet from the Executive Cookware Collection.

This is the mix 30 seconds / rest 3 minutes / repeat 2 times step. Notice you don't need a hand mixer, just a Stainless Whisk. I know it might be tempting to short cut here, but let me discourage you. By following this recipe exactly, you'll end up with perfect cookies that don't dry out the next day. Part of the magic is whatever goes on while this batter mixes, rests, and mixes again.

I baked my cookies six at a time on Cookie Sheets to give them plenty of space. When it comes to baking from scratch, don't shortcut on your tools. The Pampered Chef's baking products will blow your mind, whether you're using our line of metal or Stoneware.

3 stages: Scooped cookies, baked cookies, cooled cookies. The ones on the Cooling Rack tempted me like crazy, but you'll be happy to know they made it to their new home untouched.

If you're looking for a new chocolate chip cookie recipe to try, don't ignore this one! I'd say they're the absolute most satisfying cookies I've ever had, and trust me - I've had a lot of cookies.

Like the products you saw used?
Shop Online 24/7 at pamperedchef.biz/jennylyn
E-mail me: chefjennylyn[at]gmail.com
Call me up: (205) 585-2464


Wednesday, September 7, 2011

Traditional Whoopie Pies

I debated whether to post this recipe today since I just posted Dark German Chocolate Whoopie Pies, but then I decided that made this more appropriate than ever. Since you've got whoopie pies on the brain already, let's make a smooth transition to the real deal. Yes, I'm calling it like I'm seeing it. While there are tons of fabulous new whoopie pie recipes with all kinds of fun fillings, they will never be the original. So here I bring you the traditional pie that inspired the current fad.

Where did I get this recipe? Well, this is one of the many reasons I love my job. I was at a show last week when I began talking about whoopie pies. Rosemary, one of the guests, told me she's from Pennsylvania, and she has a Mennonite heritage. Long story short, she gave me her whoopie pie recipe! Put "whoopie pie recipe" in your search engine, and you'll come up with half a million results. Enjoy searching through those to find anything like this, something which actually came from Pennsylvania. My guess is that most whoopie pie recipes are pretty good, but I have a certain sense of satisfaction knowing I now have one which is truly an original. So thanks, Rosemary! And you were right - These are great!

(Displayed in the Mini Baker from the Stoneware Collection)

Traditional Whoopie Pies
chefjennylyn.com

1 cup shortening
2 cups sugar
2 eggs
1 cup sour milk (1 cup milk + 1 tbsp. vinegar)
1 cup hot water, scant
2 tsp. baking soda
1 tsp. vanilla
1 cup cocoa
4 cups flour

Filling
2 egg whites, beaten
1 1/2 tbsp. vanilla
4 tbsp. milk
4 tbsp. flour
4 cups confectioner's sugar
1 1/2 cups shortening

Preheat oven to 400 degrees.

For pies, cream shortening and sugar; add eggs, and beat well. Add sour milk and vanilla. In a separate bowl, sift flour and cocoa. Mix well into egg mixture.
Combine soda with hot water, and add last.
Drop on prepared sheet, and bake 8 minutes.

For filling, beat egg whites, and set aside. Combine other ingredients, folding in beaten egg whites last.

When cookies are cooled, sandwich filling between two cookies.


Let me start by saying my best friend Elizabeth and I made these on Labor Day. In case you haven't heard, Labor Day in Alabama consisted of tropical storms. Our plan was to skip the lake (like that was even a possibility with a monsoon outside), eat ribs, watch movies, and bake whoopie pies. The day was a complete success, and I've got these pictures to prove it! Baking at Elizabeth's house is great because she's got a ton of Pampered Chef products. I'm using a Small Mix 'n Scraper for the cocoa, and I've got an Adjustable Measuring Spoon, a Classic Batter Bowl, a Measure-All Cup, and Easy Read Measuring Cup, and a couple of 1-Cup Prep Bowls out. The Large Scoop is out to dip the cookies, but that was a bad life choice. The finished products in the above picture are done with the Medium Scoop.

Can you tell I just got rained all over? That's what happens when you grocery shop in a tropical storm. Fortunately, friends loan friends dry shirts... and White Lily aprons. When a recipe tells you to sift ingredients, don't skip the step. No one is above the law when it comes to baking. Can you still get good results? Yes. Should you settle for good when you can sift your way to great? No. Here's one reason I love the Small Mix 'n Scraper. With its rounded head, it acts as a spoon for jobs like this. The sifter you see has been in my family for generations... very appropriate for such a recipe.

This is Elizabeth, and she's on filling duty. You can't tell by her expressive face, but she and I are both struggling to finish everything before the power decides to go out. What looks carefree is actually quite rushed, which is why there are so few pictures of this recipe.

"Get them in the oven before the power goes off!!!!" I'm using the Cookie Sheet and Parchment Paper to hold the world's largest whoopie pies. You should have seen this batch after they came out of the oven. Saucers, people... the pies were the size of saucers. I know that sounds great, but it's really not when you want to fill them with cream. It's more like a huge mess. Live and learn!


Wait - aren't there more pictures of, well, anything? No. The storm outside, the flashing electricity, the complete rib overload... So sorry, but each of these things factored into the decision to skip the pictures. The good news is that we got most of the batter baked before losing power, and then we enjoyed fabulous whoopie pies! You can enjoy them, too.

Thanks again to Rosemary, a great show guest, for sharing this family recipe and allowing me to pass it on to everyone else! I truly appreciate your generosity.

Like the products you saw used?
Shop Online 24/7 at pamperedchef.biz/jennylyn
E-mail me: chefjennylyn[at]gmail.com
Call me up: (205) 585-2464


Tuesday, September 6, 2011

Dark German Chocolate Whoopie Pies

I do love a whoopie pie! Take two cakey cookies, sandwich amazing filling between them, and say it's a single serving? Yes, please! The new Chocolate Cookbook was just released this month, and all I can say is wow. I mean, there are some truly delectable desserts in this thing, and I'm looking forward to trying them all! With so many options, why did I choose Dark German Chocolate Whoopie Pies first? Put simply, I had most of the ingredients in my pantry. Call me uninspired, but that's how I figure out what's at the top of my "stuff to try" list.

I took these to my friends Christopher and Elizabeth, and they wholeheartedly approved. Not only were these delicious, but they made for a beautiful presentation. Definitely worthy of gifting for others! The recipe makes 32 pies - seriously - so make them with several people in mind, and feel free to indulge yourself.

Dark German Chocolate Whoopie Pies
chefjennylyn.com

2 cups flour
5 tbsp. dark chocolate cocoa powder
1 1/4 tsp. baking powder
1 tsp. baking soda
1/2 cup butter, softened
1 cup sugar
2 egg yolks
1 tbsp. vanilla
1 cup milk

Filling
1 cup sugar
1/4 tsp. salt
3/4 cup evaporated milk
2 egg yolks
1 1/2 tsp. vanilla
3/4 cup butter, cut in pieces
2 cups sweetened flaked coconut, toasted
2 cups pecan halves, toasted and finely chopped

Ganache
1 cup bittersweet chocolate morsels
1/2 cup heavy whipping cream


Preheat oven to 375 degrees. Line pans with parchment paper.

Combine flour, cocoa, baking powder, and baking soda.
In a separate bowl, combine butter, sugar, egg yolks, and vanilla. Beat on medium-high speed of electric mixer until well blended. On low speed, add flour mixture in three additions, alternating with milk in two additions. Mix well.

Using level Small Scoop, scoop batter onto prepared pans 2 inches apart. Bake 7-9 minutes or until cookies spring back when lightly pressed. Slide parchment and cookies onto cooling racks.

For filling, combine sugar and salt in saucepan. Gradually whisk in evaporated milk, egg yolks, and vanilla. Add butter. Cook over medium heat, stirring constantly, 8-10 minutes or until temperature reaches 160 degrees. Pour into bowl, and add coconut and pecans. Mix well, and refrigerate 1 hour or until cool. Meanwhile, prepare ganache.

For ganache, melt chocolate and cream together over low heat. Cool about 15 minutes or until spreadable.

To assemble, turn cookies bottom side up. Using slightly scant Medium Scoop, scoop filling onto one half, pressing down slightly so filling spreads almost to edge. Spoon 1 tsp. ganache on remaining half of cookies, and place one filled cookie on top of ganache, pressing slightly. Garnish with extra ganache, coconut and pecans, if desired.

Yield 32 whoopie pies

I don't think the flavor would have been nearly the same with a regular cocoa blend, so grab some Hershey's Special Dark, and go to it! (By the way, Hershey's didn't pay or even give me this $3.00 can of cocoa powder for mentioning it. I just like to say Hershey's. Hershey's, Hershey's, Hershey's.) With all the Hershey's talk, it's easy to become distracted from the killer prep work in the background, but here's the rundown: 1-cup Prep Bowl, Measuring Spoon Set, Adjustable Measuring Spoons, Measuring Cup Set, Stainless Mixing Bowl, and Large Cutting Board. I can't stress enough how vital it is to measure everything ahead of time. This recipe takes a while to prepare (fair warning), and it'd be a shame to mess it up because you accidentally doubled the baking soda. I know that seems silly, but things are easily confused once you become distracted by a phone ringing, a child calling, or a Hershey's ad coming on the television. Hershey's.

There is some major egg yolkage going on in this recipe! I mean, I hope you've got a beautiful meringue on your mind because Dark German Chocolate Whoopie Pies are about to leave you with four whites. Here you can see that I'm separating my eggs using the Egg Separator, and I'm doing it over a 2-Cup Prep Bowl. Then I take the yolk, dump it in a 1-Cup Prep Bowl, and get ready for the next egg. I know you're wondering why my larger bowl is full of yellow. Well... because I sometimes make mistakes. I cracked my first egg really hard and stabbed the yolk with the shell. Then I was too lazy to throw it out for the picture. These "whites" will not become a beautiful meringue.

A couple of things here. First of all, I love that the Measuring Spoon Set comes with a 1/2 tbsp. spoon. How great is that? No more 1 1/2 tsp. measurements - just straight for the 1/2 tbsp. from here on out. Second of all, this is the best vanilla you'll ever use in your life, guaranteed. Because the Pampered Pantry's Double-Strength Vanilla goes twice as far as standard brands, you get a huge bang for your buck!

Cookie Sheets are lined with Parchment Paper (which can be used multiple times), and the batter is in a Stainless Mixing Bowl. Dear Small Scoop: Thanks for owning it on all 64 stinking chocolate cookies! I couldn't have remained sane without you.

If you think sweetened coconut is good, try toasting it. Addictive, people! The Medium Bar Pan is good for two cups, but I think I'll spread it in the Large Bar Pan next time for a thinner layer. Coconut is in an Easy-Read Measuring Cup, by the way.

My filling ingredients are ready to go, so now the fun can really begin. Don't you love when your prep area is dominated by a ton of butter? I do. My egg yolks and vanilla are in a 1-Cup Prep Bowl, and I've got evaporated milk in an Easy-Read Measuring Cup. Then sugar in a Measuring Cup along with salt in a Measuring Spoon.

My mixture is in the 3-Qt. Saucepan from the Executive Cookware Collection, and the Silicone Sauce Whisk protects the pan's coating as I "stir constantly 8-10 minutes or until mixture reaches 160 degrees." Speaking of 160 degrees, check out the new Candy Thermometer! This is one thing I was really eager to add to the product line, so I was thrilled to see it introduced! It's got a silicone clip to keep from scratching non-stick pans, and there are other great features I'll let you see for yourself.

The Manual Food Processor makes quick work of chopping the pecans, and they're ready to go in the Stainless Mixing Bowl full of filling. Warning: This filling is absolutely addictive. If you don't watch yourself, you'll eat half the bowl and end up with a mere 16 whoopie pies. Don't do that.

So I know it looks pretty to have this big pile of cookies on the Dots Dinner Plate, but I'm suggesting you avoid piling these on top of one another. They stick and create craters in the unfortunates underneath. This was my first time with this recipe, so I didn't know any better. Regrets!!!

Get all your ingredients together, and get ready to fill whoopie pies! Cookies are on a Dots Dinner Plate, filling is in a Stainless Mixing Bowl with the Medium Scoop, and ganache is in a 2-Cup Prep Bowl. Garnishes are in a 1-Cup Prep Bowl and Pinch Bowl on top of a Cooling Rack.

Settle in, and let assembly begin. These are beautiful, but they taste even better than they look. Make yourself a whoopie pie, and throw one together for each of your thirty-one closest friends while you're at it!

Like the products you saw used?
Shop Online 24/7 at pamperedchef.biz/jennylyn
E-mail me: chefjennylyn[at]gmail.com
Call me up: (205) 585-2464

Wednesday, March 9, 2011

Giant Rocky Road Cookies

There are cookies, and then there are COOKIES; these would be classified as the latter. When I promoted to Pampered Chef Director, my best friend Elizabeth and I celebrated with a steak dinner... and these cookies. I chose them from the Simply Sweet Cookbook, and I'm ashamed to say I'd had the recipe over a year before trying it. I don't have a good excuse for letting this slip by, but I'll be sure to make up for lost time. Anyway, try these. They're honestly good enough that I'd pay for them at a bakery, and that's saying a lot for me.
(Cookies are displayed on the Cake Pedestal.)


Giant Rocky Road Cookies
chefjennylyn.com

1 3/4 cups flour
1/2 cup unsweetened cocoa powder (plus additional for flattening cookies)
1 tsp. baking soda
1/4 tsp. salt
1 cup (2 sticks) butter, softened
3/4 cup packed brown sugar
1 egg
1 tsp. vanilla
1 1/2 cups coarsely chopped toasted pecans, divided
1 pkg. (11.5 oz.) semi-sweet chocolate chunks, divided
1 1/4 cups miniature marshmallows

Preheat oven to 350 degrees.

Combine flour, cocoa powder, baking soda, and salt in small bowl; mix well, and set aside. In large mixing bowl, beat together butter and brown sugar on medium-high speed until creamy. Add egg and vanilla; beat until light and fluffy. Gradually add flour mixture; beat just until mixture forms into a dough. Stir in 3/4 cup pecans and 1 1/4 cups of chocolate chunks.

Using Large Scoop, drop eight rounded scoops of dough, 2 inches apart, onto cookie sheet. Dip back of scoop in cocoa powder, and flatten cookies slightly. Lightly press half of the remaining pecans and chocolate chunks into tops of cookies.

Bake 14-16 minutes or until cookies are almost set. (Centers will be soft. Do not overbake.) Remove cookie sheet from oven; immediately press half of the marshmallows into tops of cookies. Cool completely on cooling rack. Repeat with remaining dough, pecans, chocolate chunks, and marshmallows.


I talk a lot about the Measuring Cup Set, but it's because I can't get over it! The sheer quality of these cups is true to Pampered Chef form, but there are also a couple more than the standard set plus a leveler tool. So handy! I have things on the Cutting Board to keep my work surface clean, but I'm failing miserably. Anyway, this is the 2-Qt. Stainless Mixing Bowl, and you can see those handy measurements inside!


New this month - the Measuring Spoon Set!!! This was my first time to use these, and I imediately fell in love. They're sturdy, and they have rounded ends to dig in ingredients easily. Also, notice how many come in this set: 6. Hello, 1/2-tablespoon measure!


Everything's about to come together for the most amazing cookies I've ever had, and I'm eager with anticipation. It was all I could do to stop, take a picture, and keep moving. My toasted pecans are on the Small Bar Pan, the one that fits in the toaster oven. Quick tip: toast the pecans while you're prepping everything. Of course I have my flour mixture and soon-to-be butter mixtures in the Stainless Mixing Bowl Set, the best bowls of all time. Look the Measuring Spoon Set - see how they snap together even if a couple are in use? Also, my teaspoon of vanilla is stable because there's a little base on the back of the spoon. My egg is in a Prep Bowl, and marshmallows are hanging out in an Easy Read Measuring Cup. See that little Stainless Mini-Whisk in the flour/cocoa bowl? That was my mom's favorite product, and she had a kitchen full of Pampered Chef.


I am in love with all of the scrapers, but the Mix 'N Scraper might be my favorite. It's amazing with thick batters, but I adore the shape of its head. It acts as a spoon for me to "gradually add flour mixture." This is the point of the recipe where I really feel like I'm about to make something. I mean, there's batter, and it's all over the place, and I want to lick the beaters, and - oh, wait - I never do that!

According to the editor's note in my Simply Sweet Cookbook, "dipping the back of the Large Scoop in cocoa powder will keep the cookie from sticking as you flatten it. The flat surface keeps the chocolate chunks and pecans on the cookies." Why cocoa powder instead of flour? Because it's brown and won't make your cookie look floury when it bakes. That's a Pinch Bowl housing the cocoa powder, and I think it's doing a mighty fine job.


Cookie Sheet #1 is ready to go in the oven. The original recipe says to use Parchment Paper, but I was going to skip it. Then I figured I'd follow the directions just to see what happened since I'd never used it before. Well, not for cookies, at least. You know what? I didn't have to wash my Cookie Sheet when I was finished, and it didn't get any Large Serving Spatula scratches. Nice! Behind the sheet of cookies, you can see the thickness of this batter. That's why the Mix 'N Scraper was my hero; it made quick work of mixing in chocolate chunks and pecans, but was also the only way to get batter off the sides of the bowl... which meant more cookies.


I did half of these on a Cookie Sheet and half on the Large Bar Pan. All of them were excellent, and I couldn't tell a difference in final products. If you don't have Cooling Racks in your kitchen tool arsenal, let me just tell you that you're missing out. Quick tip on the marshmallows: I took the cookies out at 14 minutes, added marshmallows, and baked them an extra two minutes for hte marshmallows to toast. I'd say I'm a genius.

I've shared these cookies with several people, and I've had nothing less than rave reviews. I love these, and I'm pretty sure you will, too.

Like the products you saw used?
Shop Online 24/7 at pamperedchef.biz/jennylyn
E-mail me: chefjennylyn[at]gmail.com
Call me up: (205) 585-2464